Threat Scenarios
A Threat Scenario is a broad, contextual narrative of an attack (e.g., an overarching campaign targeting specific vulnerabilities or industries) generating alerts whenever global threat data aligns with your organization's unique digital profile.
There are 2 distinct types of Threat Scenarios within the system:
System-Inherited Threat Scenarios
These are built-in, out-of-the-box scenarios embedded directly into the Relevance System. The system currently evaluates global data against three core starting scenarios: Initial Access Broker, Data Leak, and Insider Threat.
Because these scenarios are managed automatically by the system, they cannot be manually configured. They are visible only within the Alerts section when a relevant match is generated for your organization.
Custom Threat Scenarios
These are tailored monitoring configurations managed within the My Landscape module. They allow you to continuously track threat intelligence relevant to your organization by aligning your unique digital profile with customized risk criteria, automatically triggering high-priority alerts whenever global events match your definitions.
The primary active scenario of this type is the Target Technology Watchlist, which alerts you exclusively to vulnerabilities that match your specific technology configuration and pose a threat to your environment.
Only users with Alerts Admin permissions can create and edit Threat Scenarios.
Custom Threat Scenarios List View
The custom Threat Scenarios list view is accessible from the My Landscape (Beta) -> Threat Scenarios left sidebar of the Google Threat Intelligence platform.
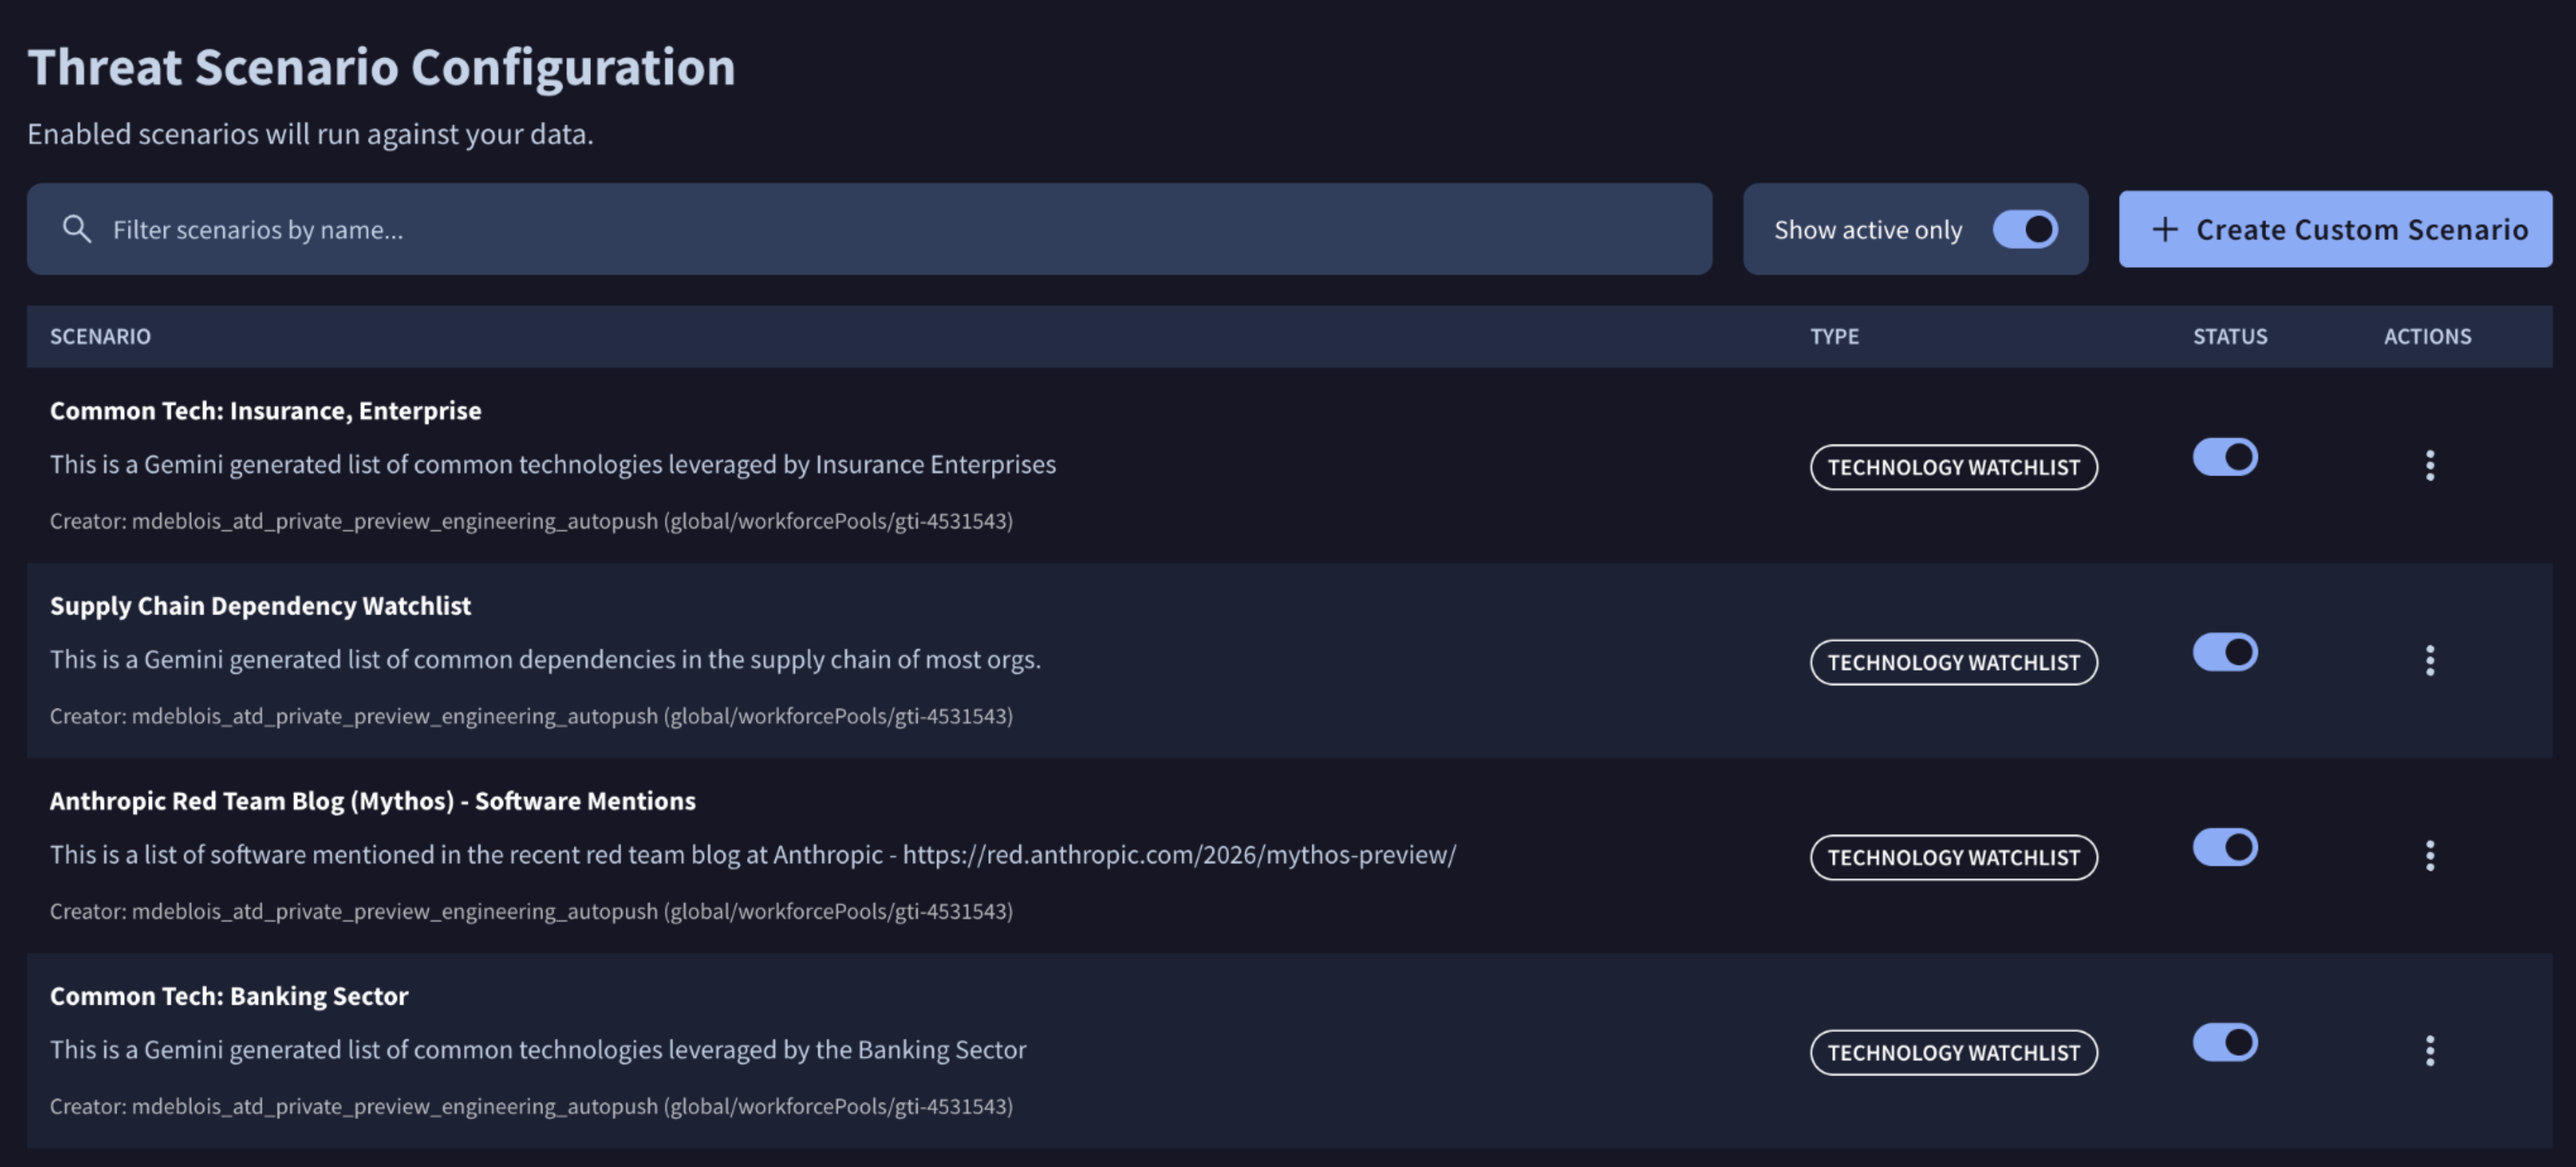
The main dashboard displays a comprehensive list of your group configured custom Threat Scenarios, detailing the following for each entry:
- Name & Description: The identifier and specific scope of the monitoring configuration.
- Owner: The user who initially configured the scenario.
- Type & Status: The categorical classification of the scenario, alongside an interactive toggle switch showing its current operational state (active or inactive).
To quickly locate specific configurations, the list view provides two management tools at the top of the table:
- Status Filter: Use the Show active only toggle to instantly filter the view between only running scenarios or all existing configurations.
- Search Bar: Search for specific scenarios by typing keywords found in either the scenario's name or its description.
Creating a Custom Threat Scenario
Please note that only alert admins are able to create custom Threat Scenarios
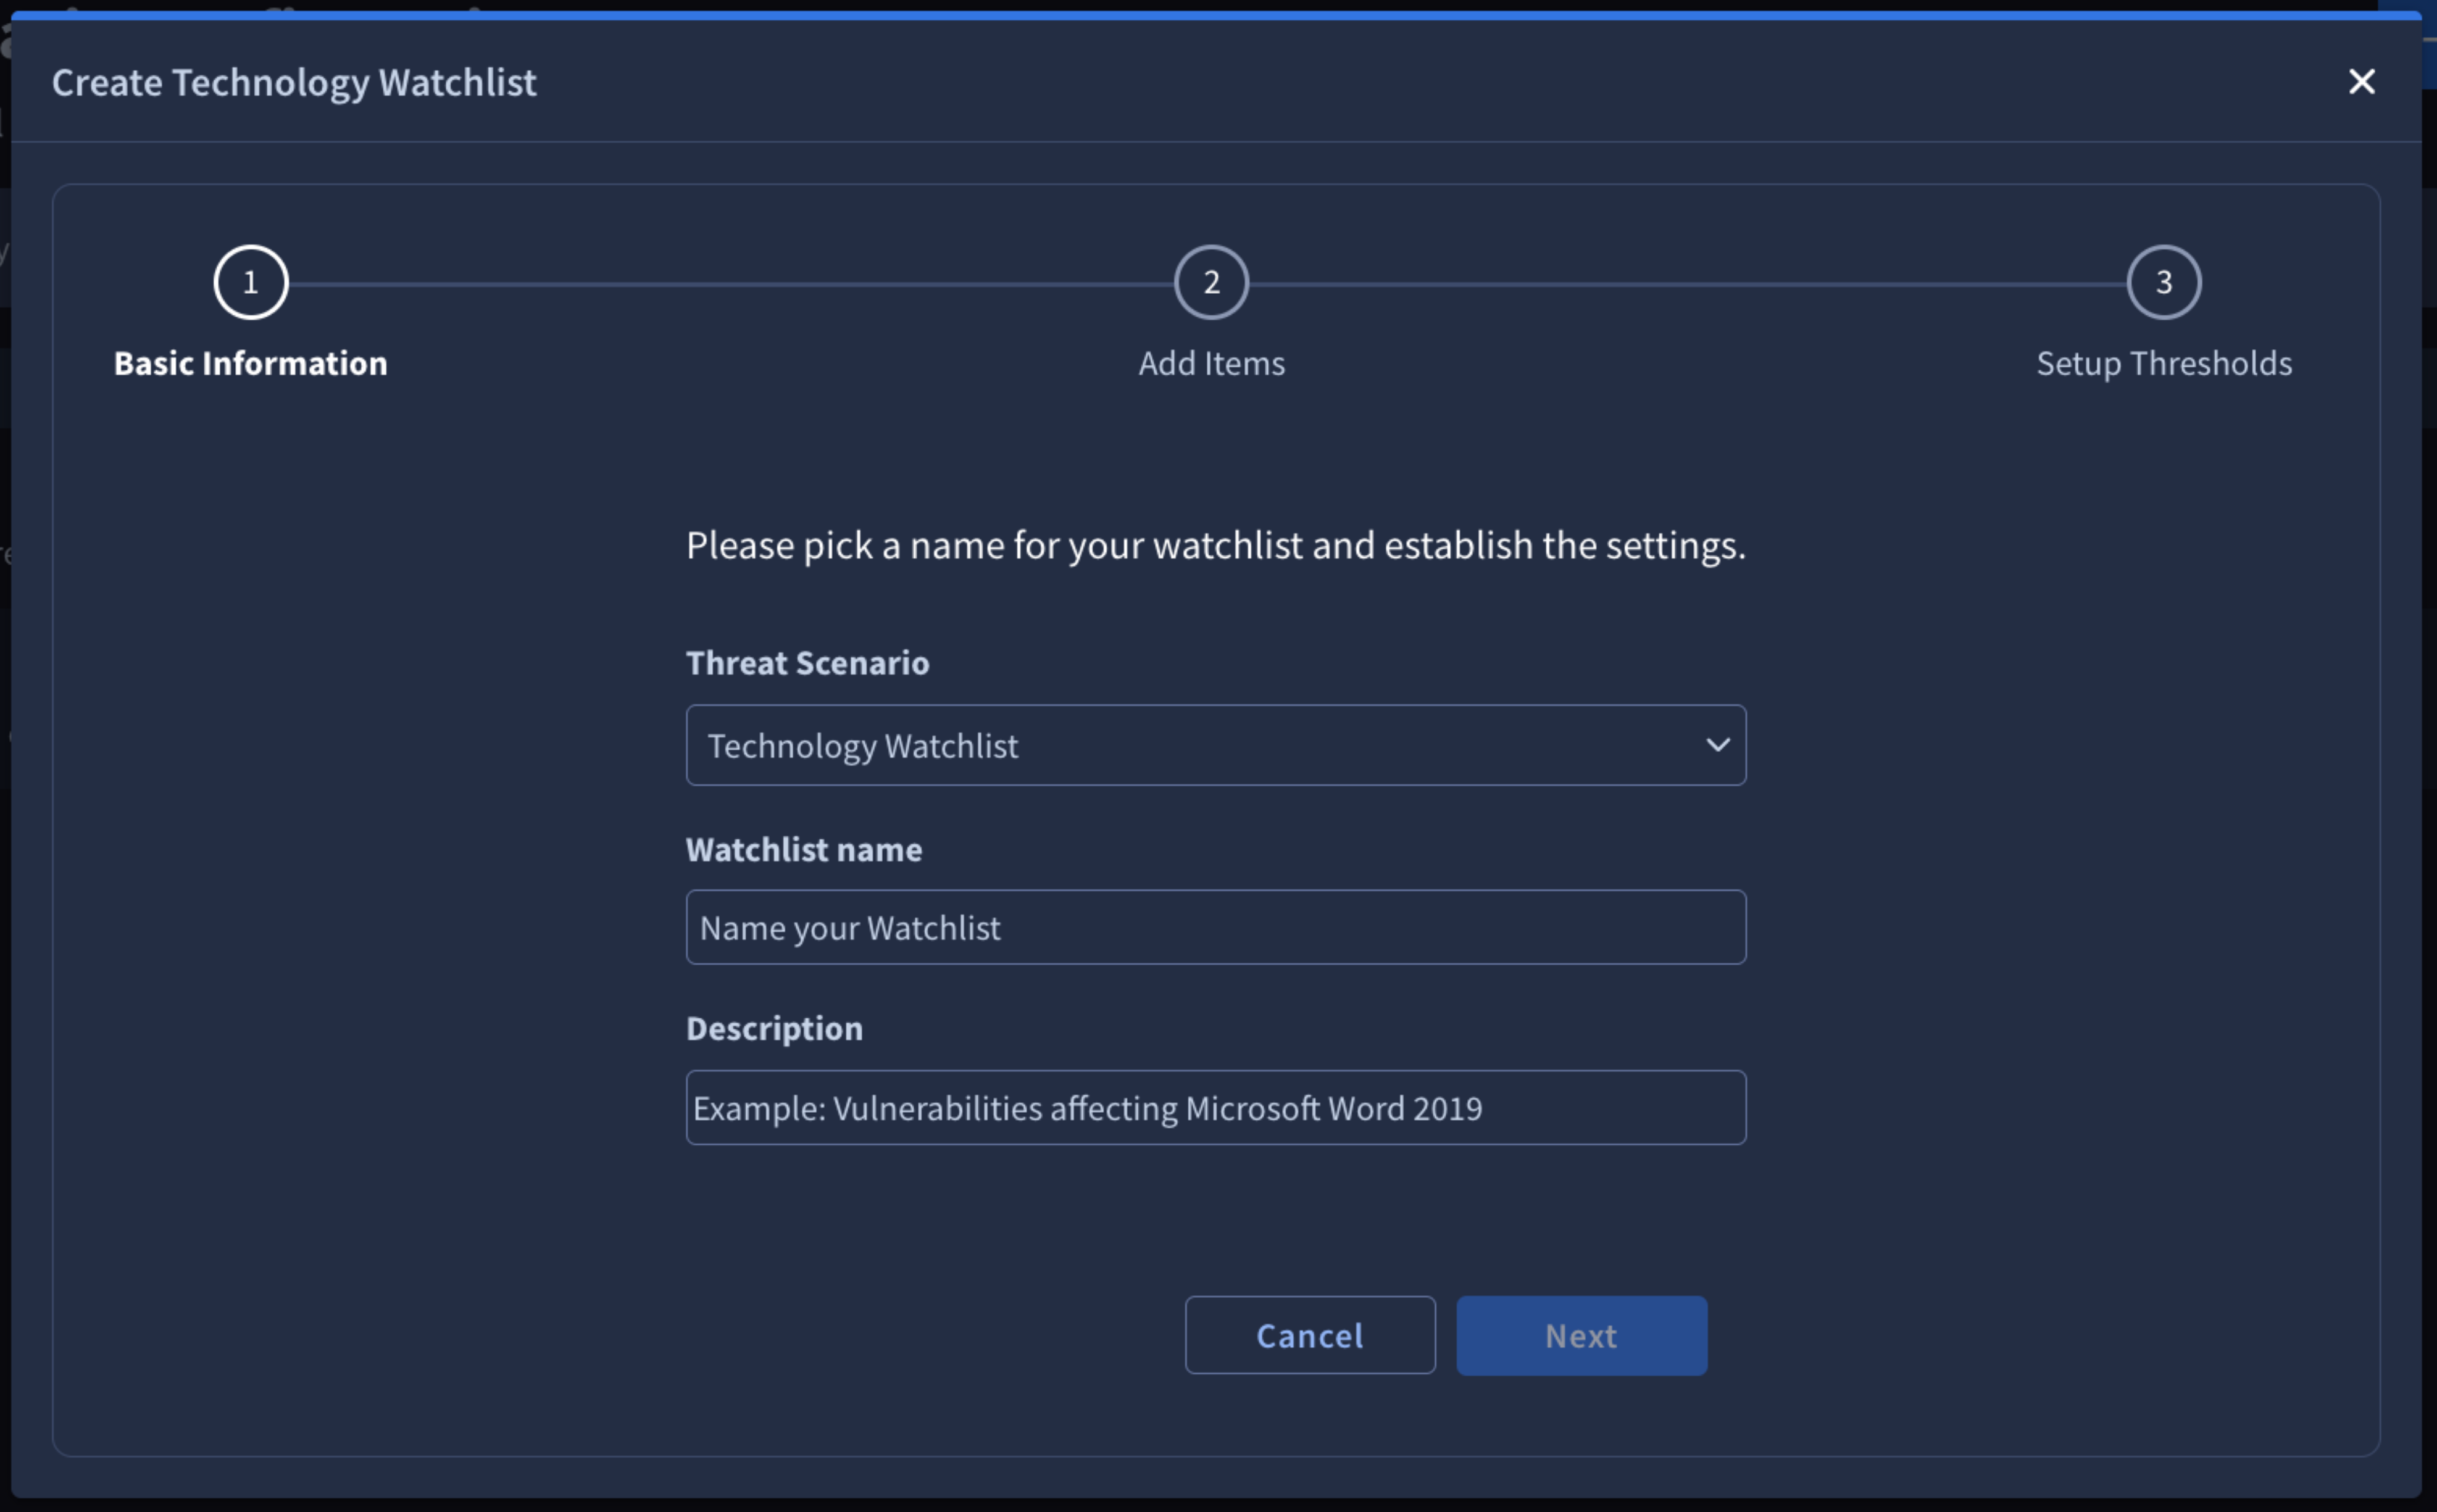
To create a new scenario, go to the custom Threat Scenarios list view and click the + Create Custom Scenario button. A three-step configuration wizard will open:
-
Select your threat scenario type (e.g., Target Technology Watchlist) and provide a unique Name and Description.
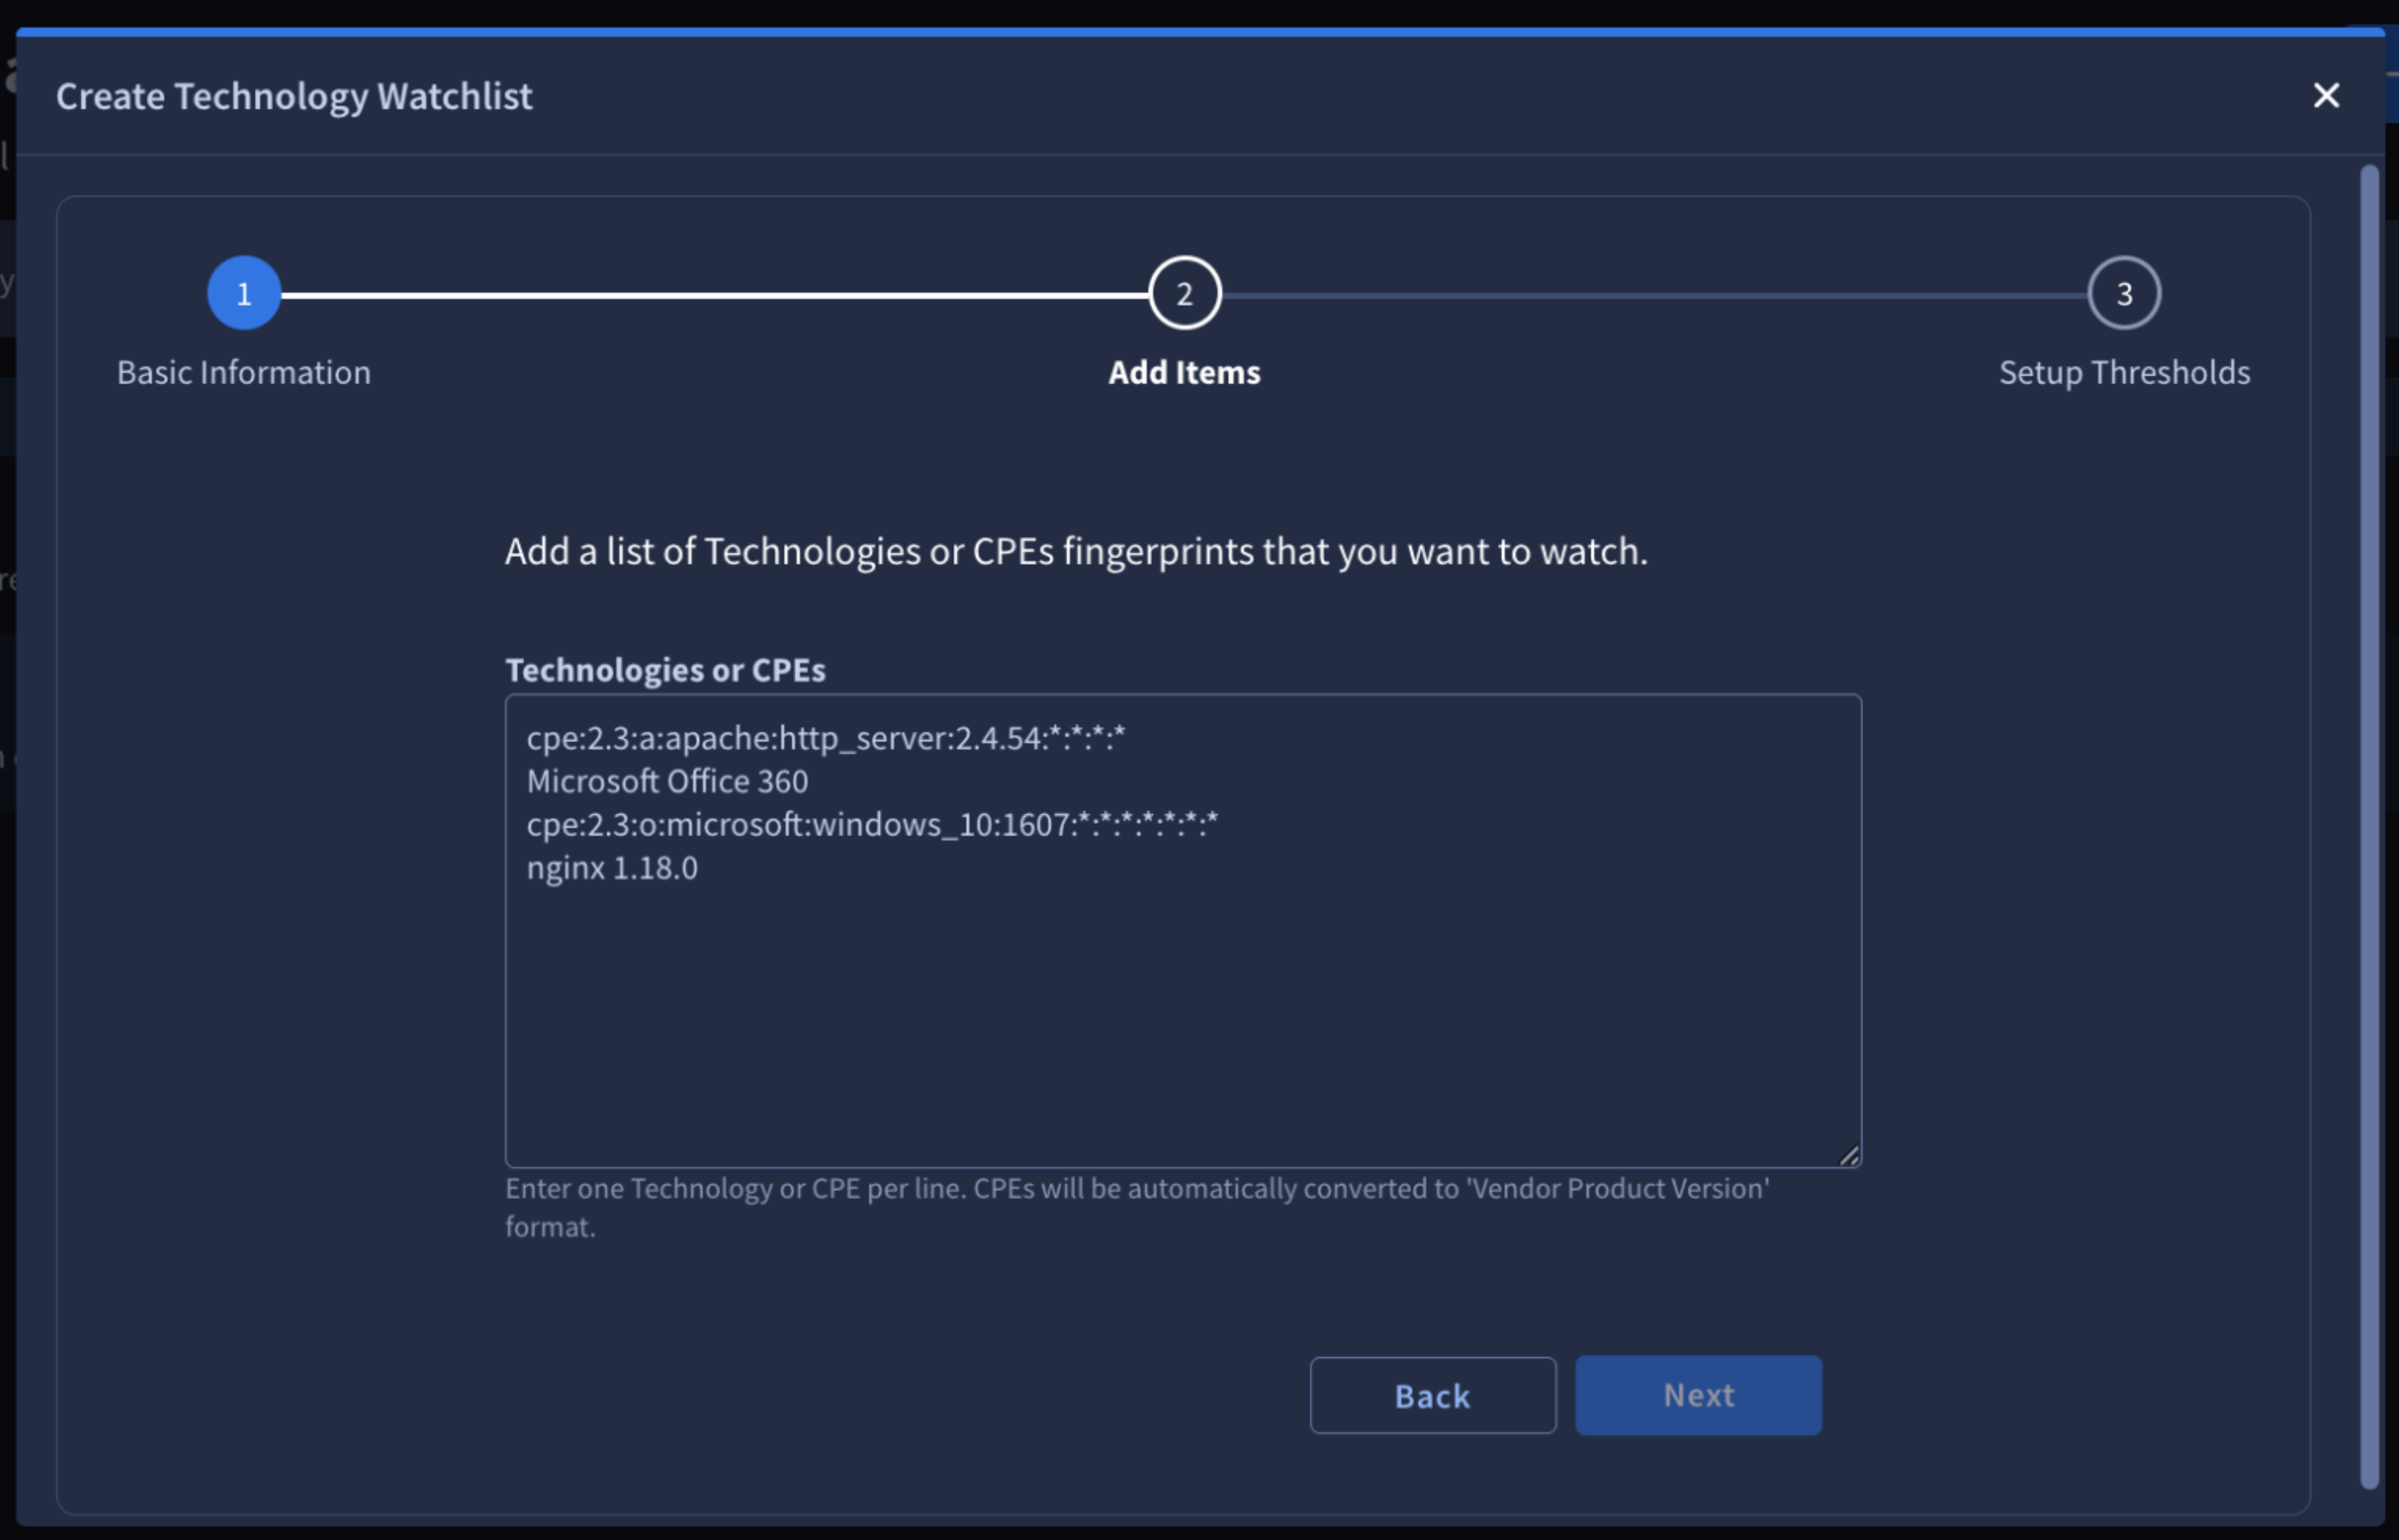
-
Enter your target technologies or CPEs (one per line) to specify what the scenario should track.
-
Configure the Risk Rating, Priority, CVSS Score, EPSS Score, and Exploitation State to determine which Vulnerabilities trigger an alert.
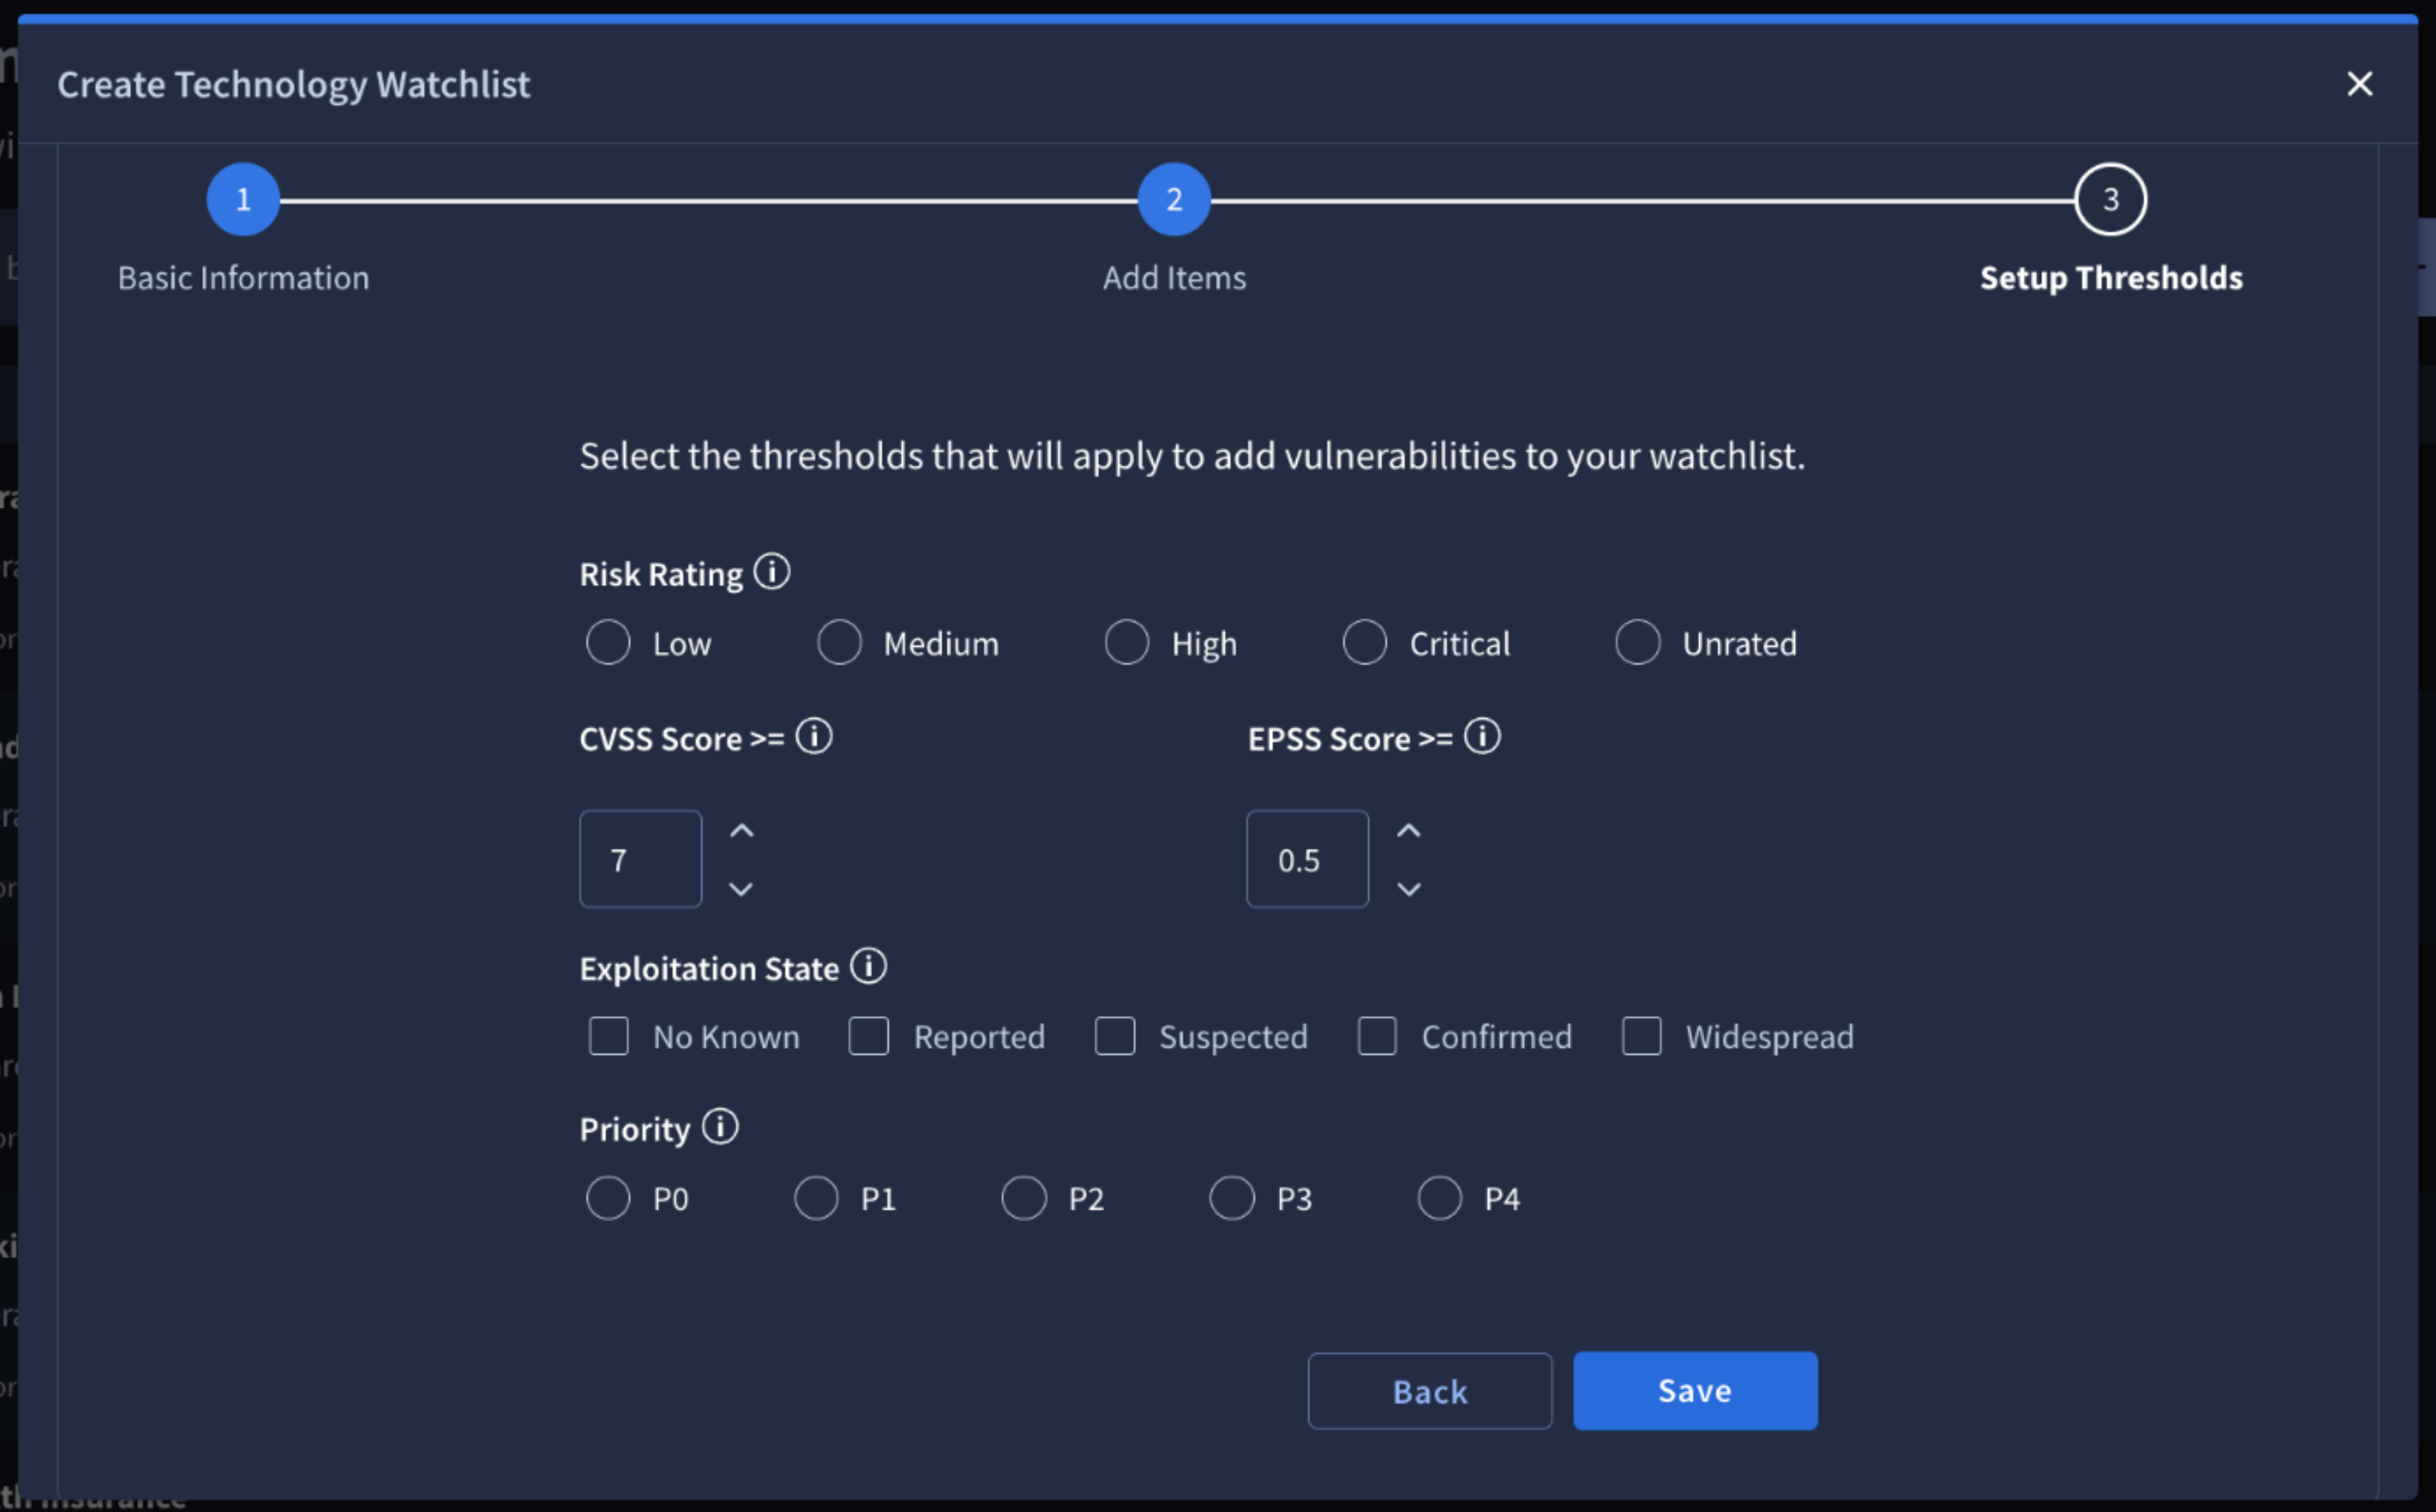
Once you have completed these steps, click Save to activate your configuration. The newly created scenario will immediately appear in your list view, and the Relevance System will begin continuously scanning incoming intelligence against your specified criteria, generating alerts whenever matching events are detected.
Editing, Enabling and Disabling a Custom Threat Scenario
From the custom Threat Scenarios list view, owner can modify or toggle the operational status of a configuration.
Please note that only the creator (owner) of a custom Threat Scenario has the permission to edit, enable, or disable it.
Editing a custom Threat Scenario
To modify an existing configuration, click the Actions menu button (⋮) at the end of the scenario's row and select Customize. This reopens the configuration wizard, allowing you to update the scenario's metadata, scope, or alert criteria.
Enabling and Disabling a custom Threat Scenario
To pause or resume monitoring, use the interactive switch in the Status column of the scenario's row. Toggling this switch to Active enables continuous scanning, while toggling it off disables the scenario and stops it from generating new alerts.
Updated about 1 month ago