ASM AWS Integration
Special privileges requiredThis feature is only available to ASM administrators.
See how credentials for integrations are stored here
This integration is not currently supported for AWS GovCloud (US) users.
To provide a more thorough view of your inventory, Attack Surface Management (ASM) can integrate with Amazon Web Services (AWS) to retrieve the following:
-
Public EC2 instances
-
S3 buckets
ASM confirms whether S3 buckets are publicly accessible and creates relevant Issues.
-
Route 53 zones
-
Amazon Relational Database Service (RDS DB) instances
ASM uses Mandiant Security Integrations-as-a-Service (MSI) to collect RDS DB data.
Adding the AWS integration requires three steps:
Create the policy in AWS
You first need to create the policy in AWS for ASM to use.
- Authenticate to AWS and browse to Identity and Access Management (IAM) in the AWS console.
- Go to Access Management > Policies. Alternatively, access https://us-east-1.console.aws.amazon.com/iam/home#/policies.
- Click Create policy.
You must have permissions to create roles and policies within AWS.

- Select JSON.

-
Copy and paste the following JSON snippet into the text field and click Next.
{ <span>"Version"</span>:<span>"2012-10-17"</span>, <span>"Statement"</span>:[ { <span>"Effect"</span>:<span>"Allow"</span>, <span>"Action"</span>:[ <span>"route53:ListHostedZones"</span>, <span>"route53:ListResourceRecordSets"</span> ], <span>"Resource"</span>:<span>"*"</span> }, { <span>"Effect"</span>:<span>"Allow"</span>, <span>"Action"</span>:<span>"s3:ListAllMyBuckets"</span>, <span>"Resource"</span>:<span>"*"</span> }, { <span>"Effect"</span>:<span>"Allow"</span>, <span>"Action"</span>:<span>"ec2:DescribeInstances"</span>, <span>"Resource"</span>:<span>"*"</span> }, { <span>"Effect"</span>:<span>"Allow"</span>, <span>"Action"</span>:<span>"rds:DescribeDBInstances"</span>, <span>"Resource"</span>:<span>"*"</span> } ] } -
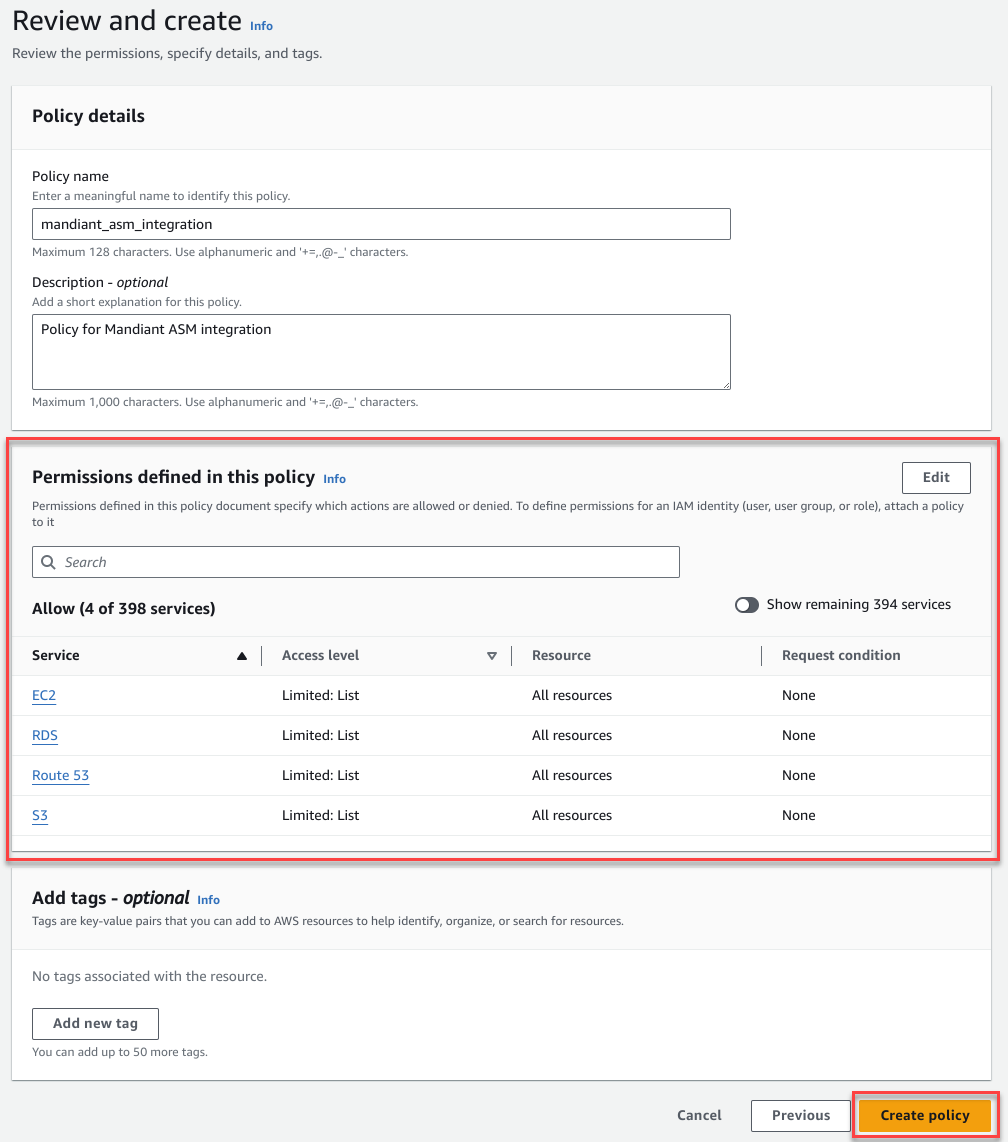
On the Review and create page, populate the following Policy details fields:
-
Policy name: Name for the policy.
Make a note of the name that you use as it is needed in the next section.
- Description -optional: Description of the policy.
-
-
Review the Permissions defined in this policy section and click Create policy.
Authenticate using cross-account access
Once the AWS Policy is created, you must provide a method for ASM to authenticate with your AWS Accounts. ASM uses the cross-account access from the preceding section to automatically generate temporary, short-lived tokens whenever it needs to integrate with your AWS account. This access method eliminates the need for any additional access keys.
- In the AWS console, browse to Identity and Access Management (IAM).
- Go to Access Management > Roles. Alternatively, access https://us-east-1.console.aws.amazon.com/iam/home#/roles.
- Click Create role.

-
On the Select trusted entity page:
- Select the AWS Account tile.
- Select the Another AWS account radio button.
- In the Account ID field, enter
220283773642.
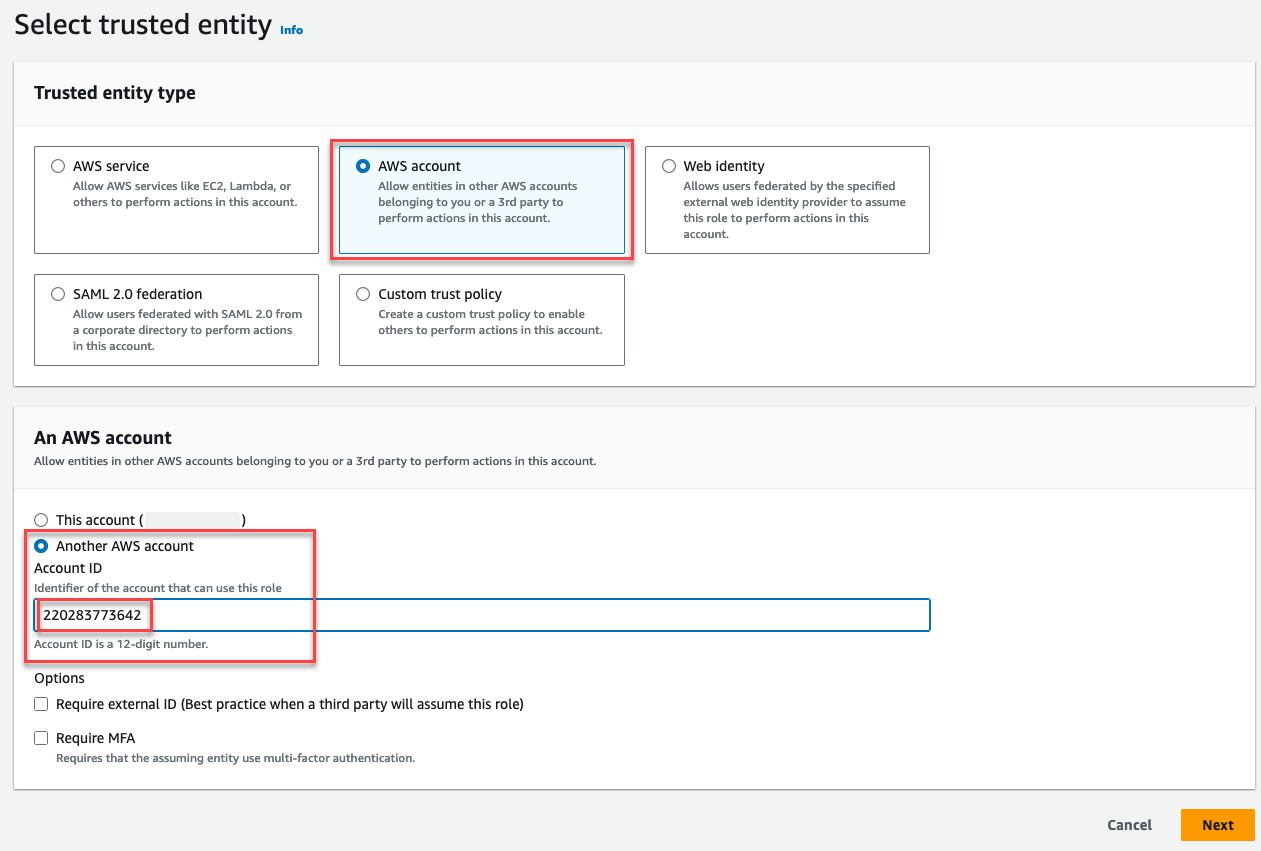
- Under Options, select the checkbox requiring use of an external ID. Copy the External ID from ASM and paste it here.
Requiring an external ID is an AWS best practice when a third party (ASM, in this case) assumes the role.
There is one external ID per ASM project.
To access the AWS External ID from ASM:
- From the Projects and Settings menu in ASM, select the appropriate Project then click Account Settings.
- Click Integrations.
- Click Add New for AWS (Roles).
- Click Copy Key.

- Click Next.
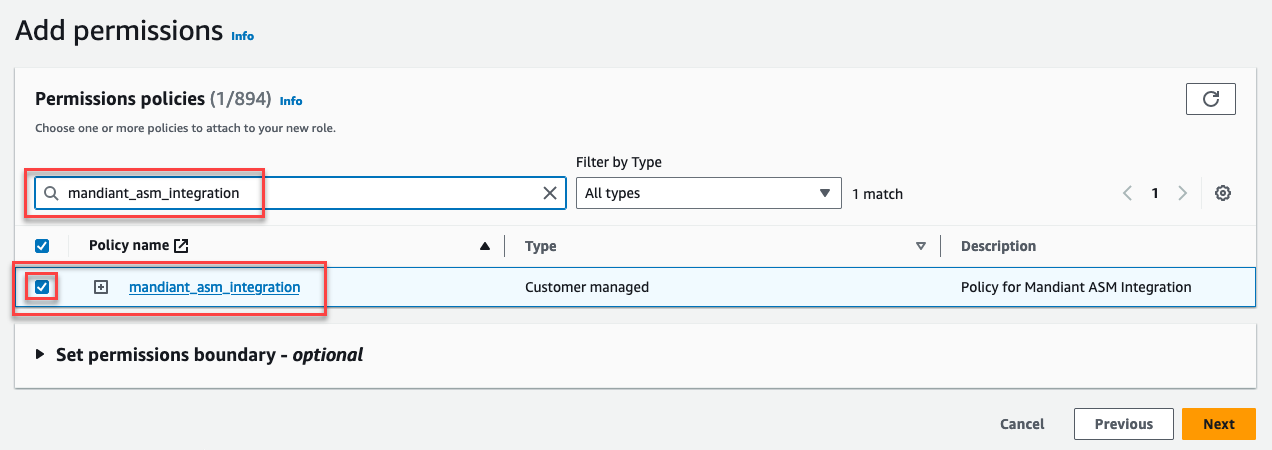
- On the Add permissions page, search for the name of the policy that you created in the preceding section. Once the search populates, select the checkbox associated with the policy.
- Click Next.
- On the Name, review and create page:
a. In the Role name field, enter a meaningful name.
b. Confirm that the Step 1: Select trusted entities section shows"AWS": "220283773642"and"sts:ExternalID": "AWS External ID".
c. Click Create role.

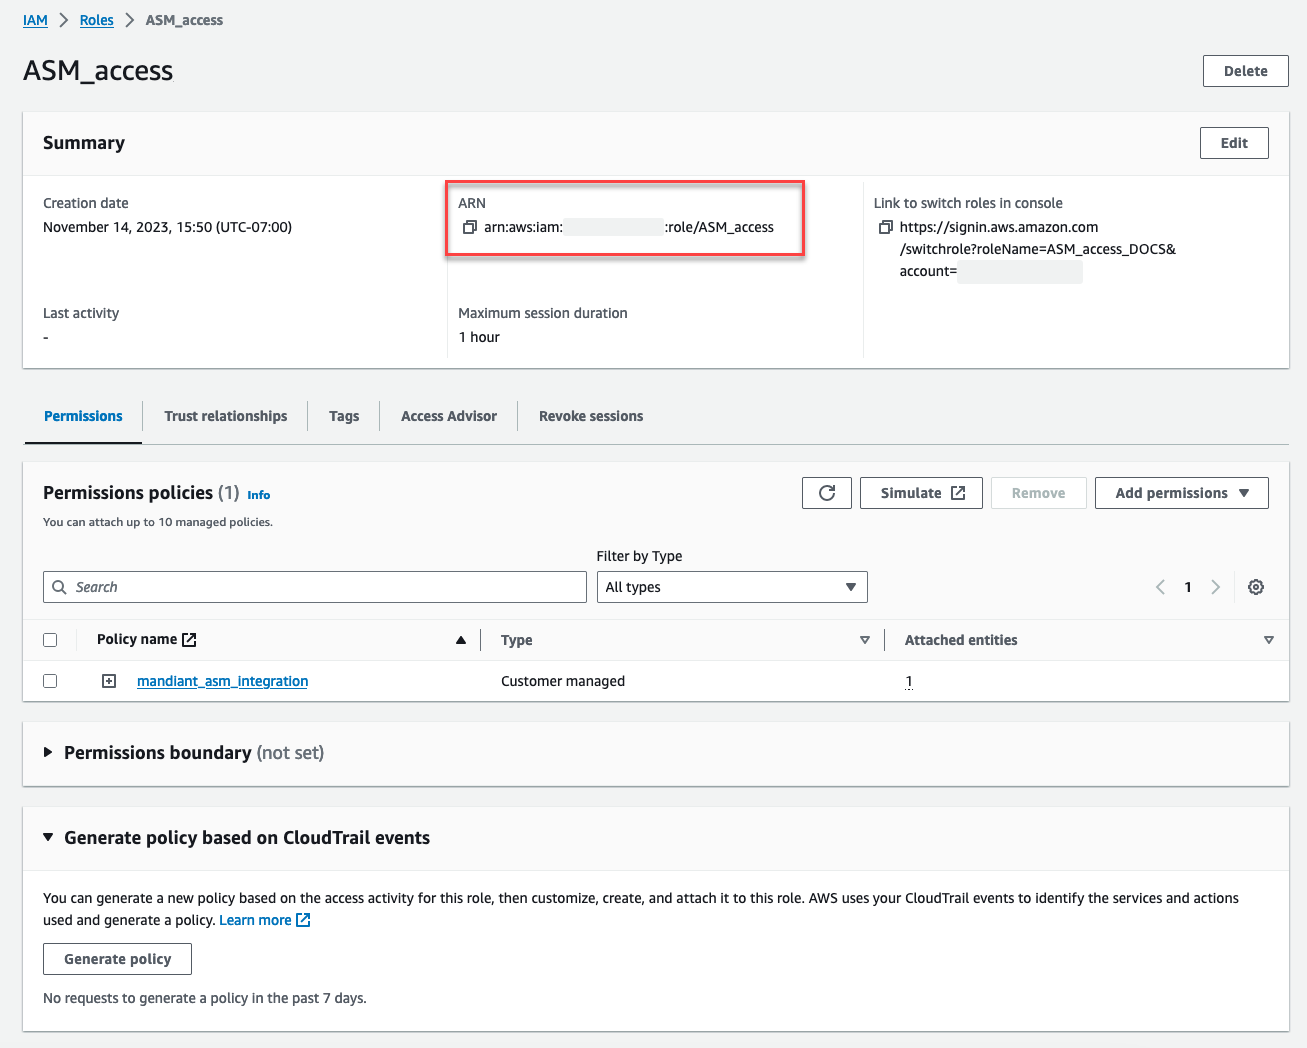
- Select the newly created role and make a note of the Role ARN to be used when providing AWS Credentials to ASM.
Provide AWS Credentials to ASM
Now that you have AWS ready to accept connection requests from ASM, it's time to add the appropriate AWS credentials into your Project.
-
From the Projects and Settings menu in ASM, select the appropriate Project then click Account Settings.
-
Click Integrations.
-
Click Add New for the appropriate connection method:
- Recommended: AWS (Roles)
- AWS (Keys)

-
Depending on what you select in the preceding step:
- Enter the Role ARN value from your AWS account into the appropriate field.
- Enter the AWS Access Key ID and AWS Secret Access Key into the appropriate fields.
-
Click Connect.
-
Connect the integration to the appropriate Collection.
- Click Collections and click
Collection Settings for the Collection that you want to connect the integration to.
- Click Collections and click
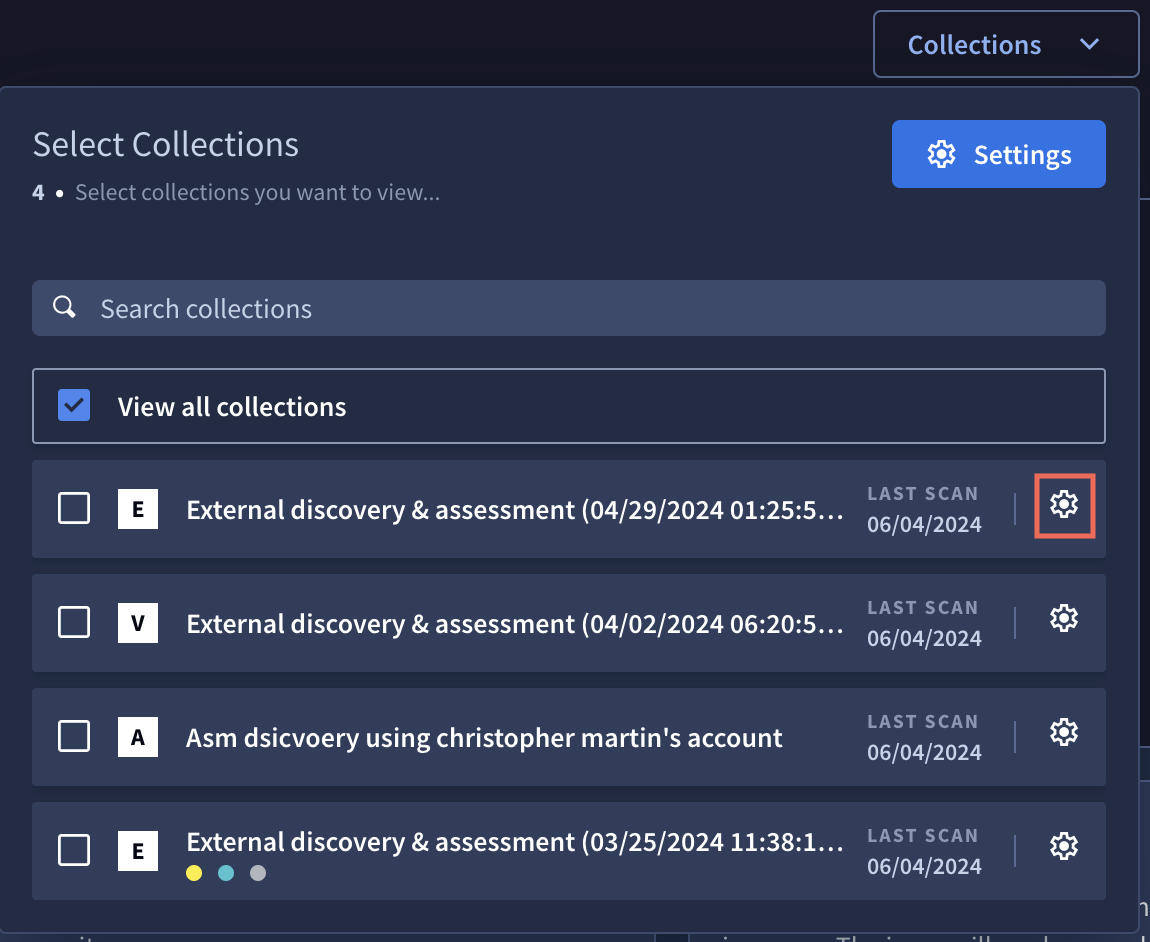
- Select the Integrations tab.
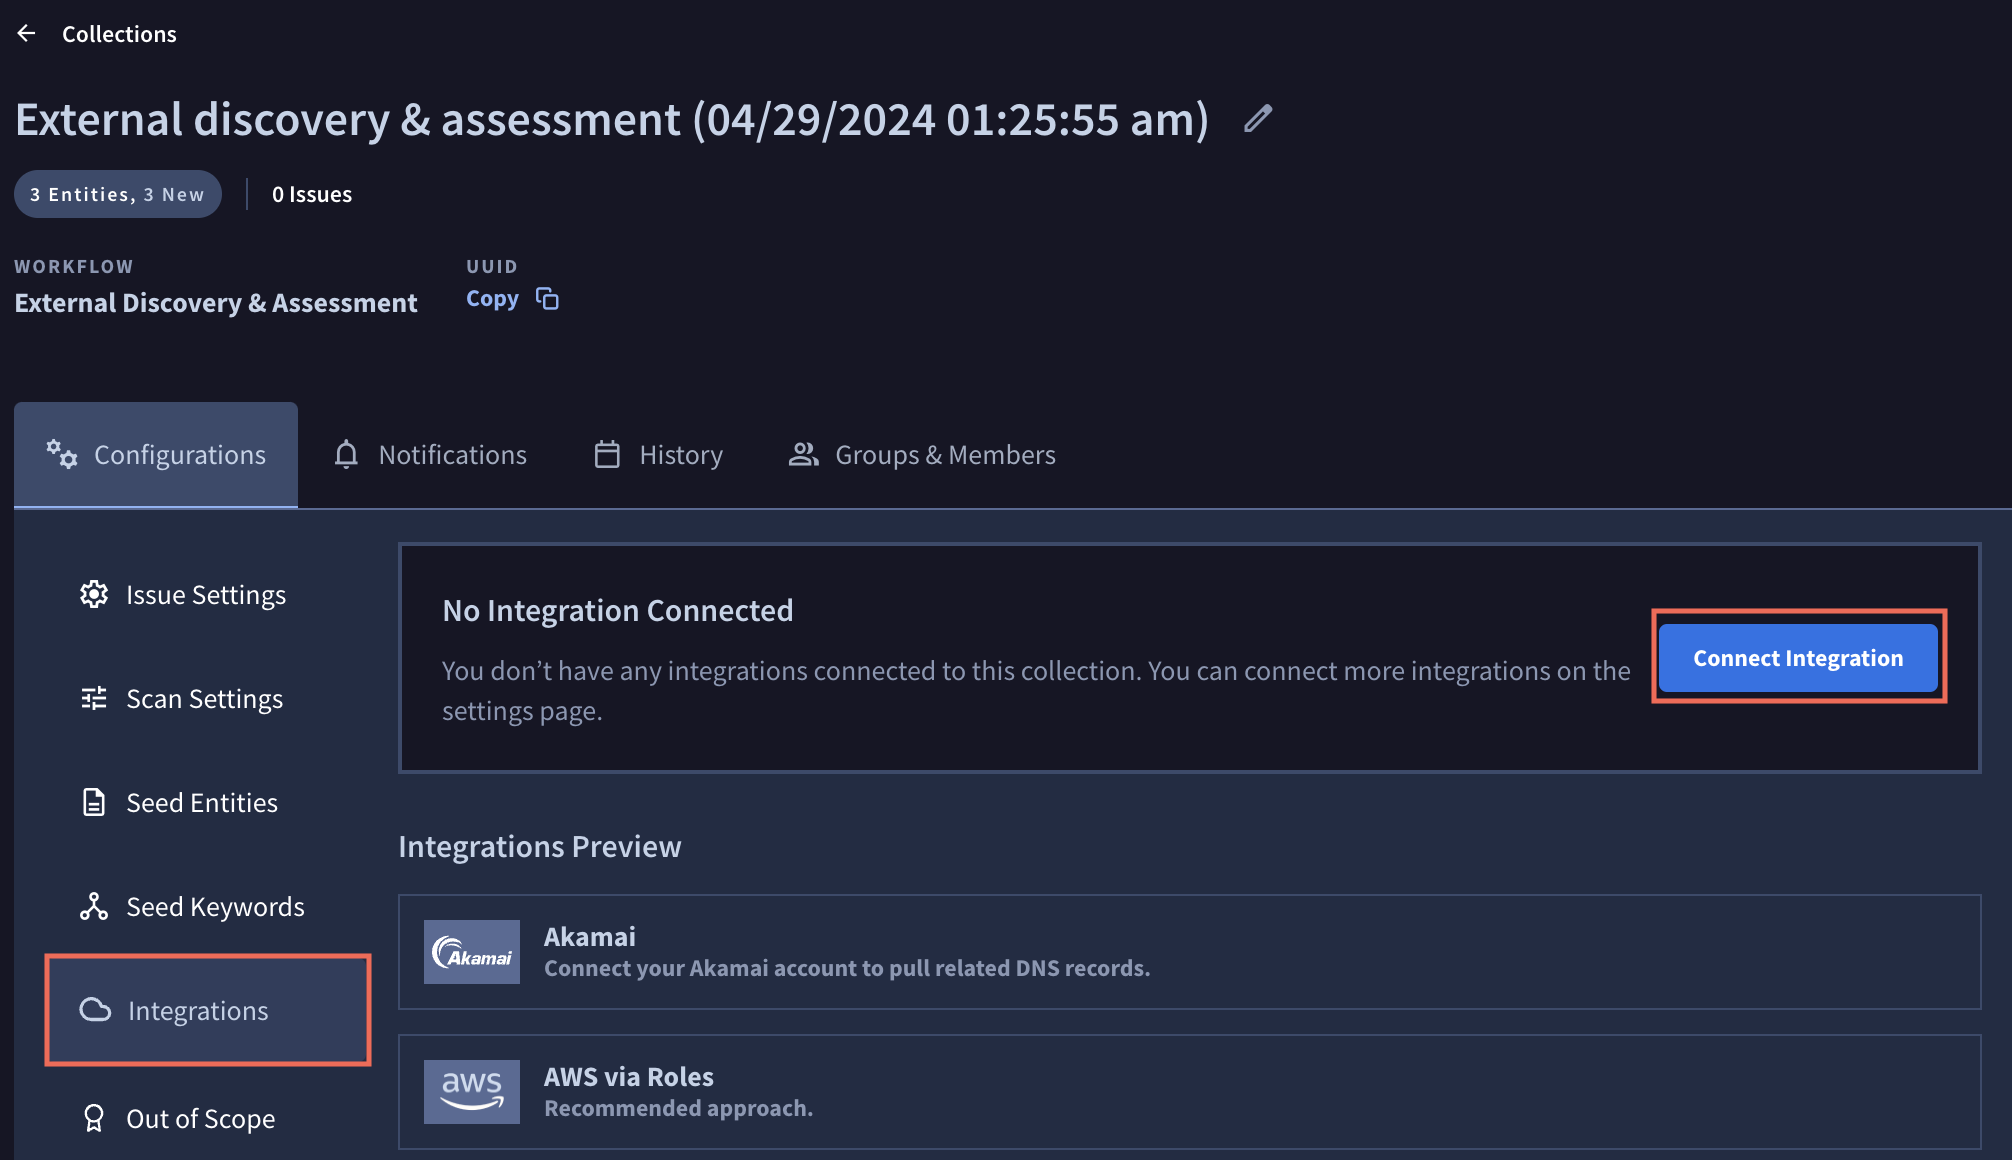
- Select Connect Integration and Link the integration.

The integration is immediately added to the Collection.
Clickto remove the integration from this Collection.
- Click
to close the Connect Integration pane. Click Scan Collection to update your Collection with the current settings and integrations. Otherwise, your newly configured integration is incorporated at your regularly scheduled scan interval.

Updated 5 months ago


