Scale AWS Integration Across AWS Organizations
See how credentials for integrations are stored here
The following information is not intended to apply to all variations of customer environments. There can be several factors that may prohibit you from achieving the intended results. As such, this document should be treated as general guidance. These instructions were written for an out-of-box AWS organization containing a single organization unit. If your organization differs, please adapt the instructions to fit your requirements.
There are two steps in this process:
Create the Stack Set
- Sign in to the AWS Management Console as the root user.
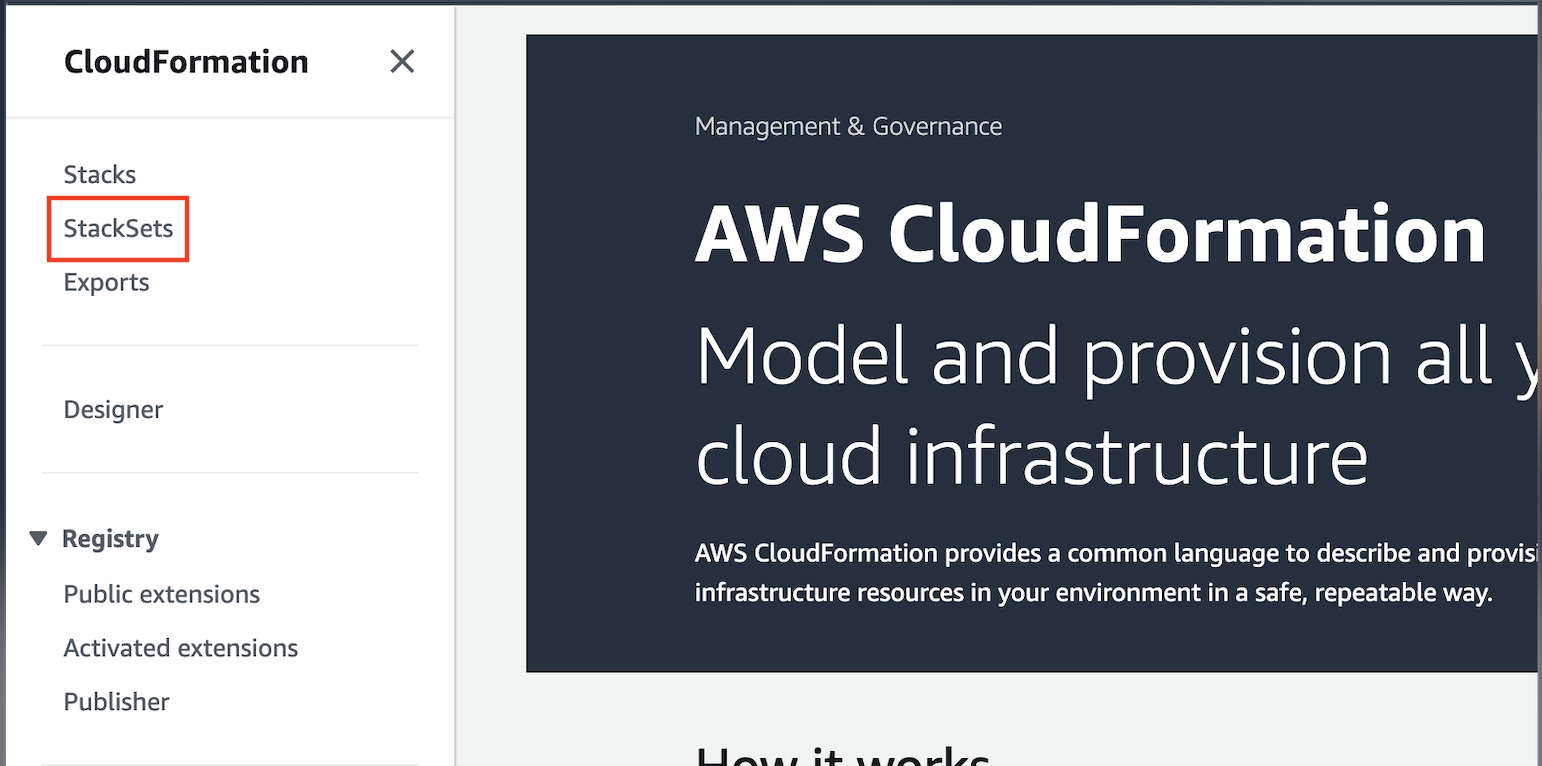
- Navigate to the CloudFormation service and select StackSets.
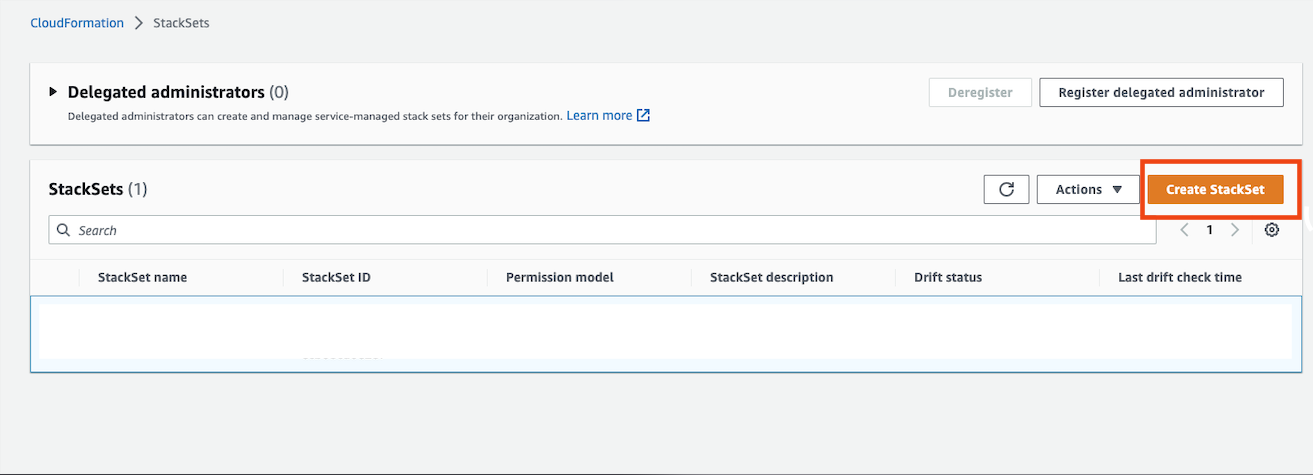
- Click Create StackSet.
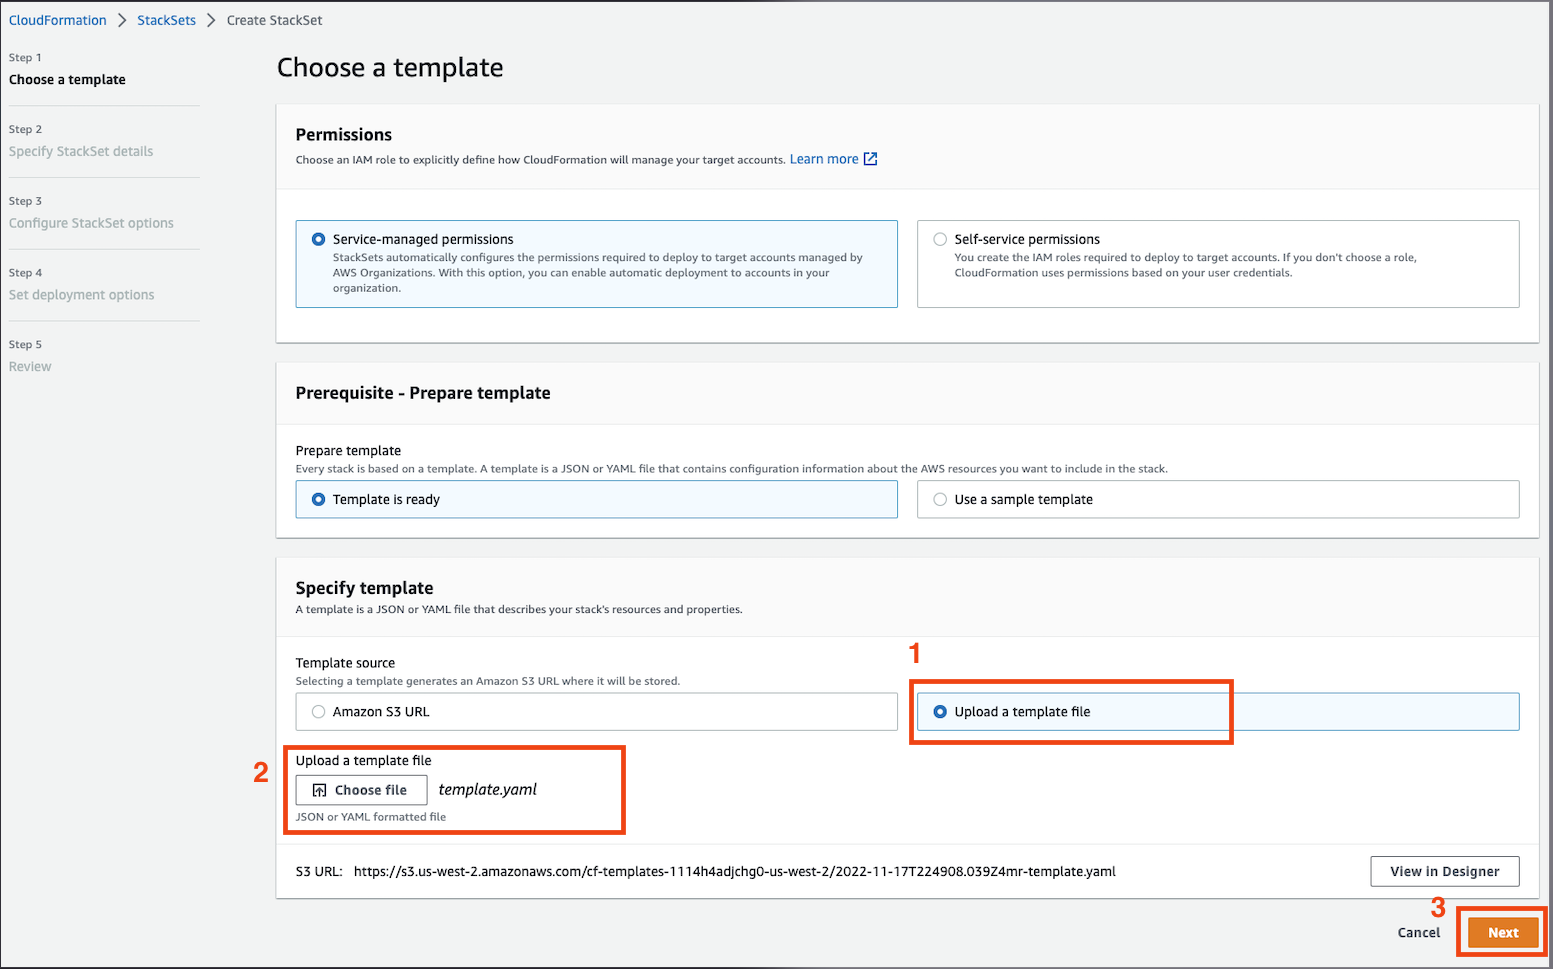
- Under the Specify template, select Upload a template file, upload this CloudFormation template file, and click Next.
Ensure you are using the version of this template file that allows the
masm-access-policypolicy access toec2:DescribeInstances,route53:ListHostedZones,route53:ListResourceRecordSets,s3:ListAllMyBuckets, andrds:DescribeDBInstances.
-
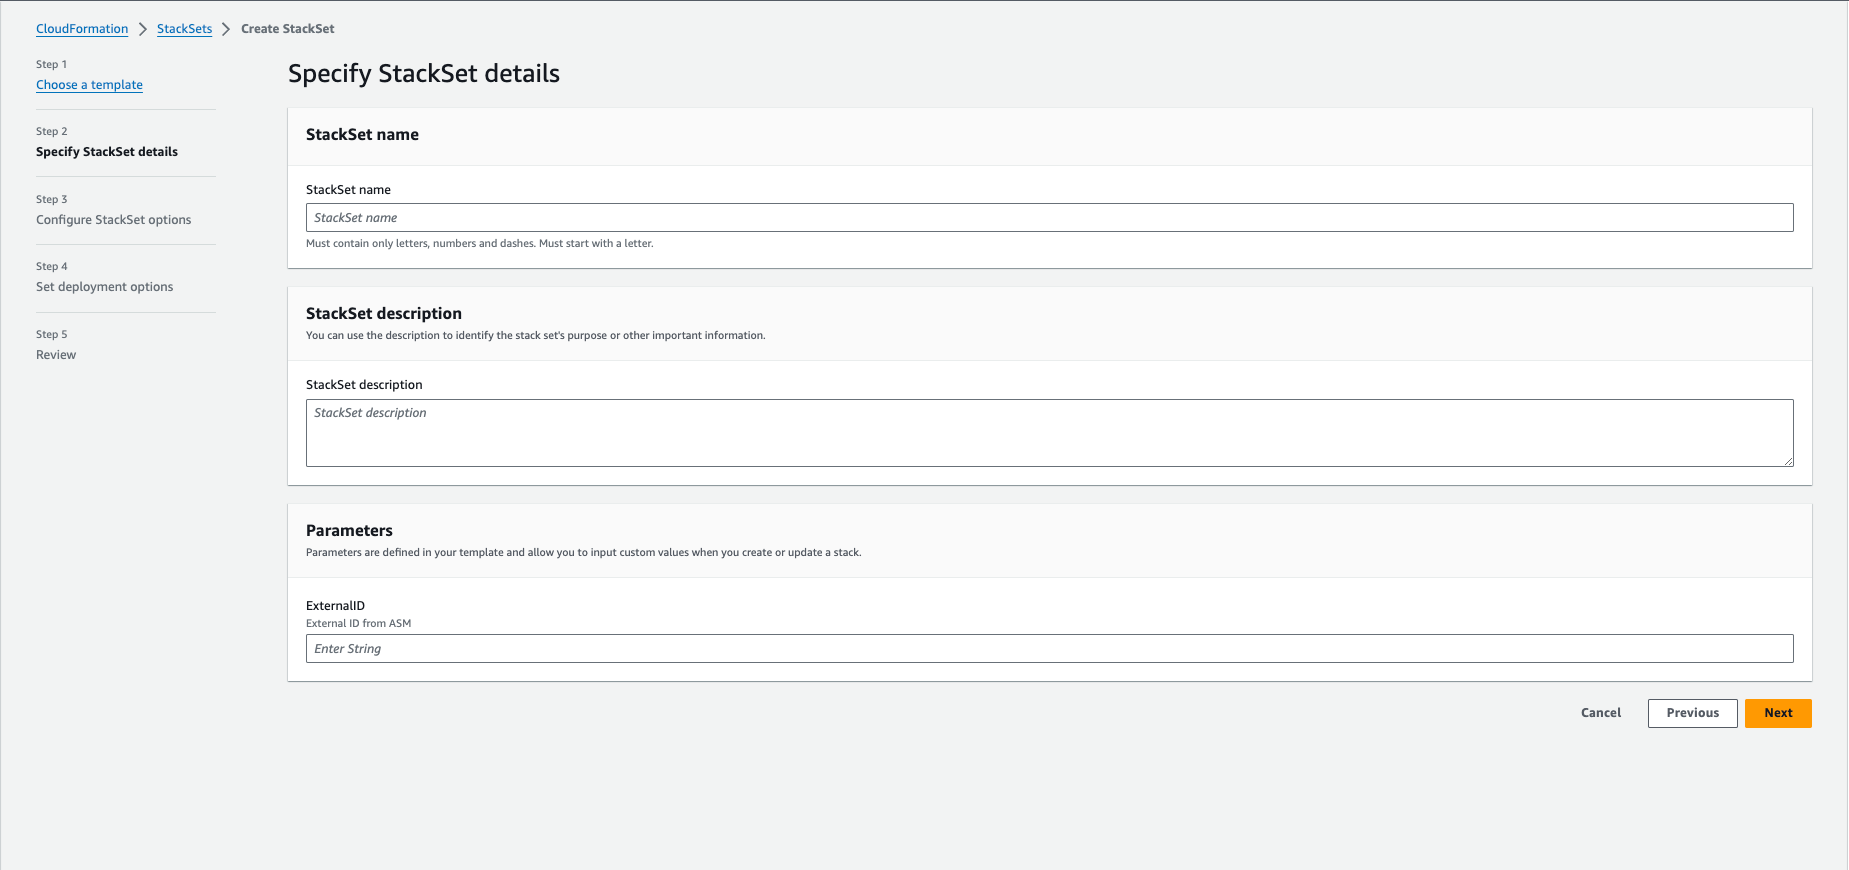
Populate the following fields and click Next.
- StackSet name: This should be a memorable value such as Mandiant-ASM-Integration-StackSet.
- StackSet description
- External ID
Requiring an External ID is an AWS best practice when a third party (ASM, in this case) assumes the role.
External ID per ASM
There is one External ID per ASM project.
To access the AWS External ID from ASM:
From the Projects and Settings menu in ASM, select the appropriate Project then click Account Settings.
Click Integrations.
Click Add New for AWS (Roles).
Click Copy Key.
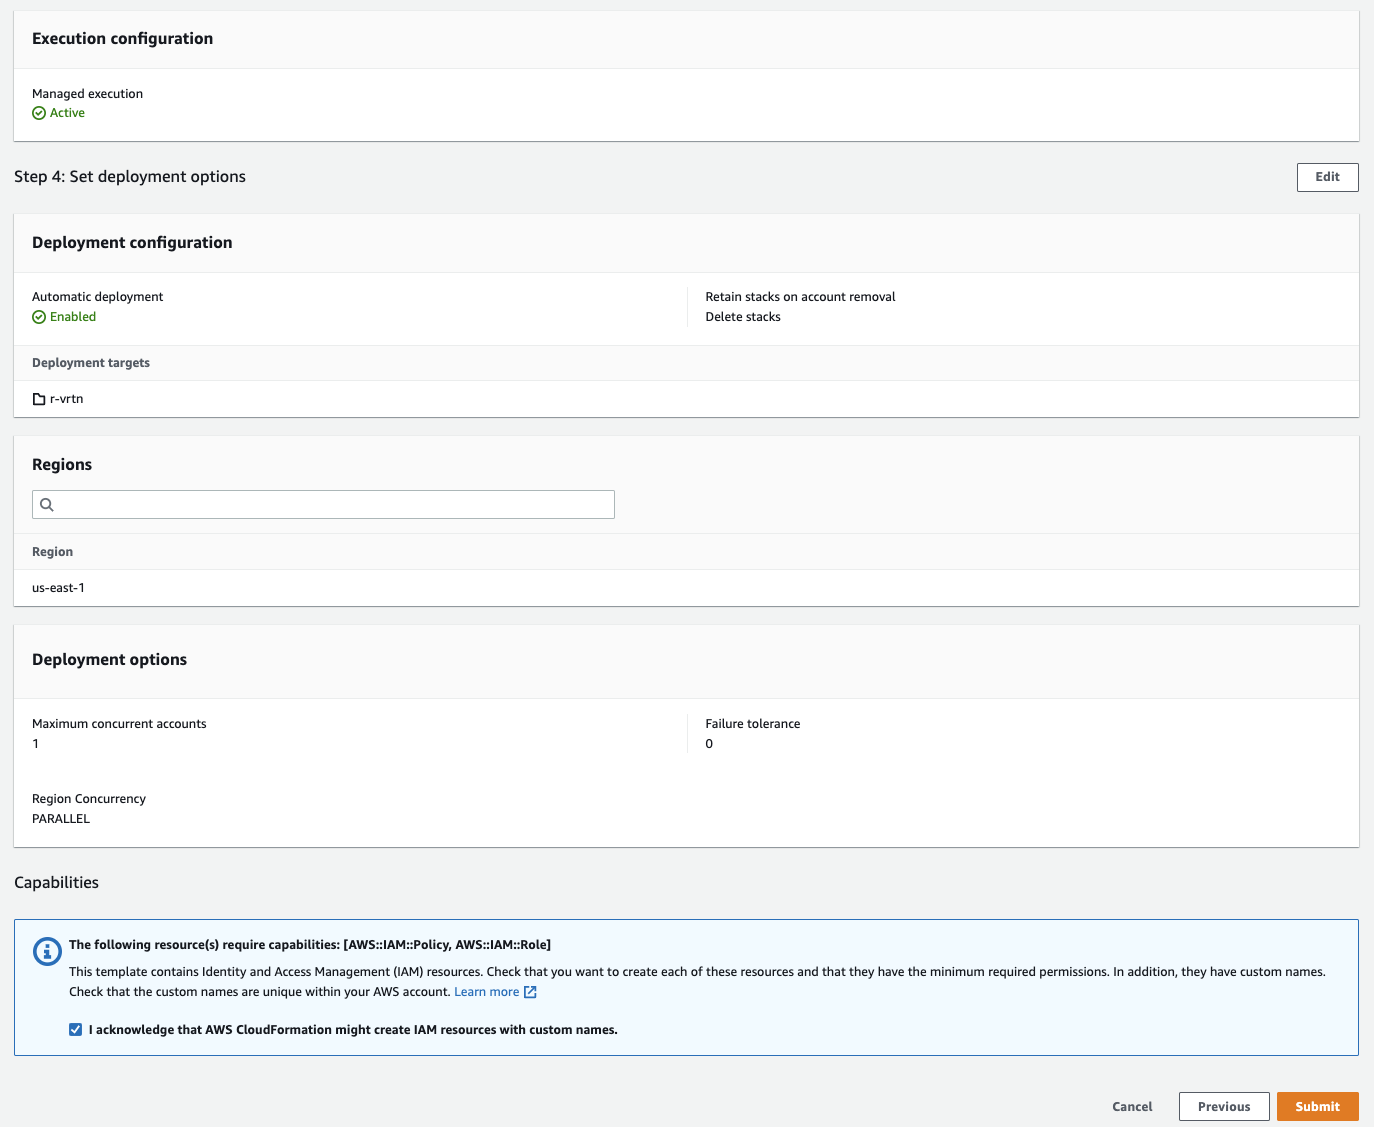
- Under Execution configuration, select Active.
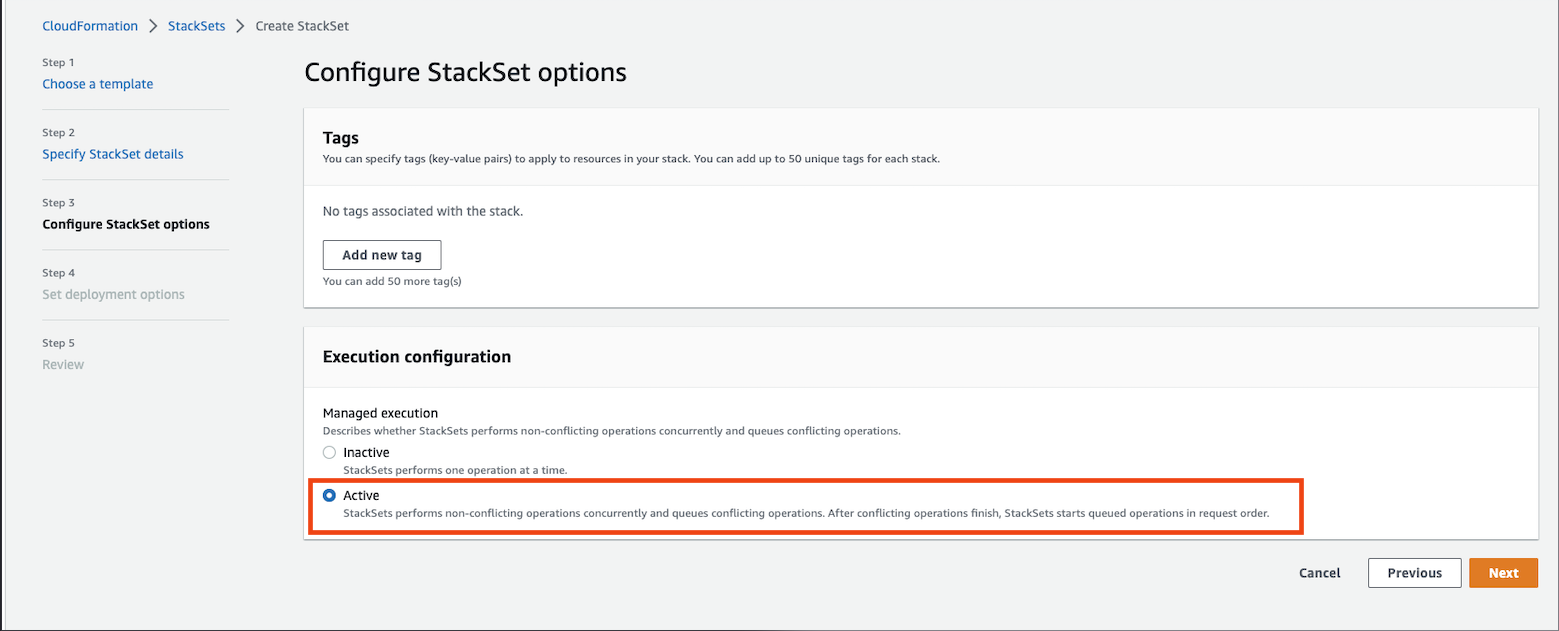
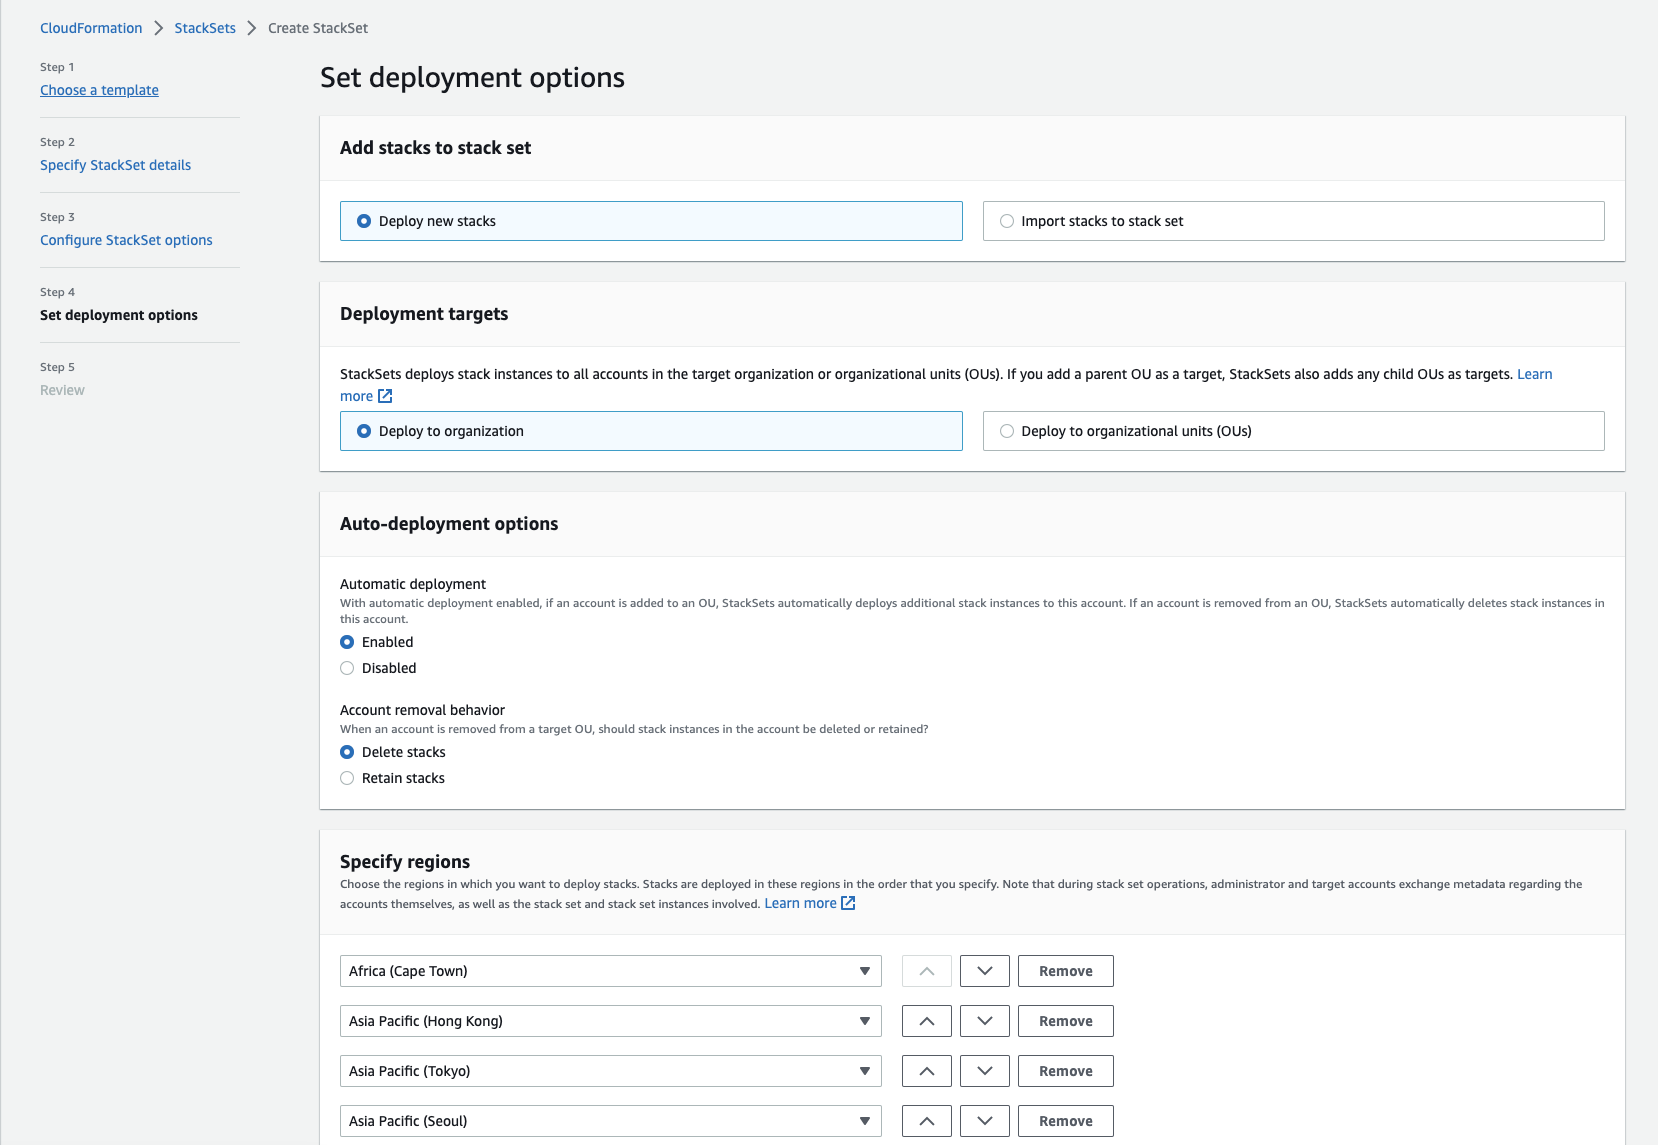
- Define Set deployment options and click Next.
- Deployment targets:
- Deploy to organization (default): Deploys the stack to all accounts in the organization.
- Deploy to organizational units (OUs): Deploys the stack to specific organizational units.
StackSets don't create roles in AWS management by default. The user must use a combination of OUs and account ID filters in the "Deployment target" section to prevent the StackSet from running against the management account. Otherwise the operation will fail.
- Specify regions: As IAM is Global, you can select any single region of your choice.
IAM roles have a global scope therefore you must should specify one region to run the StackSet in. Otherwise the operation will fail.
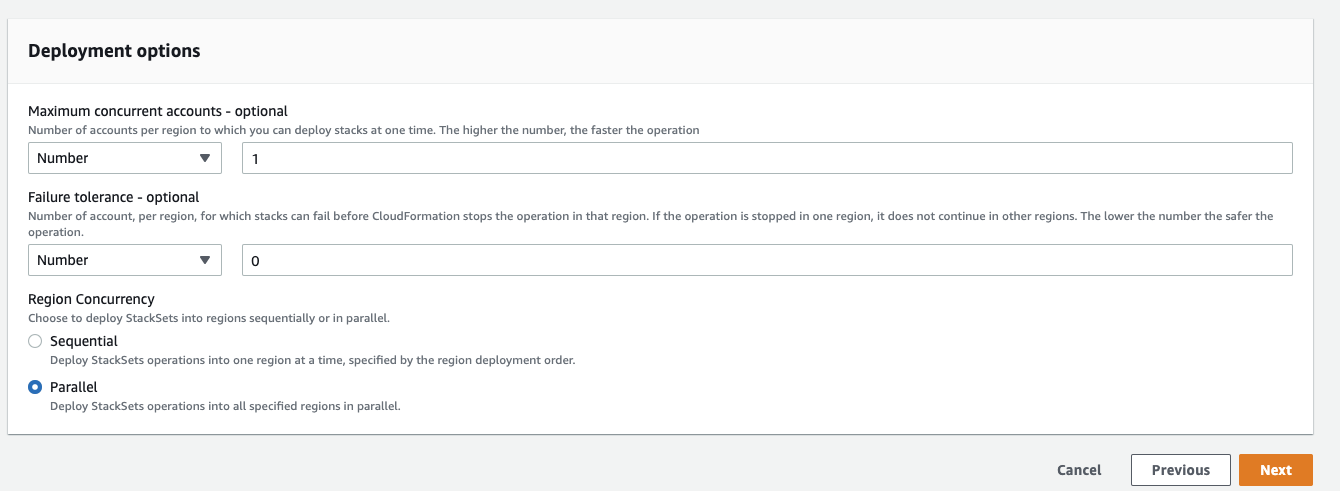
- Deployment options: The default options are shown here, but can be modified to suit the needs of your organization.
- Deployment targets:
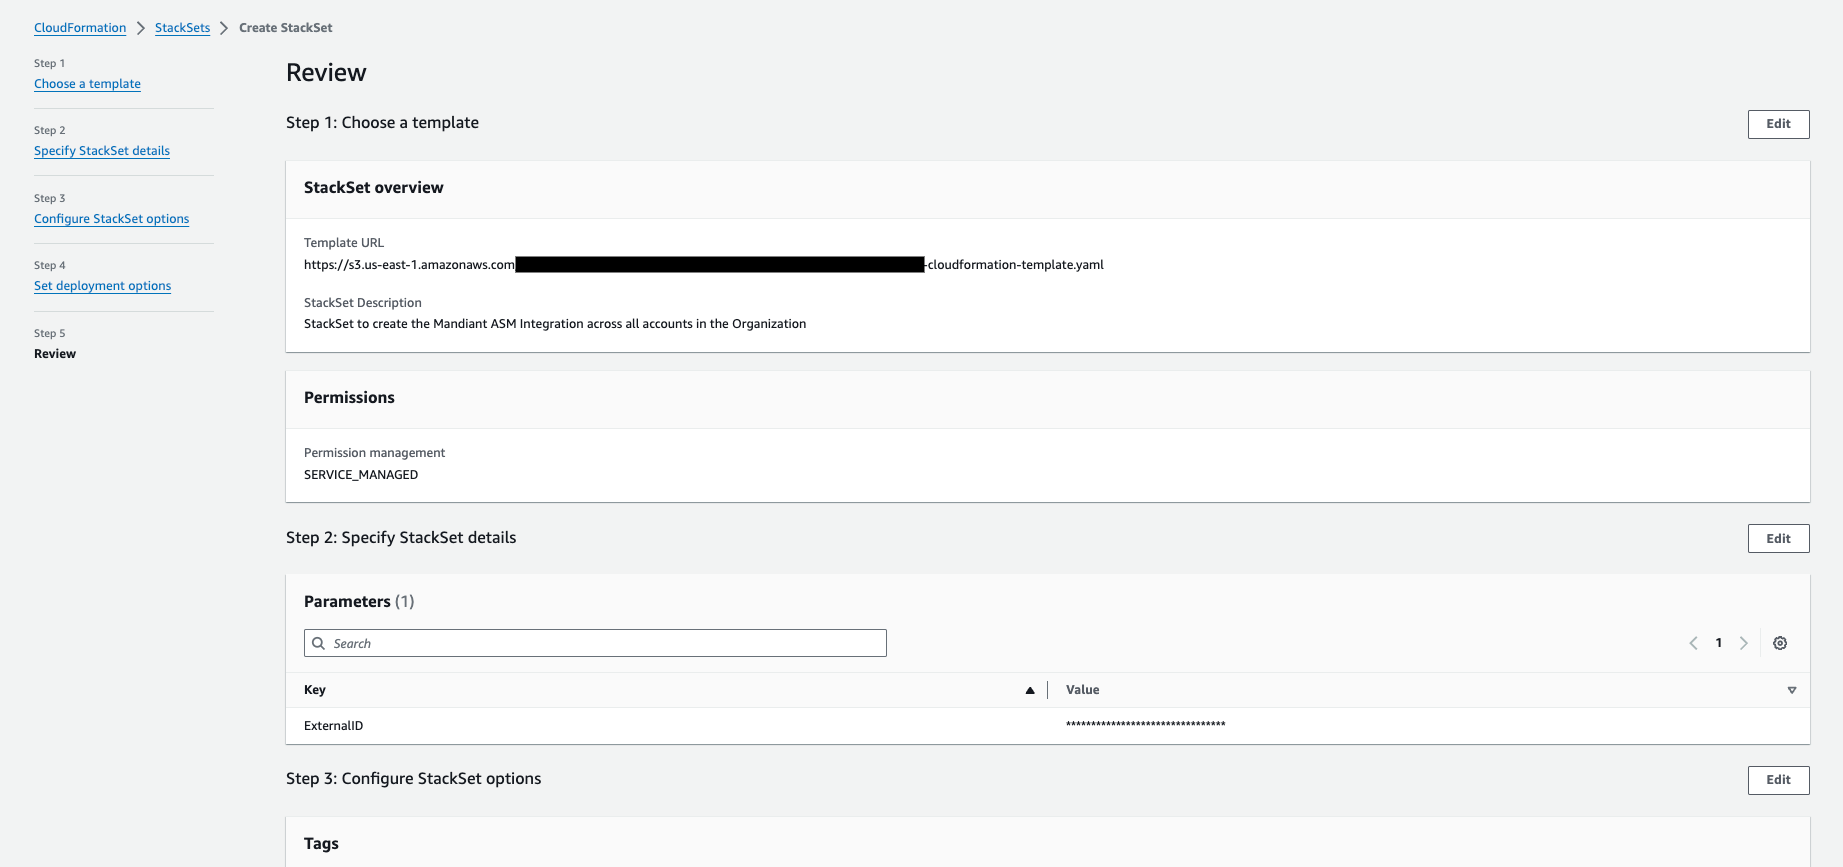
- Review and click Submit.
Gather the Role ARNs
The ASM AWS Integration requires you to input the Role ARN associated with the Mandiant-ASM-Access Role belonging to each child account the StackSet was deployed to.
This list is easy to produce as the name of the role are the same across all accounts and AWS' Role ARNs follow a specific format.
Using the parent account in the AWS CLI, run the following command to obtain the Role ARNs associated with the AWS accounts belonging to your organization:
aws cloudformation list-stack-instances --stack-set-name Mandiant-ASM-Integration-StackSet | jq -r '.Summaries[] | select(.StackInstanceStatus.DetailedStatus == "SUCCEEDED") | .Account | "arn:aws:iam::\(.):role/Mandiant-ASM-Access"'
- The
jqutility parses the resulting JSON and forms the Role ARN.* If the Role Name was changed from what is listed in the CloudFormation template file, be sure to update the preceding command to include the correct Role Name.
Sample Result (where each line is an individual Role ARN):
arn:aws:iam::11111111111:role/Mandiant-ASM-Access
arn:aws:iam::22222222222:role/Mandiant-ASM-Access
arn:aws:iam::33333333333:role/Mandiant-ASM-Access
Create a new AWS Integration for every Role ARN listed. If there are too many, it's highly suggested to script this process. The API Docs can help provide more insight.
Updated 4 months ago

