Monitor Compromised Credentials
Digital Threat Monitoring (DTM) automatically alerts you if any accounts linked to designated domains have appeared in compromised credential data collected from the deep, dark web.
Compromised Credentials monitoring automatically includes any associated subdomains.
Create a Compromised Credential Monitor
Use the following workflow to create a Compromised Credentials Monitor.
-
From DTM, select the Monitors tab.
-
Select the Compromised Credentials Monitor template.
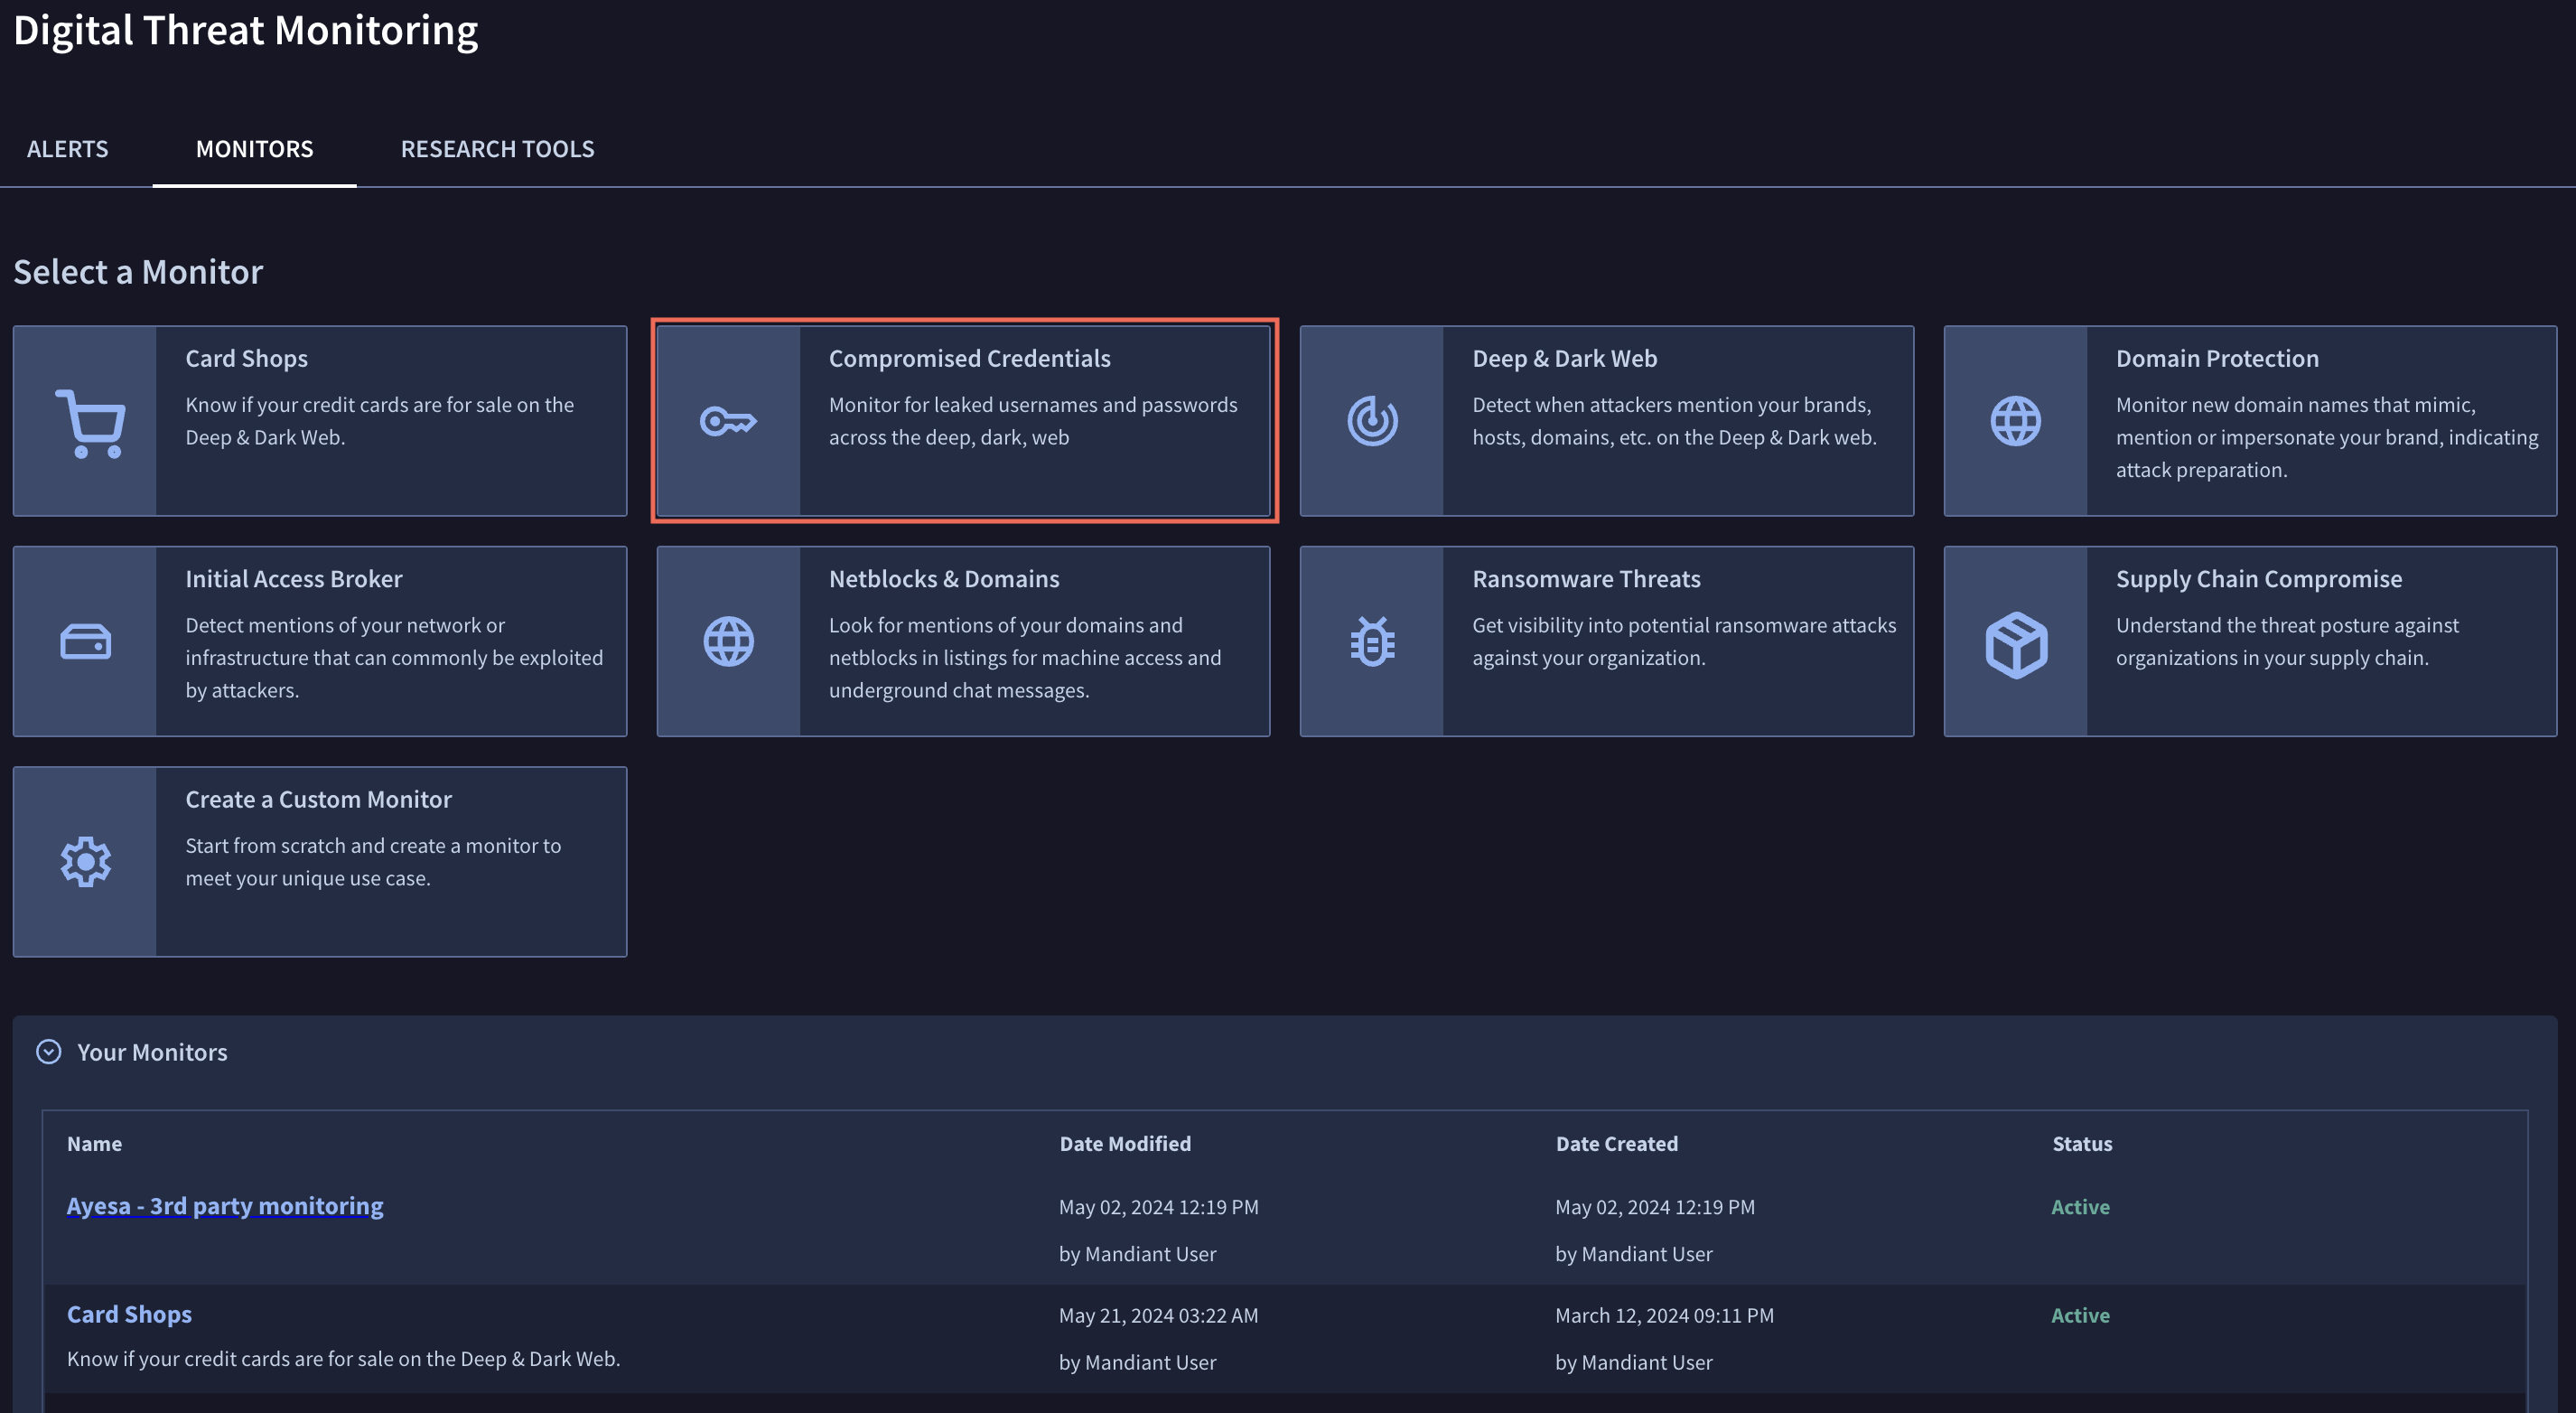
You are presented with a setup wizard to walk you through the monitor setup steps.

-
Name the Monitor.
- Enter a name for the Monitor.
- Optional: Provide a description.
- Click Next.
-
Add your domains.
-
Enter domains to be monitored.
-
Click Next.
. Domains must be entered one per line.. You only need to add the most top-level domain; all sub-domains alerts are included.. You are required to prove that you own these domains in order to receive alerts containing unmasked login credential details.. Monitoring compromised credentials for free or public email domains is not supported.
-
-
Optional: Exclude specific subdomains if you want to reduce monitor noise and false positives.
- Enter domains to be excluded.
- Click Next.
-
Define Matching Logic. Select either or both of the following options:
- Match email domains in the login field.
- These are high-confidence employee credential matches.
- When available, these matches deliver additional context around the breach including compromised machine’s IP, hostname and other metadata.
- Only these matches for verified domains include clear text passwords.
- When there are matches to both of the email domain and web service domain, the matches are shown.
- Match the web service domain.
- Match your domains to the web service the compromised credential logs into.
- These matches expand coverage for when there are not email domains in the login field.
- Clear text passwords are not provided for these credentials because it cannot be confirmed whether credentials with this match are employee credentials.
- Match email domains in the login field.
-
Optional: Configure password policy to know if passwords in compromised credentials alerts meet your organization’s password policy.
- Set a minimum and maximum password length.
- Configure Complexity Rules, such as at least one non-alphanumeric character or at least one uppercase character.
- Click Next.
-
Optional: Configure notification delivery.
- Select the checkbox to Enable email alert notifications.
- Select the checkbox to Deliver email notifications from this monitor immediately.
- Click Next.
-
Optional: Configure backfill alerts if you want to create historical alerts for the period you select.
- Choose an option:
- No, do not backfill alerts
- Yes, backfill alerts for the last
- Choose a time period from the drop-down. For example, 7 Days.
- Choose an option:
-
Click Create Monitor.
-
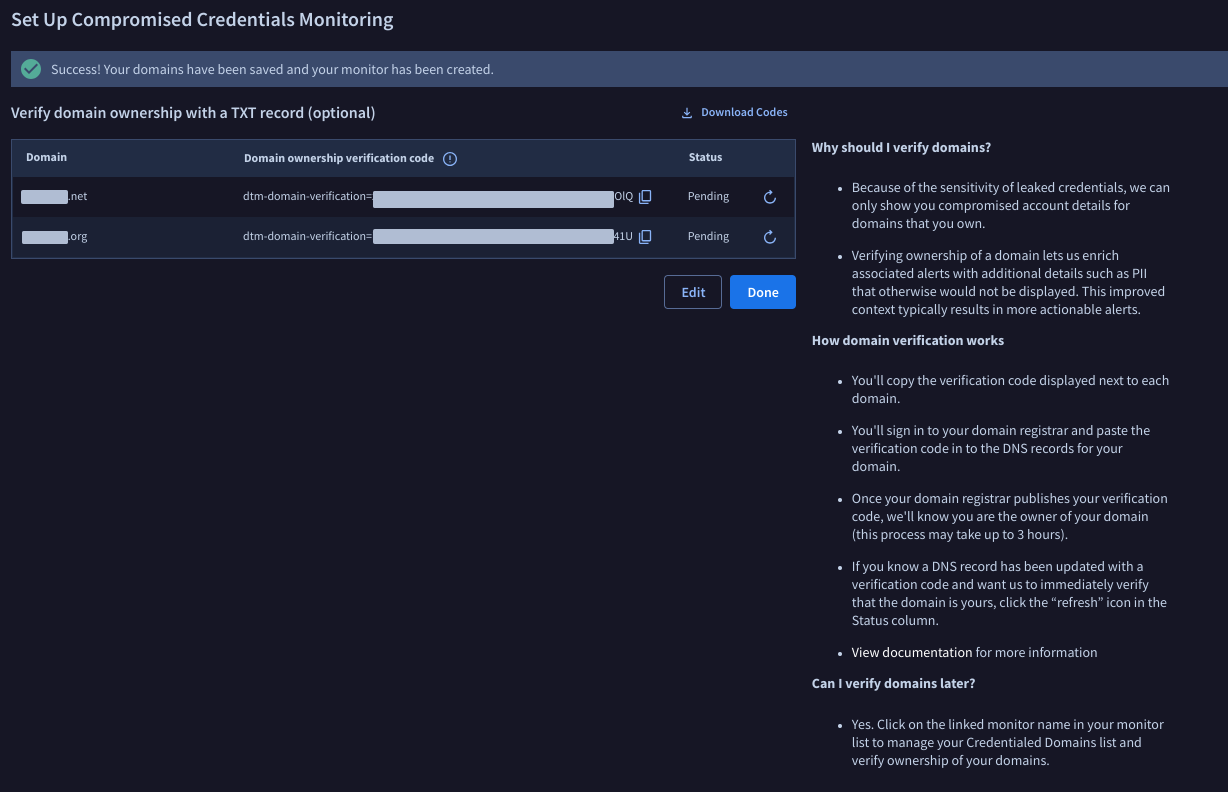
Optional: Verify domain ownership with a TXT record.
Verifying ownership of a domain lets us enrich associated alerts with additional details such as PII that otherwise would not be displayed. This improved context typically results in more actionable alerts.
For more information on verifying domains with a TXT record, including step-by-step instructions, see Verify your domain with a TXT record.
i. Select Click to Copy to copy the verification code for the TXT record.
ii. Paste the verification code in to the DNS records for your domain. Once your domain registrar publishes your verification code, we'll know you're the owner of your domain.
This process may take up to three hours.
iii. Optional: If you know that your DNS records have been updated, click Refresh to initiate an ad hoc query to verify your domain.
iv. Optional: Click Download Codes to download all TXT record verification codes in a CSV file.
- Click Edit to modify your domain list or Done to save the Monitor for the listed domains.
View or Edit Compromised Credentials Monitors
Once created, the new monitor will appear in Your Monitors. Use the following workflow to edit or delete Monitors from this list.
-
From DTM, select the Monitors tab.
-
Select an existing monitor from the list of Your Monitors. A summary view of the monitor appears.
-
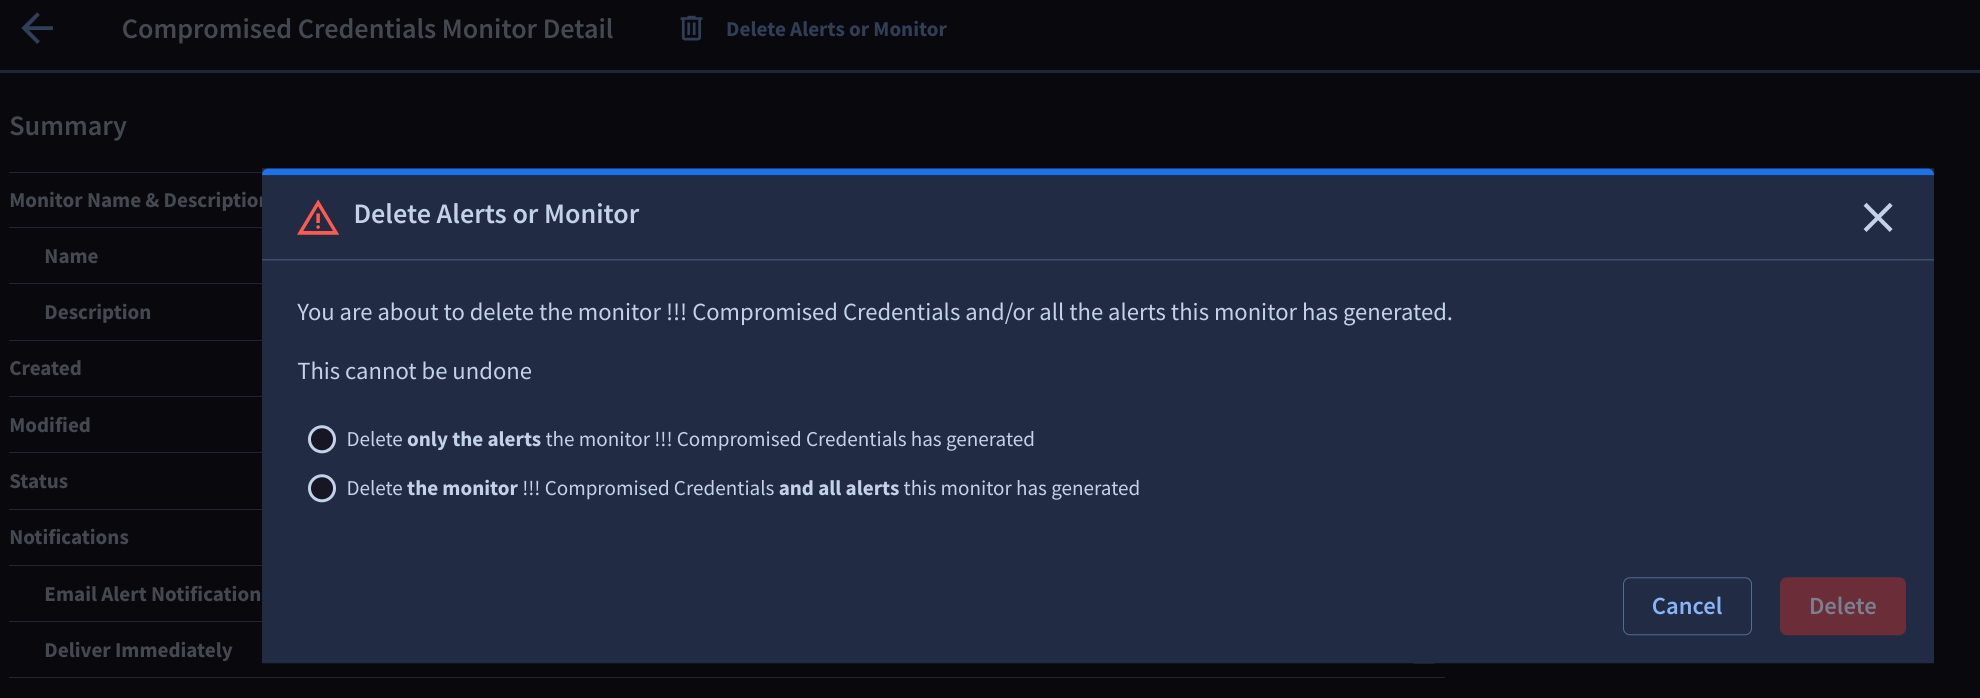
To delete, click Delete Alerts or Monitor and make a selection to delete the Alerts for this Monitor or the Monitor itself.
This process cannot be undone. Deleted Alerts and Monitors can be recreated but they can't be restored with historical data intact.
-
- Alternatively, to edit any field associated with the Monitor, click
 Edit or the toggle associated with the field to make the necessary adjustments.
Explore Compromised Credentials Alerts
In DTM, the Alerts tab displays all Alerts generated from DTM Monitors.
See Working with Alerts for more information about DTM Alerts in general.
All Alerts associated with a single Compromised Credentials Monitor are automatically aggregated into a bucket Alert with a Multiple Alerts label. The label includes the number of related Alerts.
Filtering the Alerts list affects how aggregated Alerts are displayed:
- If any child ticket in an aggregated bucket matches the filtering criteria, the bucket is displayed in the Alerts list.
- When using a Date Range filter in the Alert List view, the date range determines which child Alerts are displayed when you select the bucket.

Click an aggregated bucket Alert to view a table containing all the associated Alerts. New Alerts are tagged with a yellow dot that becomes gray once the Alert has been opened.
-
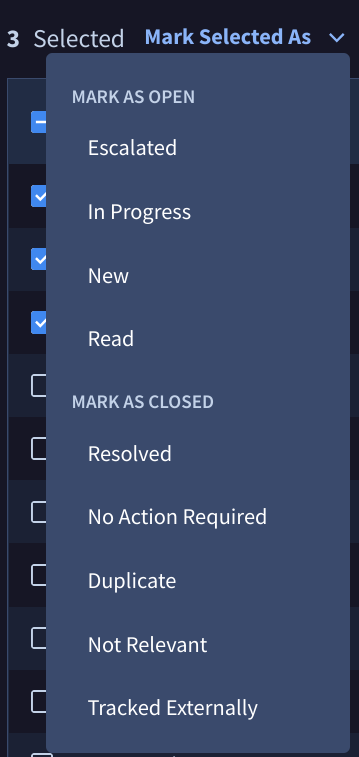
Alert status can also be changed individually or in bulk. Select one or more Alerts and choose New, Read, or Closed from the Mark Selected As drop-down.

-
The Alerts table includes the following:
-
Alerted: Date and time the Alert was generated.
-
Published: Date and time at which the credentials were exposed.
-
Status: New, Read, or Closed.
-
Service URL: The specific source URL used for sign in, such as
myownpersonaldomain.com. -
Account Login: The username that was found in the compromised credentials data.
-
Password: The password that was found in the compromised credentials data.
- Password hashes and clear text passwords are displayed if available for domains that have been verified.* Passwords are only displayed if the Account Login contains the verified domain, or if the Service URL domain has been verified and the Account Login domain is empty.
-
Pwd Policy Met?: A password policy can be established when the monitor is created.
-
Threat Name: The associated threat, such as malware or threat actor, that was found in the compromised credentials data.
Click the hyperlink for the threat to pivot directly to its profile in the Google Threat Intelligence platform.
-
Source File: If the domain has been verified, you can use this link to navigate to the Breach Data view. This view contains information about the threat, the compromised host, and credentials related to your domain.

-
 Link icon: Copy the individual Alert URL to your clipboard.
 -
 Open icon: Open the individual Alert URL in DTM.
-
Download Credentials and View History
DTM admins only: Click Download Credentials to export a CSV file that includes detailed information about each Alert such as:
-
Date and time Alerted, Collected, Published
-
Service URL
-
Account Login
-
Password
The Password field is only shown for verified domains.
-
Threat Name
-
Alert URL
-
Alert Status
Click View History for an audit trail of the following activities with timestamps and the name of the user that performed the activity:
- Opened, reopened, or closed an Alert
- Created or deleted a Monitor
- Downloaded the CSV file of Alert credentials data
Assign Alert Status
Alert status can be changed individually or in bulk. Select one or more Alerts and click Mark Selected As. Select a status to apply to the selected Alerts.
Add Tags
Click + New Tag to select tags from the Popular Tags list, or enter your own tag and press enter to save.
Tags apply to all Alerts in the table. Alerts cannot be tagged individually.
Updated 10 months ago