ASM Akamai Integration
Special privileges requiredThis feature is only available to ASM administrators.
See how credentials for integrations are stored here
Attack Surface Management (ASM)'s Akamai integration gives you more visibility by pulling both DNS records and CDN hostnames from Akamai directly into the ASM platform as a Seed.
Adding this integration requires two steps:
Create API Key in Akamai
- Once authenticated with Akamai, go to https://control.akamai.com/apps/identity-management/#/tabs/users/list.
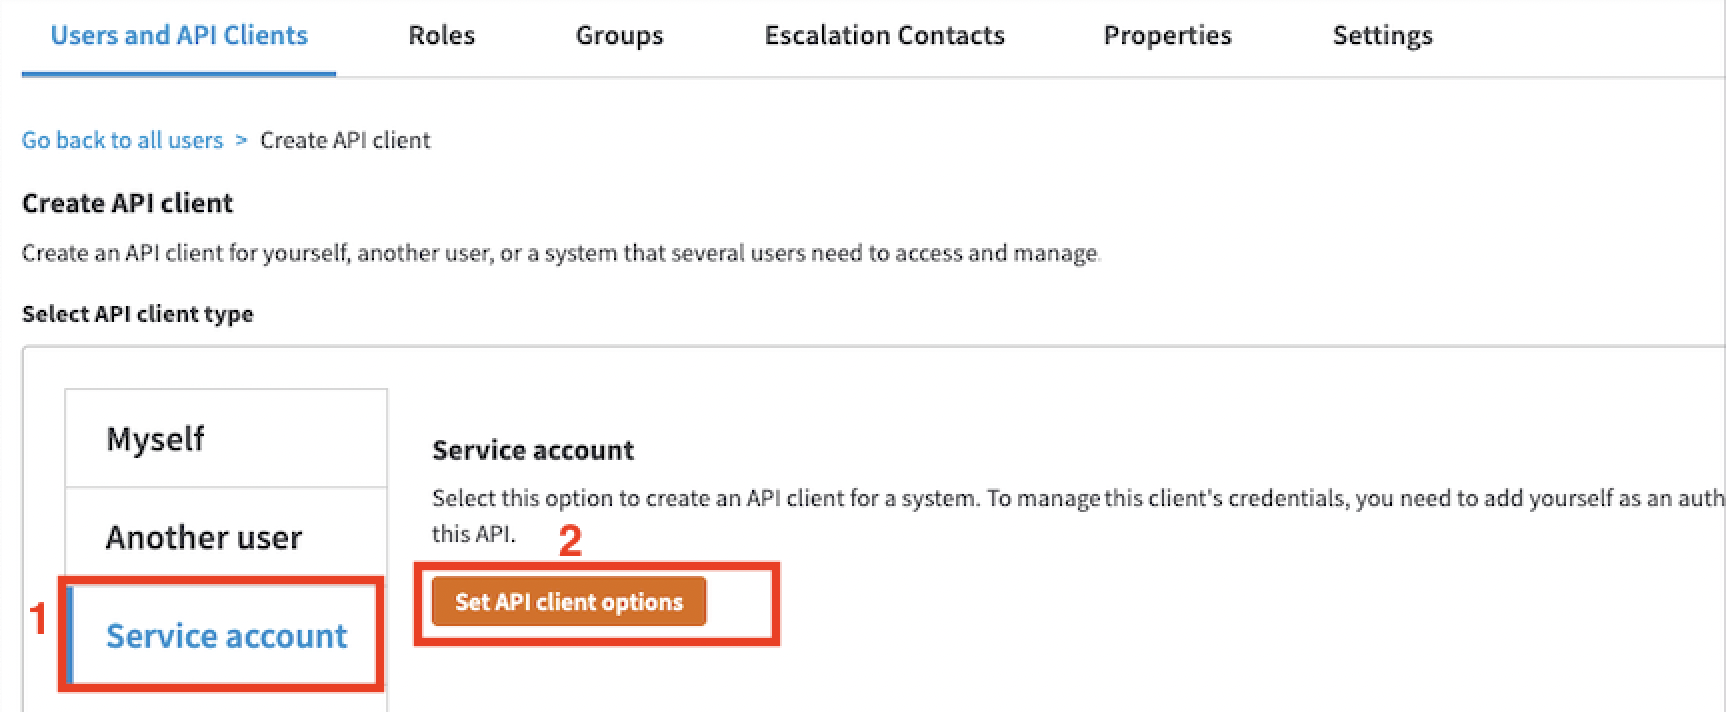
- From the Identity and Access Management menu, select the Users and API Clients tab (1) and click Create API client (2).

- In the Select API client type section, select the Service account tab (1) and click Set API client options (2).
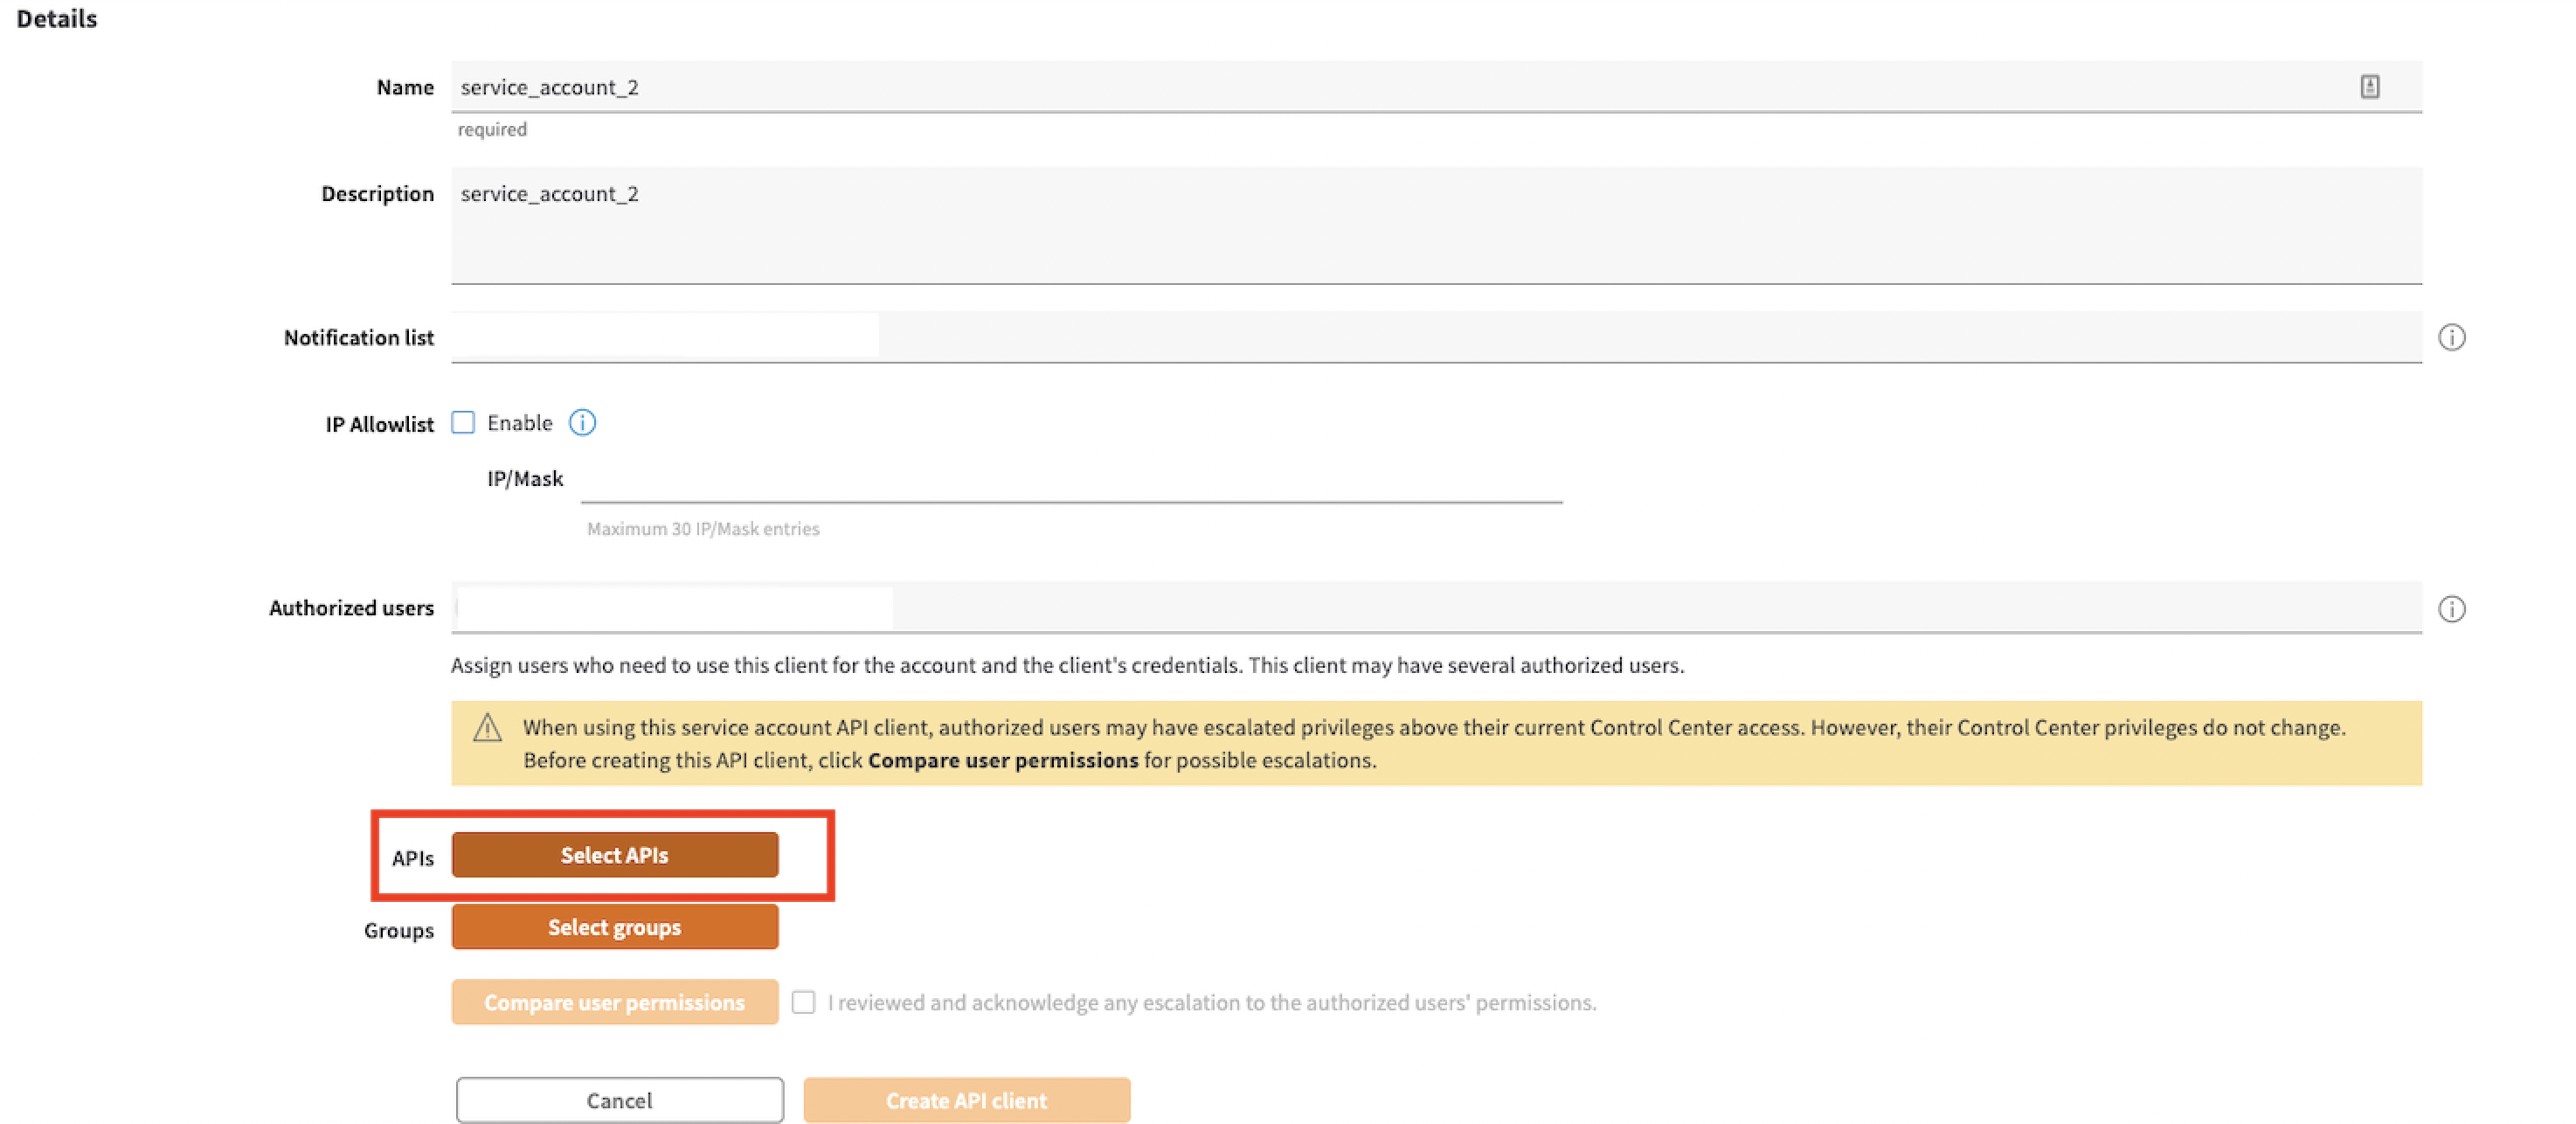
- On the Details page, fill in the required fields and click Select APIs.
-
Select and configure APIs.
-
Search for the APIs you wish to pull downstream:
-
DNS - Zone Record Management (DNS records)
The DNS - Zone Record Management API is required for this integration.
-
Property Manager (PAPI) (CDN hostnames)
-
For each applicable API, set the Access level to READ-ONLY.
-
Click Submit.
As an example, a DNS record is shown here, but this process is similar for a CDN hostname, also known as Property Manager (PAPI).

-
-
Back on the Details page, click Select groups and set the Role to Viewer for any groups that will be sending data to the ASM API. Click Submit.


- After reviewing your entries on the Details page, select the acknowledgement checkbox (1) and click Create API client (2).
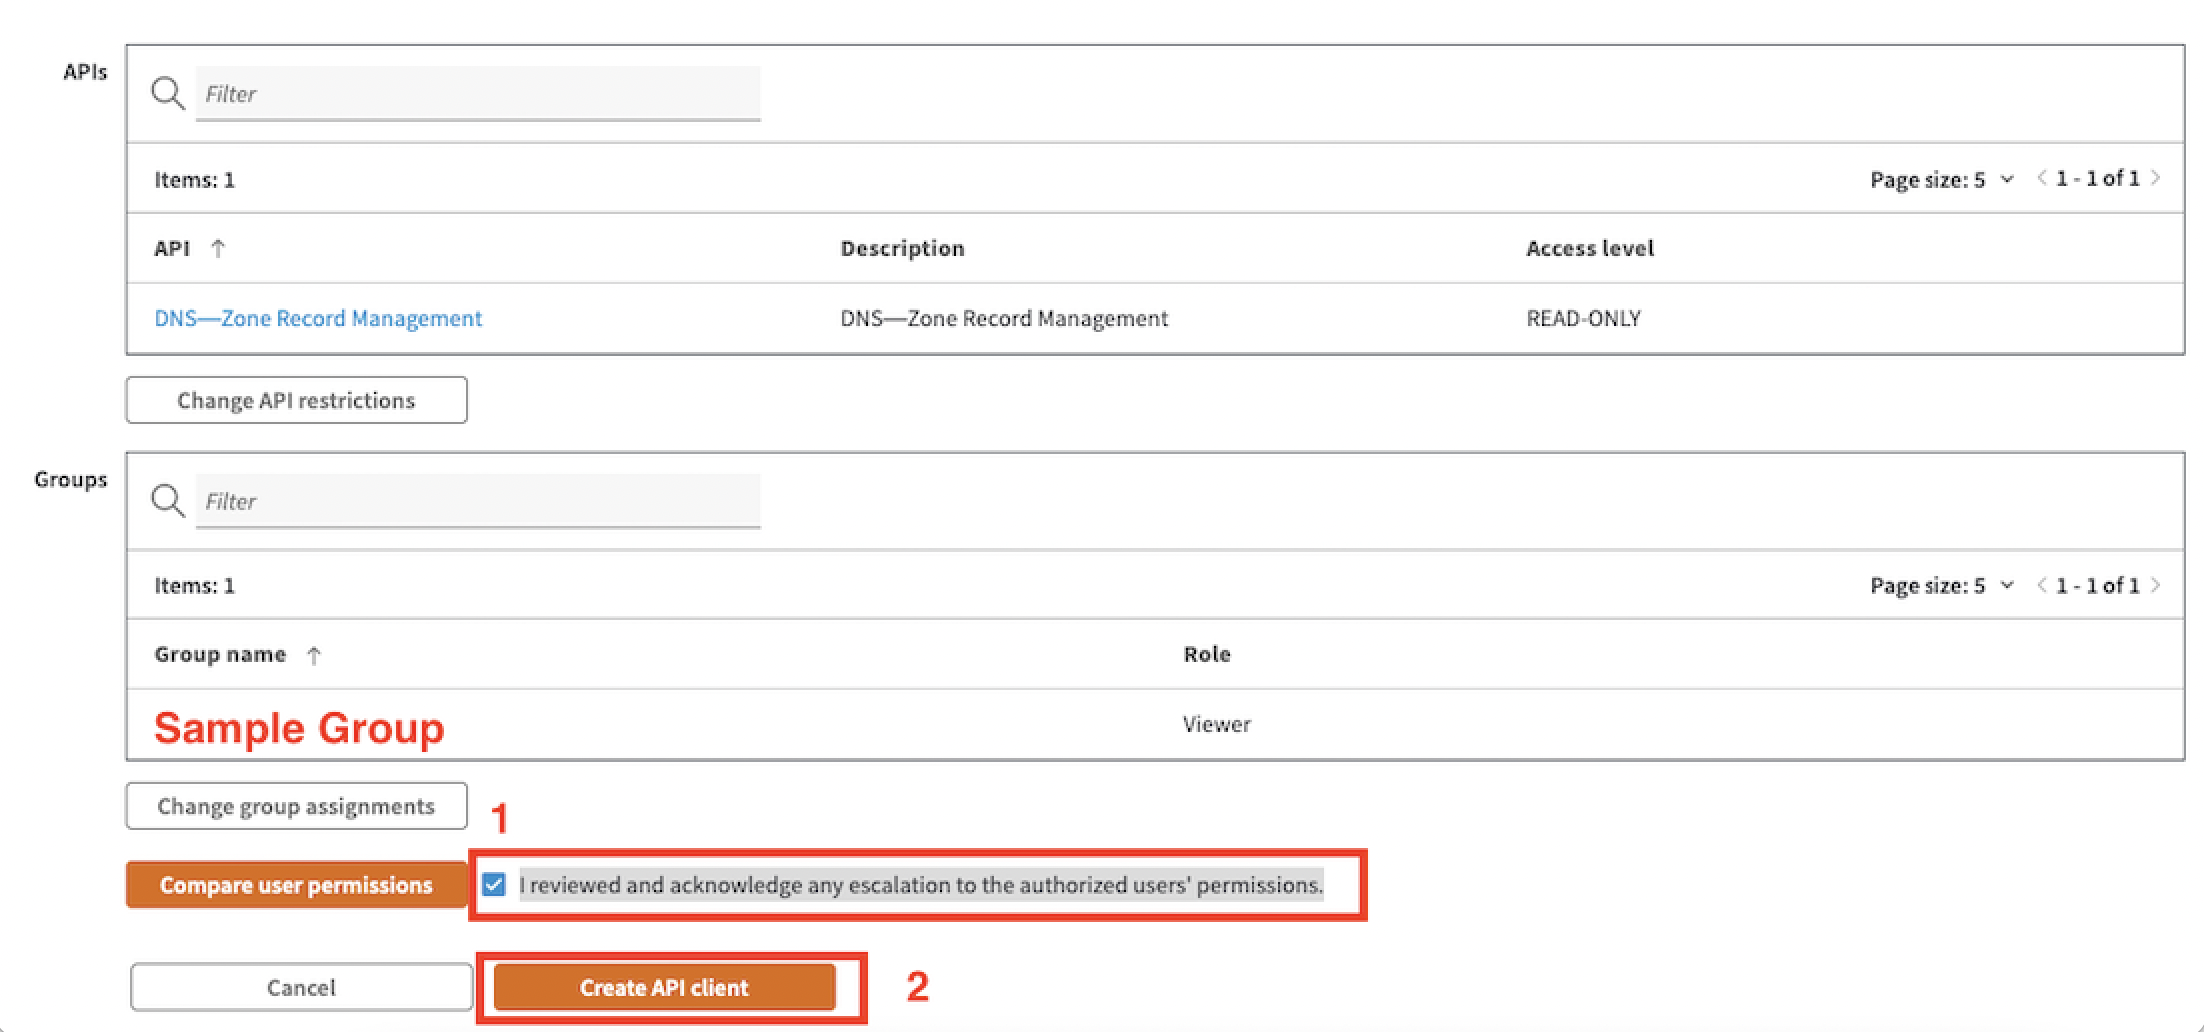
Only a DNS record API is shown in the preceding example. Depending on your setup, a Property Manager (PAPI) API may also be listed:
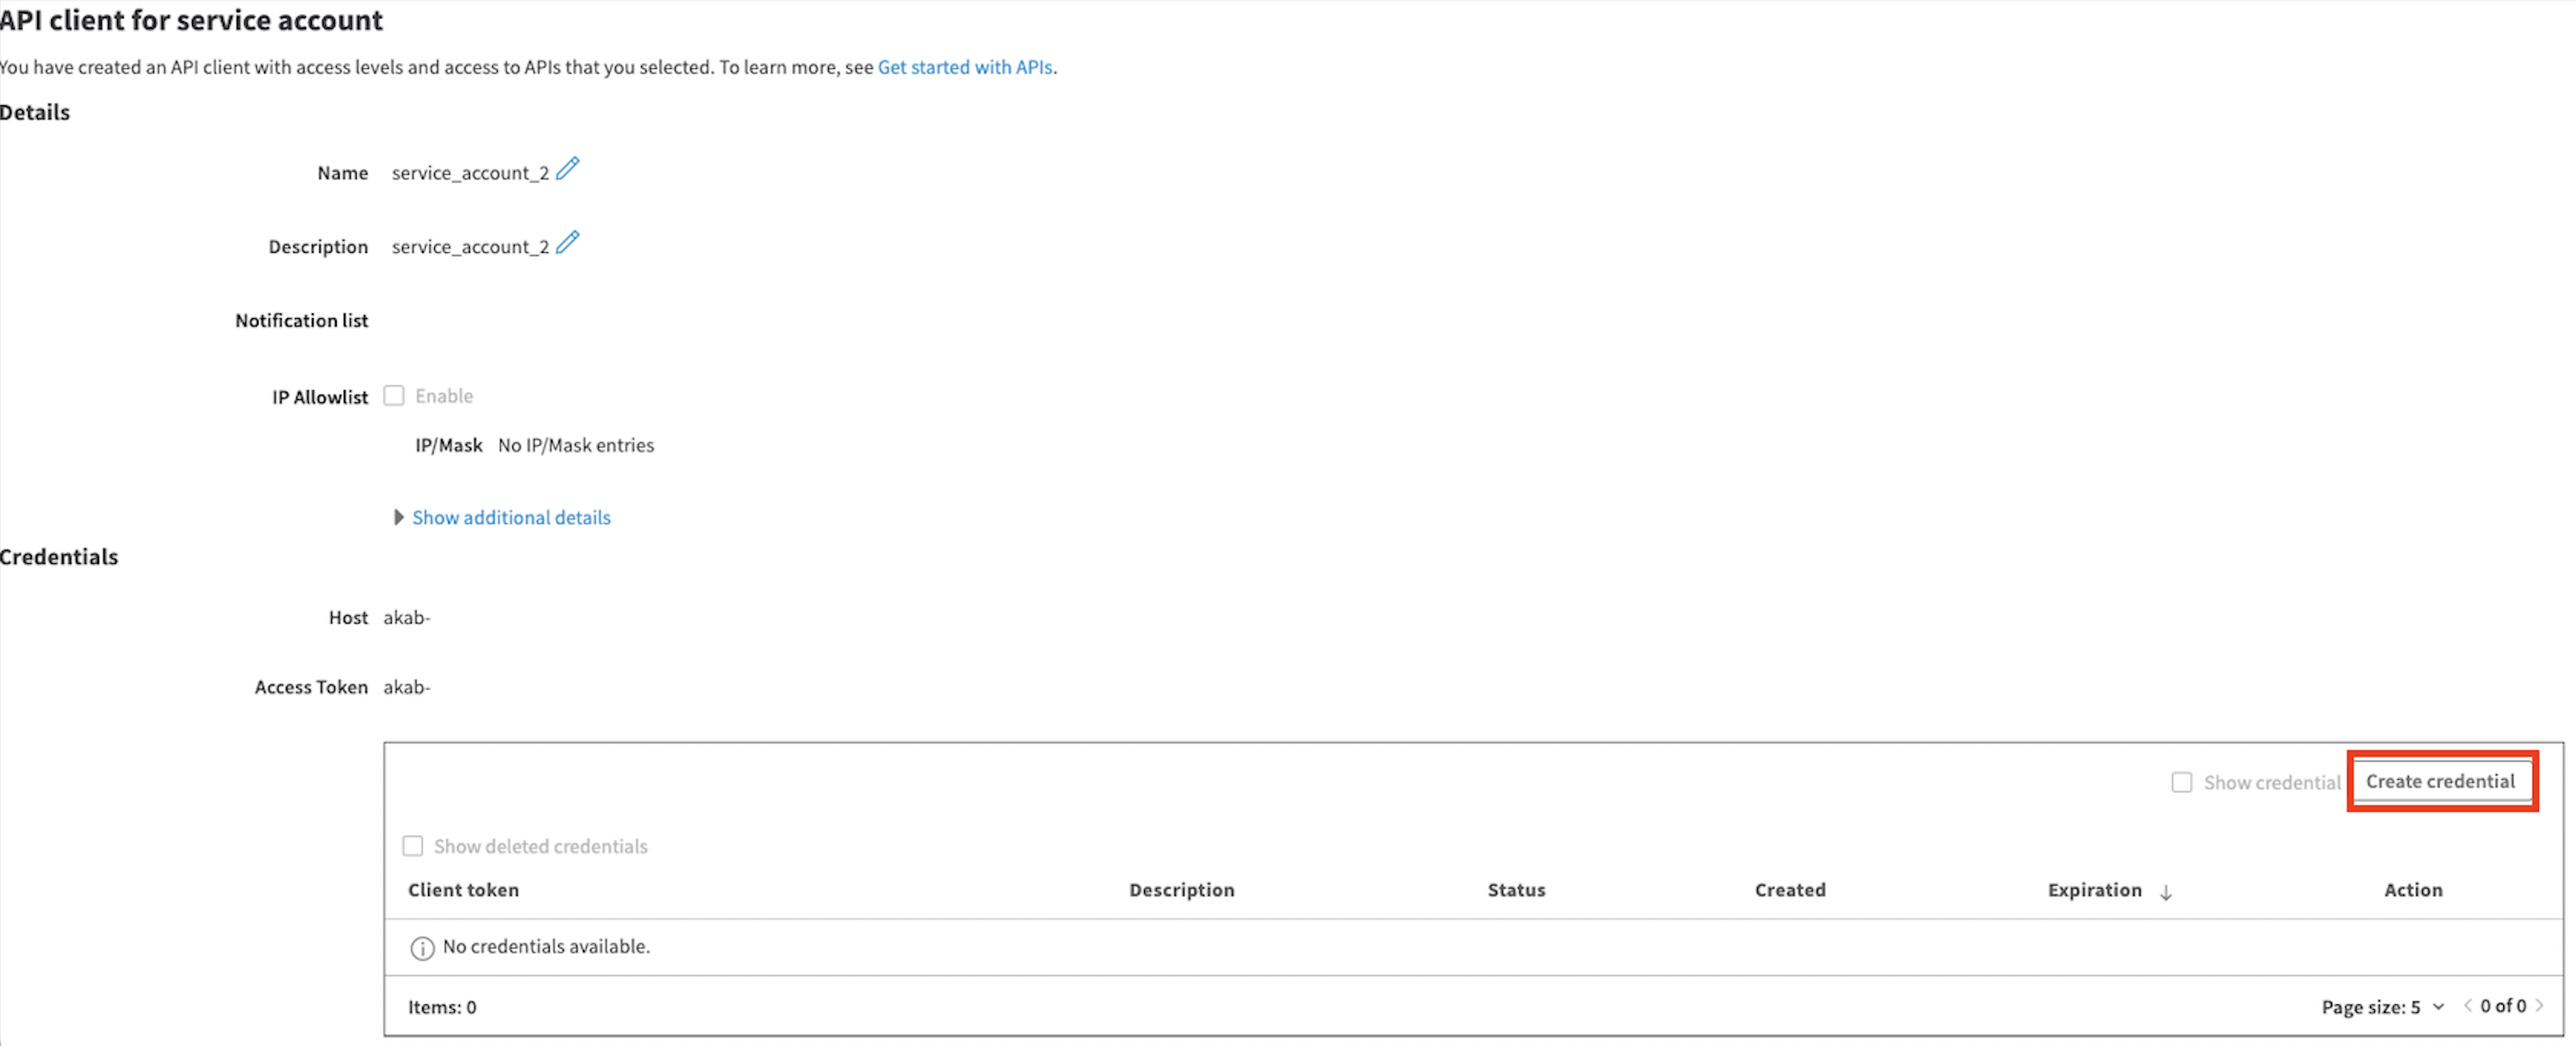
- Click Create credential and then download or copy the credential information. This is required to complete the Akamai API integration in ASM.

Provide Akamai API Credentials for ASM Integration
- From the Projects and Settings menu in ASM, select the appropriate Project then click Account Settings.
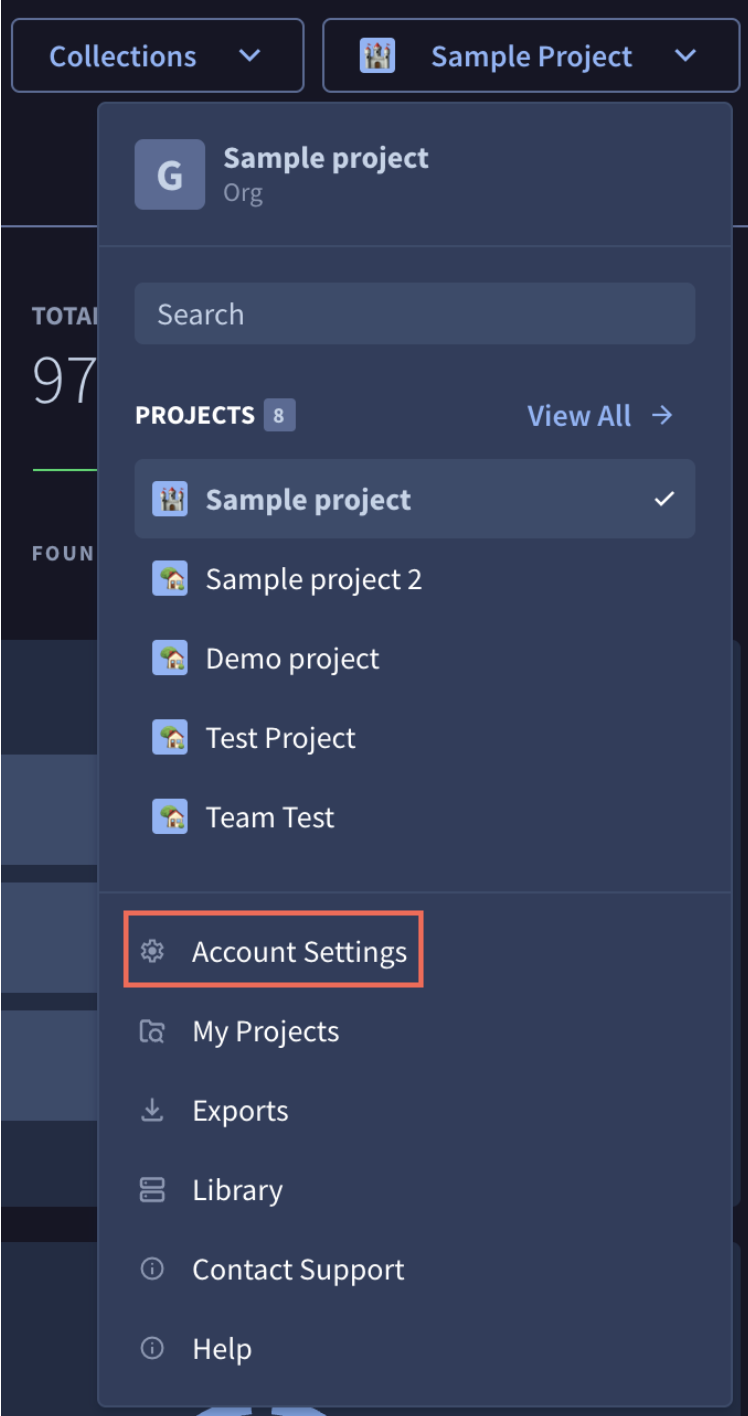
- Click Integrations.
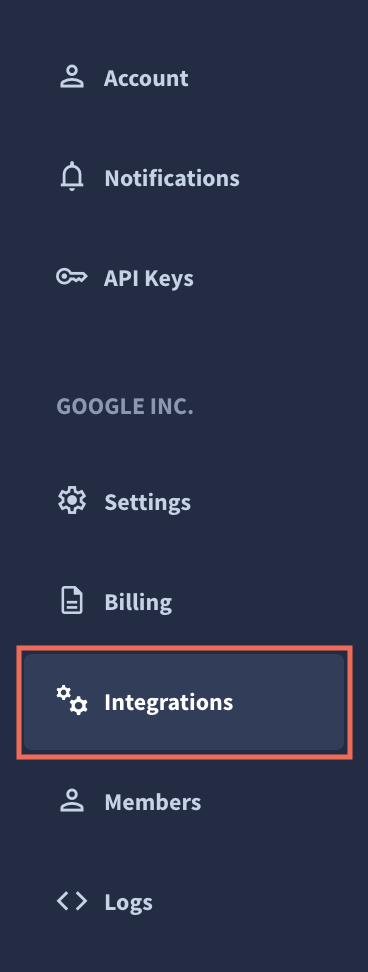
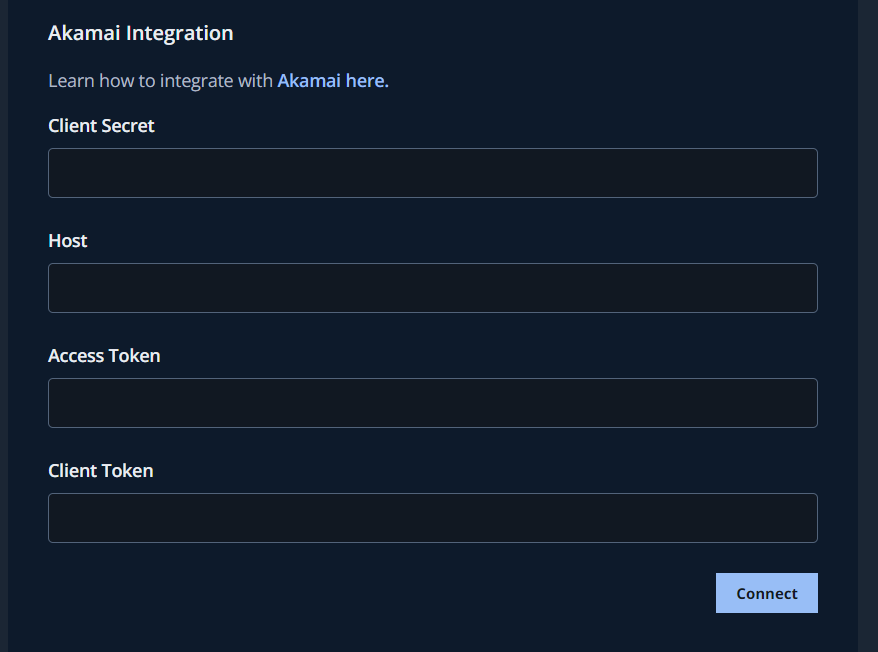
- From Inbound Integrations, click Add New for Akamai.

- Paste the Client Secret, Host, Access Token, and Client Token values from the preceding section into the appropriate fields and click Connect.
-
Connect the integration to the appropriate Collection.
- Click Collections and click
Collection Settings for the Collection that you want to connect the integration to.
- Click Collections and click
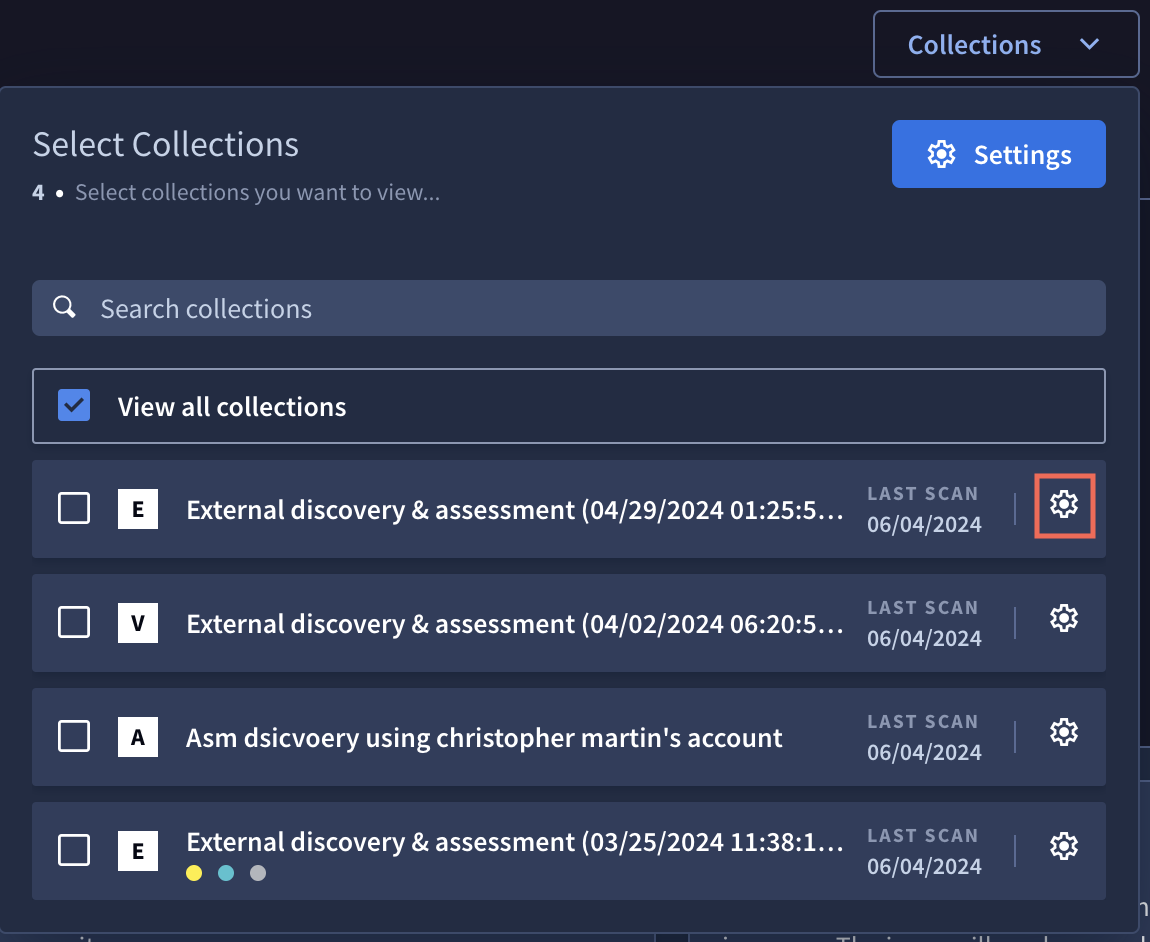
- Select the Integrations tab.
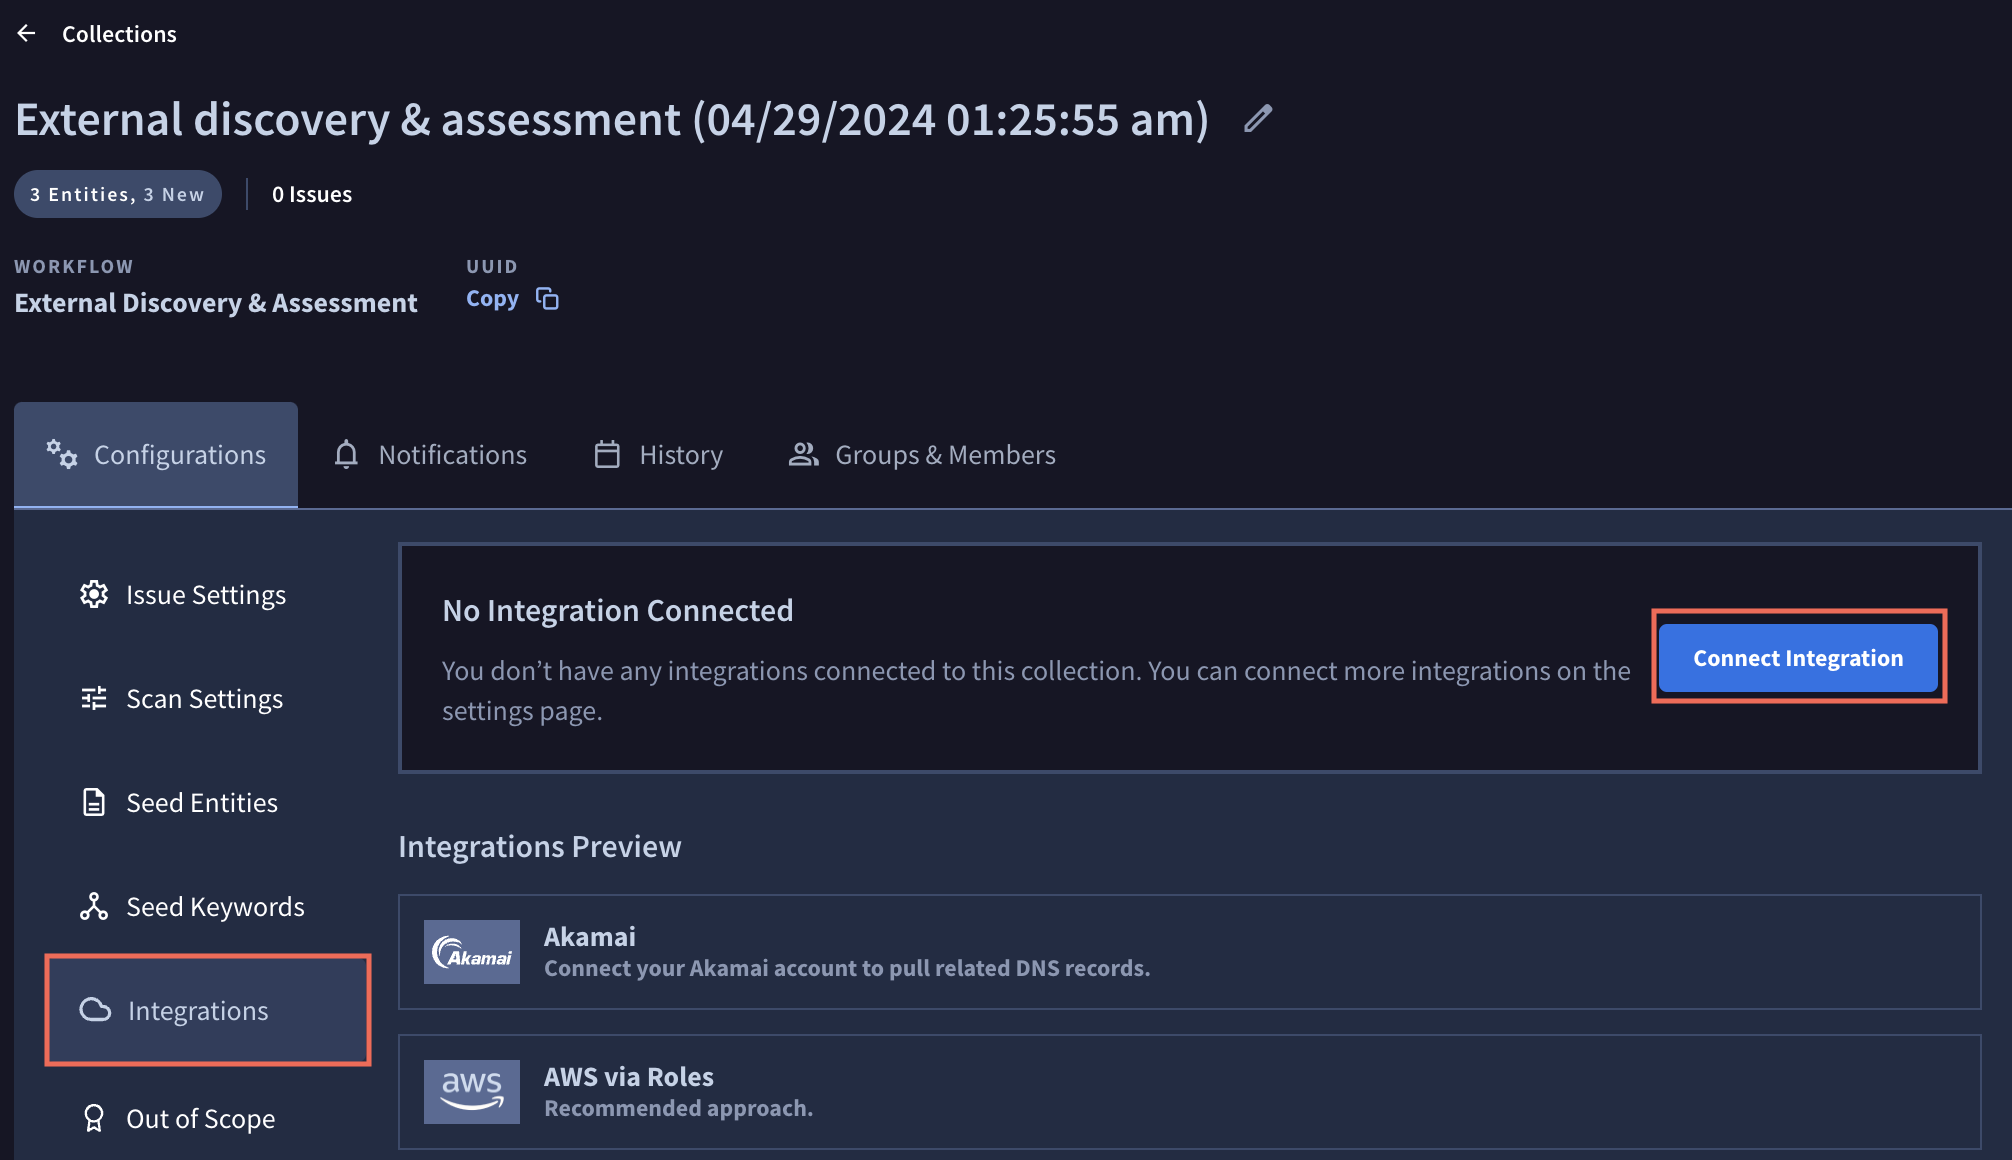
- Select Connect Integration and Set-up the integration.

The integration is immediately added to the Collection.
Clickto remove the integration from this Collection.
- Click
to close the Connect Integration pane. Click Scan Collection to update your Collection with the current settings and integrations. Otherwise, your newly configured integration is incorporated at your regularly scheduled scan interval.

Updated 3 days ago


