Monitors
Monitors in Digital Threat Monitoring (DTM) let you define conditions for searching artifacts (called Documents) collected from the deep and dark web for exposures relevant to your organization.
You can create your own custom Monitor, or you can use any of the Monitor creation templates available:
These model template examples are not fixed and continue to be updated over time.
-
Card Shops: Looks for mentions of your bank identification numbers (BINs) in forum posts, chat messages, pastes, and underground shop listings indicative of fraudulent payment card activity.
-
Compromised Credentials: Detects the presence of specific user accounts in compromised credentials data collected from the deep and dark web.
This Monitor template replaces Credential Leaks Mentions, which detected mentions of leaked credentials in chat messages, forums, and documents found on the web.
-
Data Leaks: Detects exposures of your sensitive information, such as financial data, trade secrets, or customer information.
-
Deep & Dark Web: Detects when attackers refer to your brands, hosts, domains, and other identifiers on the deep and dark web.
-
Domain Protection: Looks for new domain names that mention your company or brand names, indicating fraud and brand reputation attack preparation.
-
Initial Access Broker: Searches for Initial Access Broker activities that mention your network or business, wherein attackers sell access once they have successfully exploited an entry point. These services are commonly used by ransomware groups, for instance.
-
Netblocks & Domains: Looks for domains and netblocks in the lists for machine access and underground chat messages.
-
Ransomware Threats: Tracks ransomware victim listing pages, websites where the ransomware attackers list their victims and may also begin to leak sensitive files as part of their campaign.
-
Supply Chain Compromise: Searches for mentions of cyberattacks on your third-party suppliers, which may lead to disruptions, breaches of your network, or disclosures of sensitive files.
Create a monitor from a template
-
Sign in to the Google Threat Intelligence platform.
-
Select the Digital Threat Monitoring > Monitors section in sidebar menu.
-
Click the Monitors tab.
-
Select the template tile that you're interested in using. The Domain Protection template is used in this example.

-
Follow the guidance in the How to use this template section to populate the necessary fields.
Domain Protection in DTM includes the following capabilities:- Real-time notification of any domain registration or changes that may pose a threat to your digital assets
- Coverage for all domains registered in country code top-level domains (ccTLDs)
- Accurate identification of brand names in domains and subdomains to prevent brand impersonation
- Ability to capture spoofed domain names registered using internationalized characters

-
Update the preset Name and Description to differentiate this specific Monitor.
-
Optional: Configure your Email Alert Notifications.
-
Configure the preset conditions (see Building Effective Monitors).
-
To test the monitor, click Test Monitor.
-
To create the monitor, click Create Monitor.
Custom Monitors
A Custom Monitor is configurable to meet your specific needs. The goal in creating effective monitors is to target content that’s relevant to your organization while minimizing the amount of false-positives, or "noise." This goal can be achieved by familiarizing yourself with existing data through Research Tools to understand the types of content your target data includes. This effort, combined with some trial and error within your Monitor configurations, can help you zero in on specific Alerts that your organization will find useful.
For examples of custom monitors and testing, see Building Effective Monitors.
To create a Custom Monitor
-
Sign in to the Google Threat Intelligence platform.
-
Select the Digital Threat Monitoring > Monitors section in sidebar menu.
-
Click the Monitors tab.
-
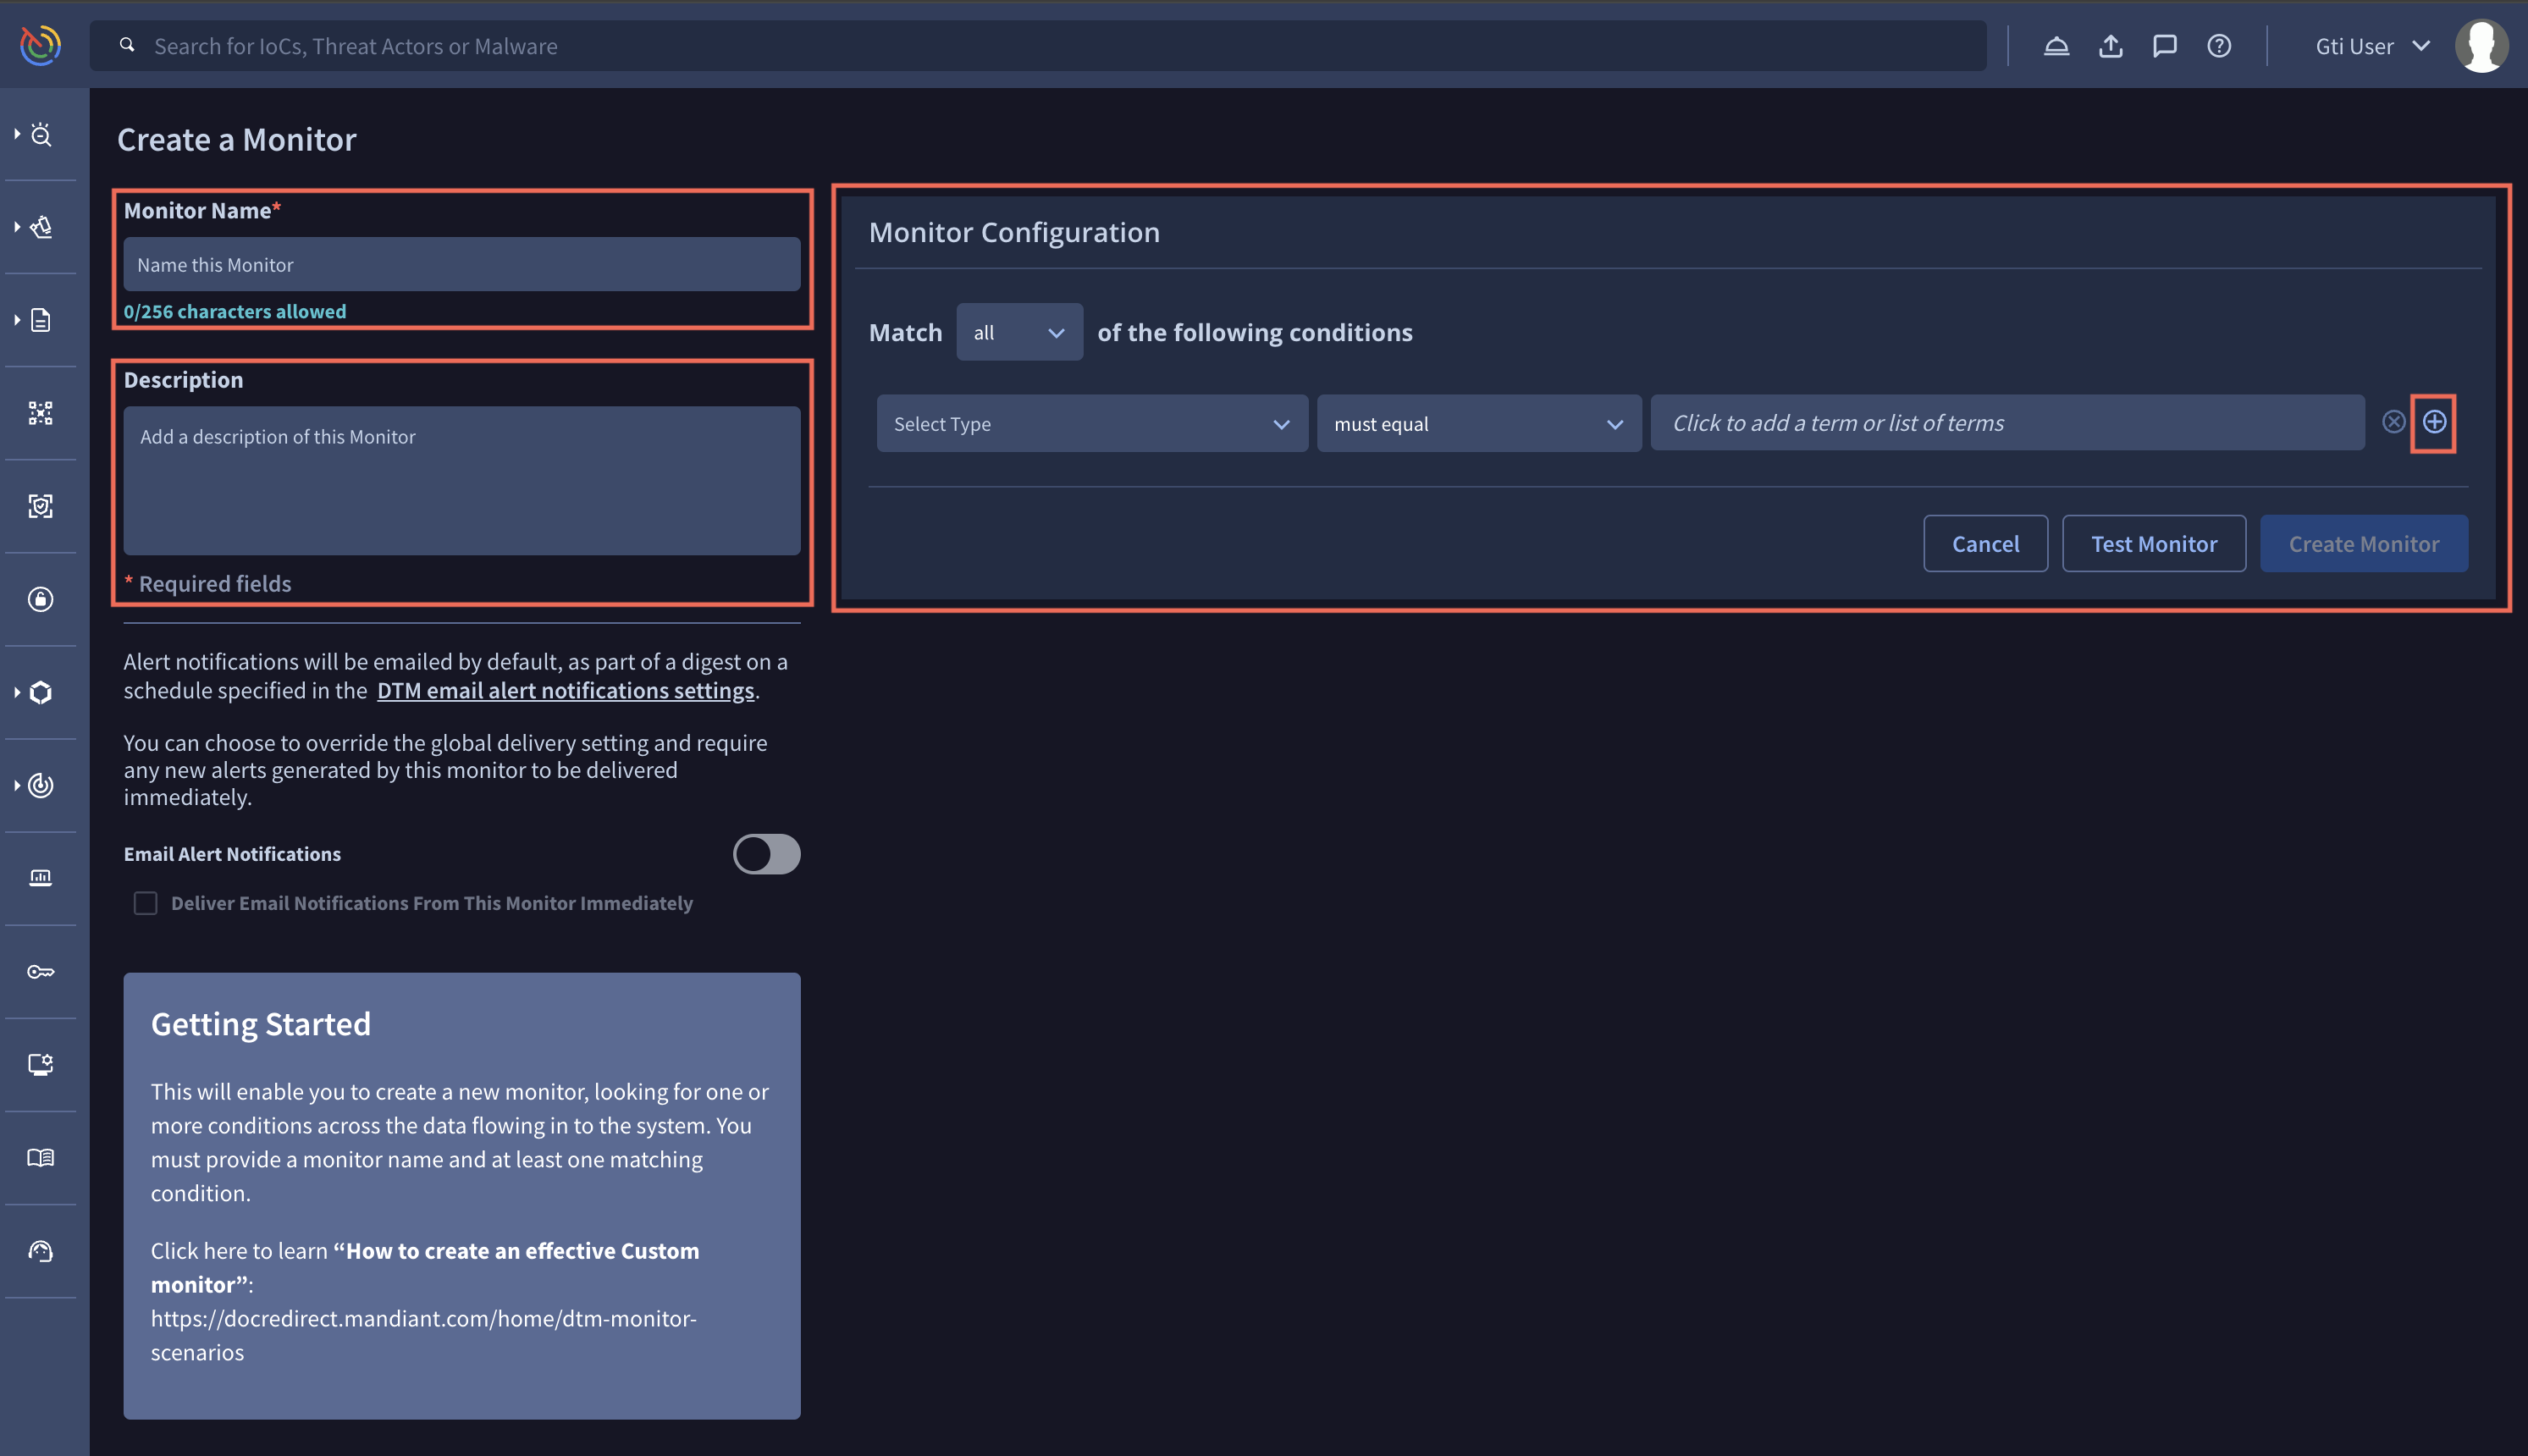
Click the Create a Custom Monitor tile.
-
Enter the Monitor Name.
-
Optional: Enter a Description.
-
Configure conditions to customize your monitor.
-
Enter comma-separated terms. If you have many terms to add to the list, click the text box.
-
Additional conditions or groups of conditions can be added clicking the plus sign. The grouping can be useful if you want to nest your conditional logic to create more specific matches.
For each condition in the Select Type, you have different options to select, such as Free Text Search, Lucene Text Query (Advanced).

-
-
Optional: Configure your Email Alert Notifications.
To see the current schedule for when notifications are sent and who is configured to receive them, see DTM Email Notifications.
-
Click Create Monitor.
Edit an existing monitor
If you need to make any changes to an existing Monitor, select it from the list of Your Monitors. DTM lets you perform several operations on existing Monitors:
- Update the Monitor Name.
- Add or update the Monitor Description.
- Update Monitor conditions.
- Activate or deactivate the Monitor by clicking the Monitoring toggle.
- Activate or deactivate email notifications by clicking the Email Alert Notifications toggle.
- View which user created and last updated the Monitor.
- Delete Alerts this Monitor has generated or the Monitor itself by clicking Delete Alerts or Monitor.
Updated 5 months ago
