ASM Splunk Integration
Special privileges requiredThis feature is only available to ASM administrators.
We strongly recommend you use the Mandiant Advantage for Splunk integration instead of this legacy integration. The integration discussed in this article will be deprecated by the end of November 2022.
The (legacy) Intrigue Platform Add-on enables Splunk users to load data such as entities and issues from Attack Surface Management (ASM) directly into their Splunk Enterprise instance.
This page documents the process for using the Intrigue Platform Add-on to connect your Splunk Enterprise instance to ASM. The following is an outline of all of the required steps, along with the detailed instructions for each step:
- Step 1: Download and Install the Add-on
- Step 2: Gather Collection Info from ASM
- Step 3. Configure the Intrigue App in Splunk
Step 1: Download and Install the Add-on
The add-on is available from Splunkbase.
- From Splunkbase, download and save the add-on (
intrigue-platform-add-on_101.tgz) to your desktop. - Follow the directions from Splunk to install the add-on. A summary of one of the methods is provided here but refer to your Splunk documentation for complete details:
- Log into your Splunk Enterprise instance.
- Navigate to Apps > Manage Apps.
- Click Install app from file.
- Upload the file that you just downloaded.
- Restart Splunk.
After installation, the add-on should be accessible from your Apps menu.
Step 2: Gather Collection Info from ASM
After installing the app, you will need to enter the following information from ASM to enable loading of any data into Splunk:
- Access Keys
- UUID of a Collection
Access keys
-
In your ASM instance, navigate to Projects and Settings > Account Settings.
-
Click API Keys to bring up a list of any keys that may already exist.
-
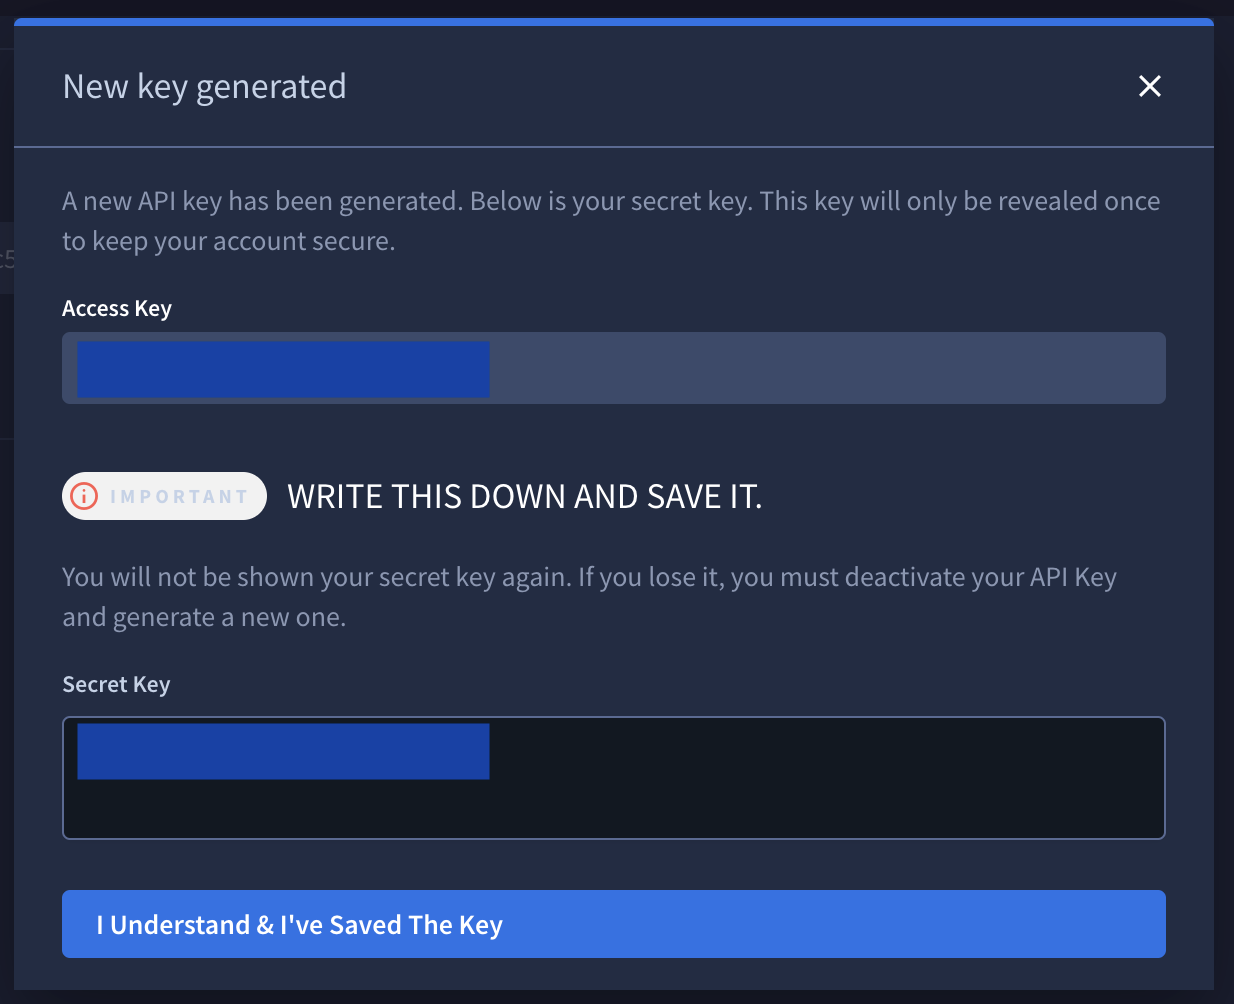
Click Generate New Key and make a note of the Access Key and Secret Key that are shown. You will use these in Step 3 when configuring access to a Collection in Splunk.
WARNING: This is the ONLY time you will have access to this information, so if they are lost you will have to remove this set and generate a new pair of keys.
UUID of a Collection
The UUID of a Collection is what Splunk uses to identify which Collection it will use as a data source. Repeat the following steps for every Collection whose data is to be loaded into Splunk.
- From the main dashboard of ASM, navigate to Collections > Collection Settings.
- Click on the name of the Collection to use as the data source.
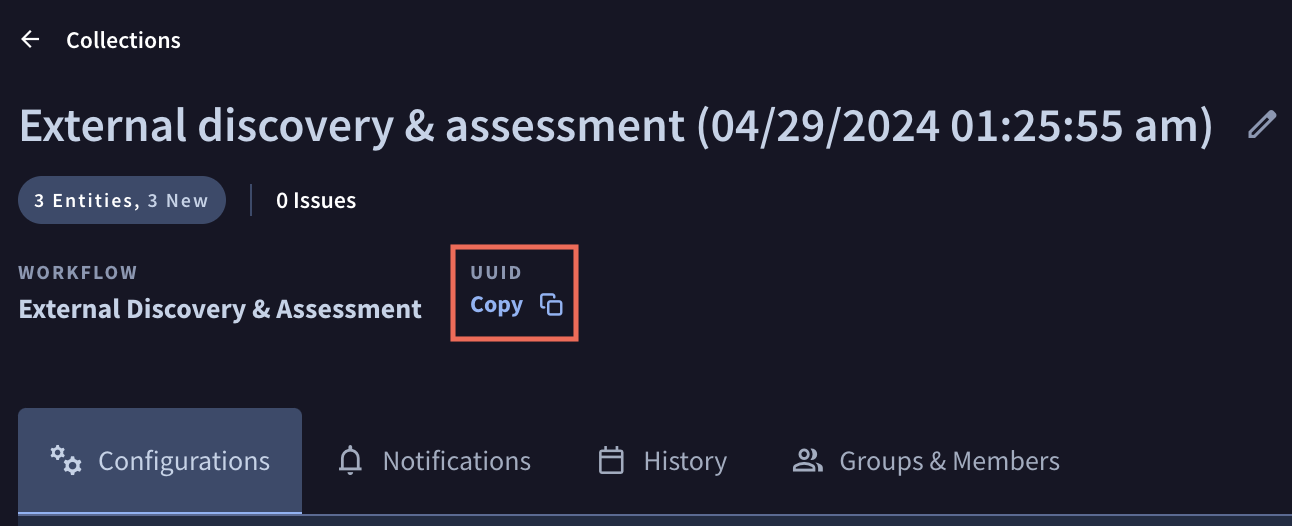
- Under the name of the Collection will be UUID, with a clipboard icon next to it. Click the clipboard icon to put the complete UUID into your clipboard.
- Make a note of the UUID, as you will use it when configuring access to this Collection in Splunk in the next step.
Step 3. Configure the Intrigue App in Splunk
Splunk must now be configured with the Collection information from ASM so that data can be loaded.
- In Splunk, locate and open the Intrigue app.
- For each Collection and Item Type to load into Splunk:
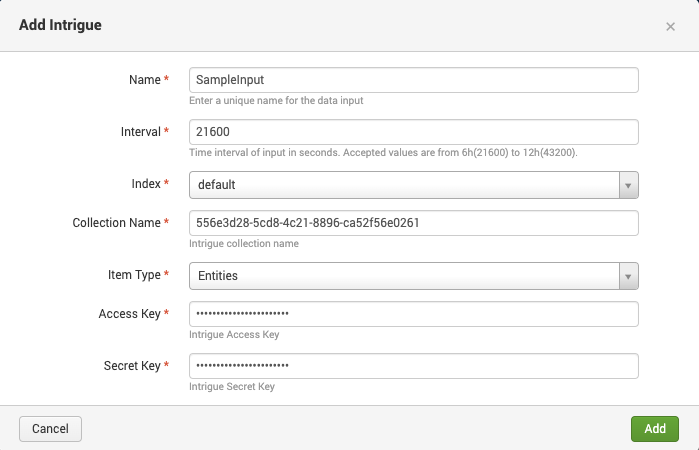
- Click Create New Input to specify the details of the data ingestion. The following information must be entered:
- Name: Name for this input configuration. Does not have to match the actual name of the Collection.
- Interval: Interval (in seconds) for obtaining data. Must be between 21600 (6 hrs) and 43200 (12 hrs).
- Index: Splunk index.
- Collection Name: UUID of the Collection from Gathering Info above.
- Item Type: Type of data to load from ASM.
WARNING: Currently only Entities and Issues are fully supported. Selecting any other type may result in false positives being included. - Access Key: Access Key from Gathering Info above.
- Secret Key: Secret Key from Gathering Info above.
- Click Add to save the input and display it in the list.
- Click Create New Input to specify the details of the data ingestion. The following information must be entered:
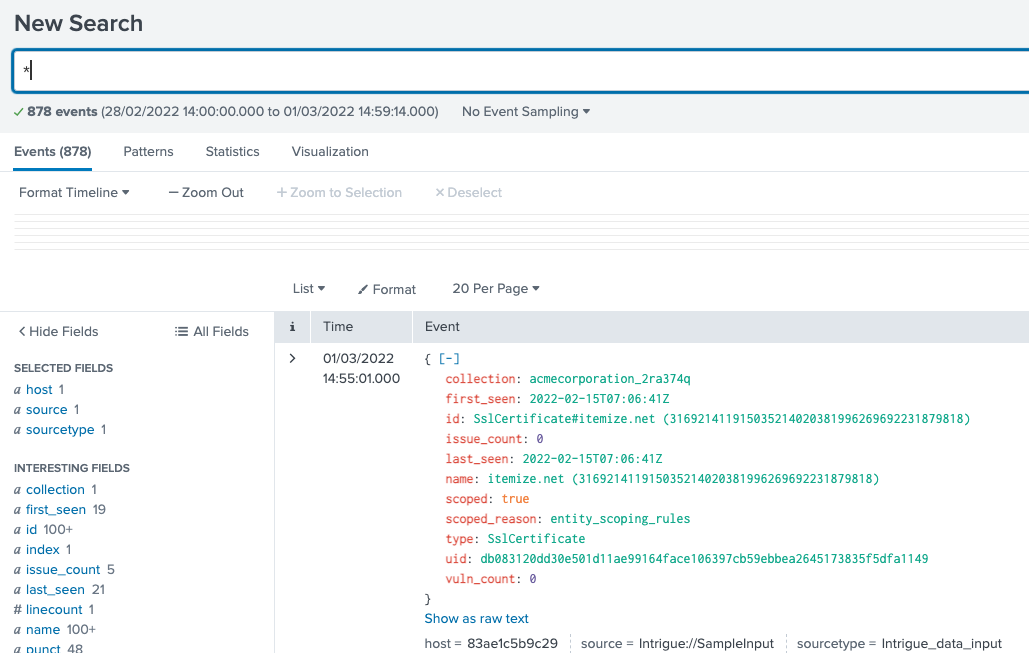
Once a Collection is added, results could be available in as soon as a few minutes depending on the size of the Collections.

You can then use the Search page to query and sort through the returned data.
Updated 5 months ago
