
Configure SAML with Azure AD
You can configure Google Threat Intelligence to use SAML with Azure AD Identity Idp. These are the recommended steps for this set-up.
Configuring the Azure Application
1. Azure application
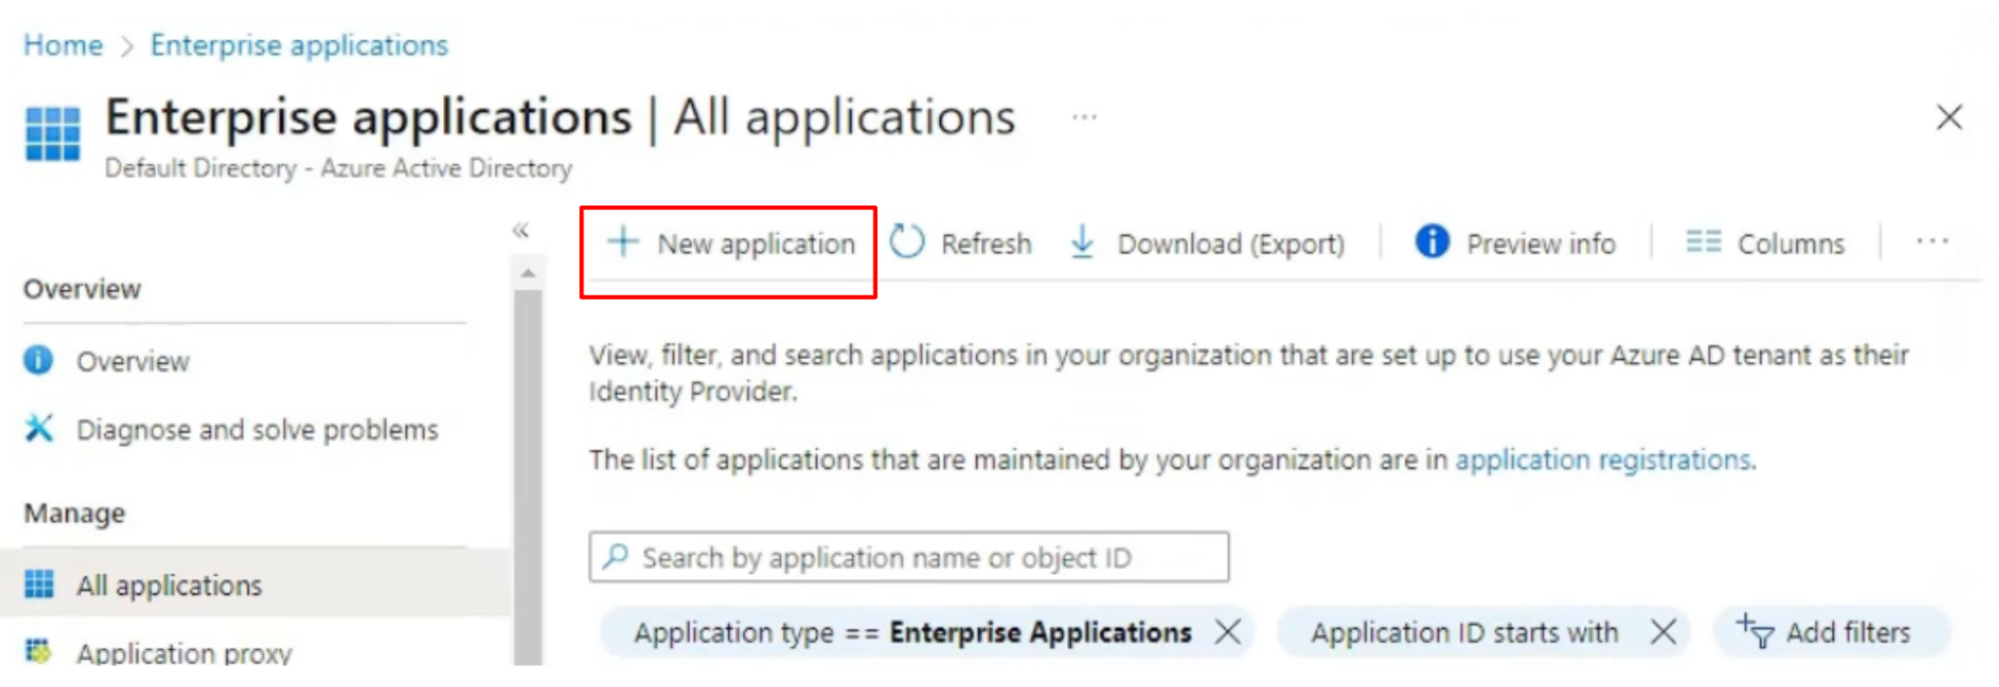
In your Azure portal, search for Enterprise Applications.
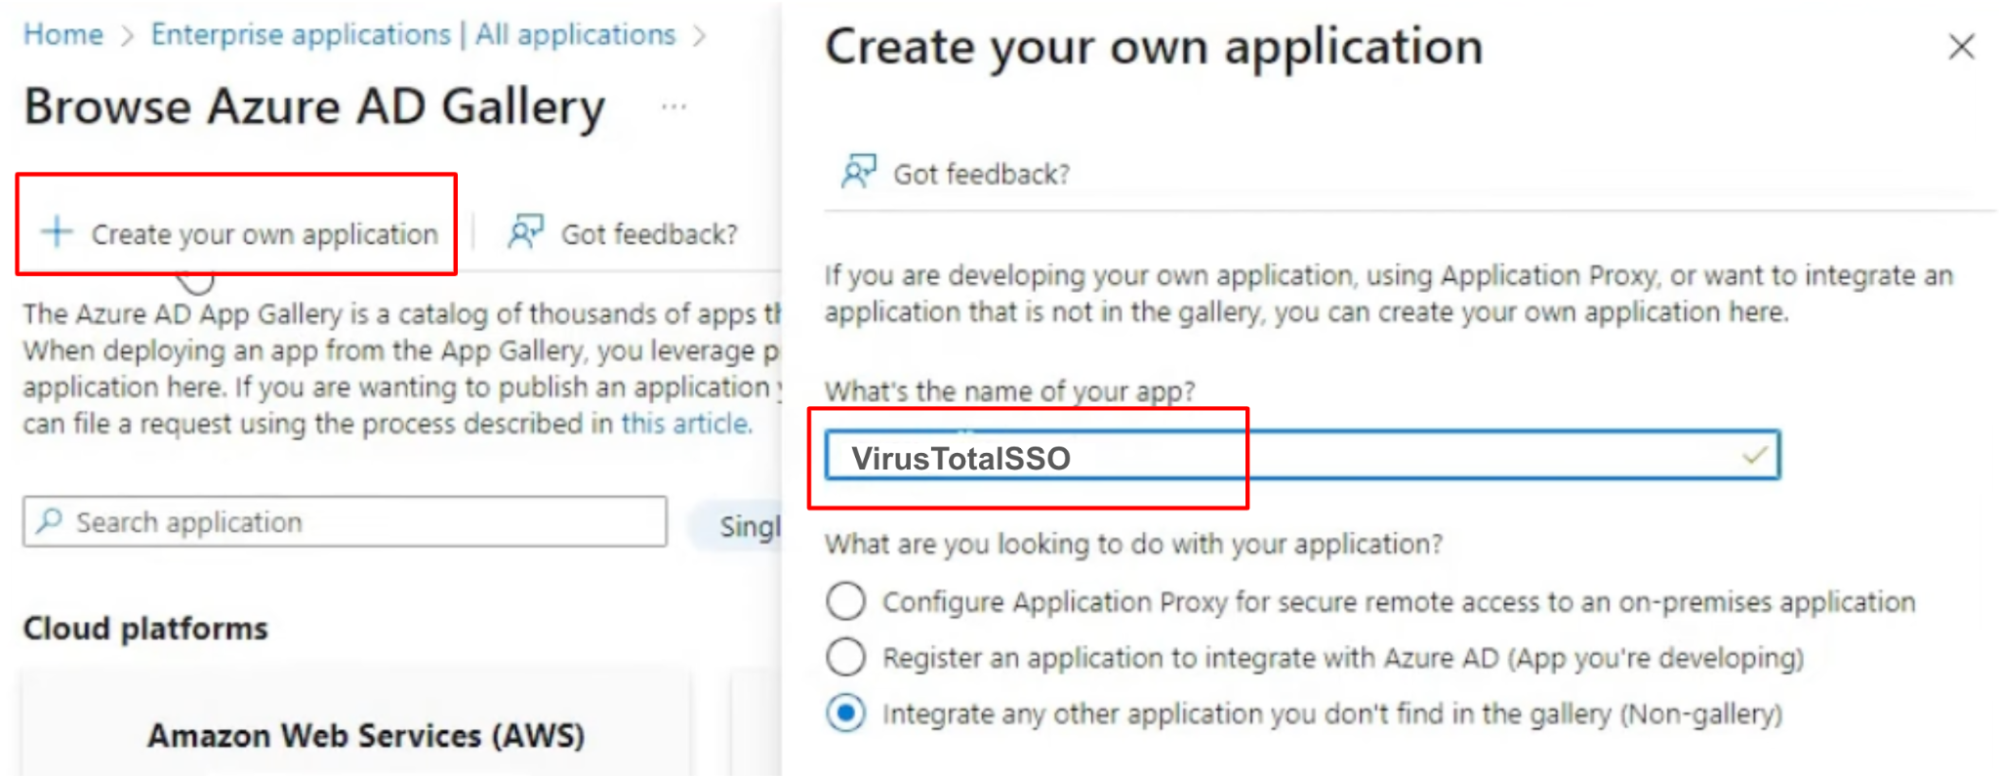
Press the "Create a new application" button.
2. Application configuration
Provide a name to the new application (as an example, VirusTotalSSO).
Select the "Integrate any other application you don’t find in the gallery (Non-gallery)" option.
Press the "Create" button at the bottom in order to create the instance of the new application.
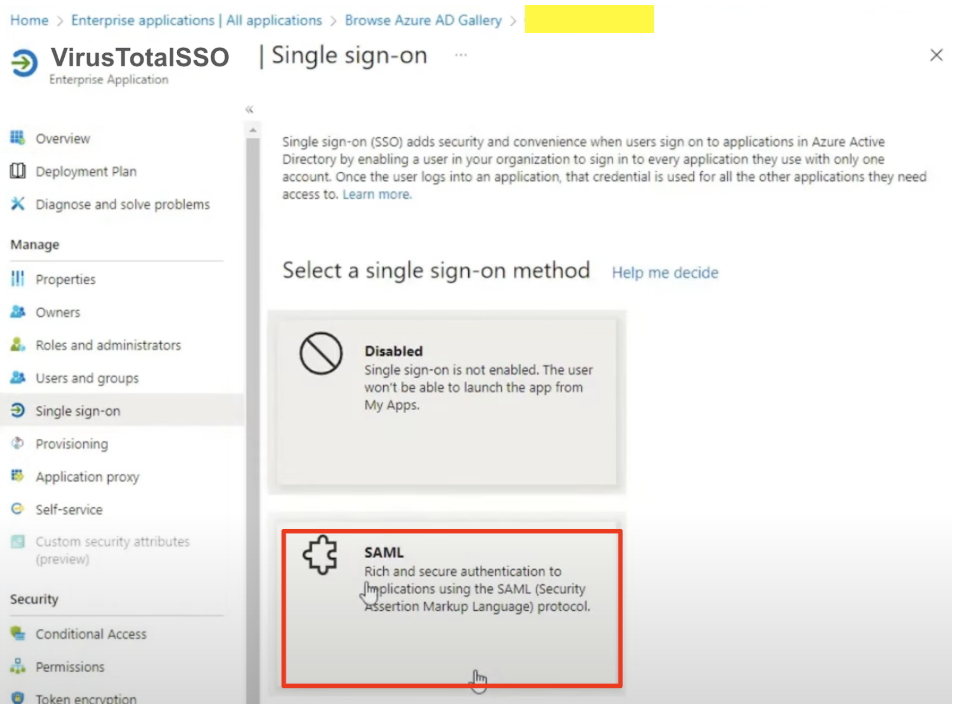
3. Single sign on setup
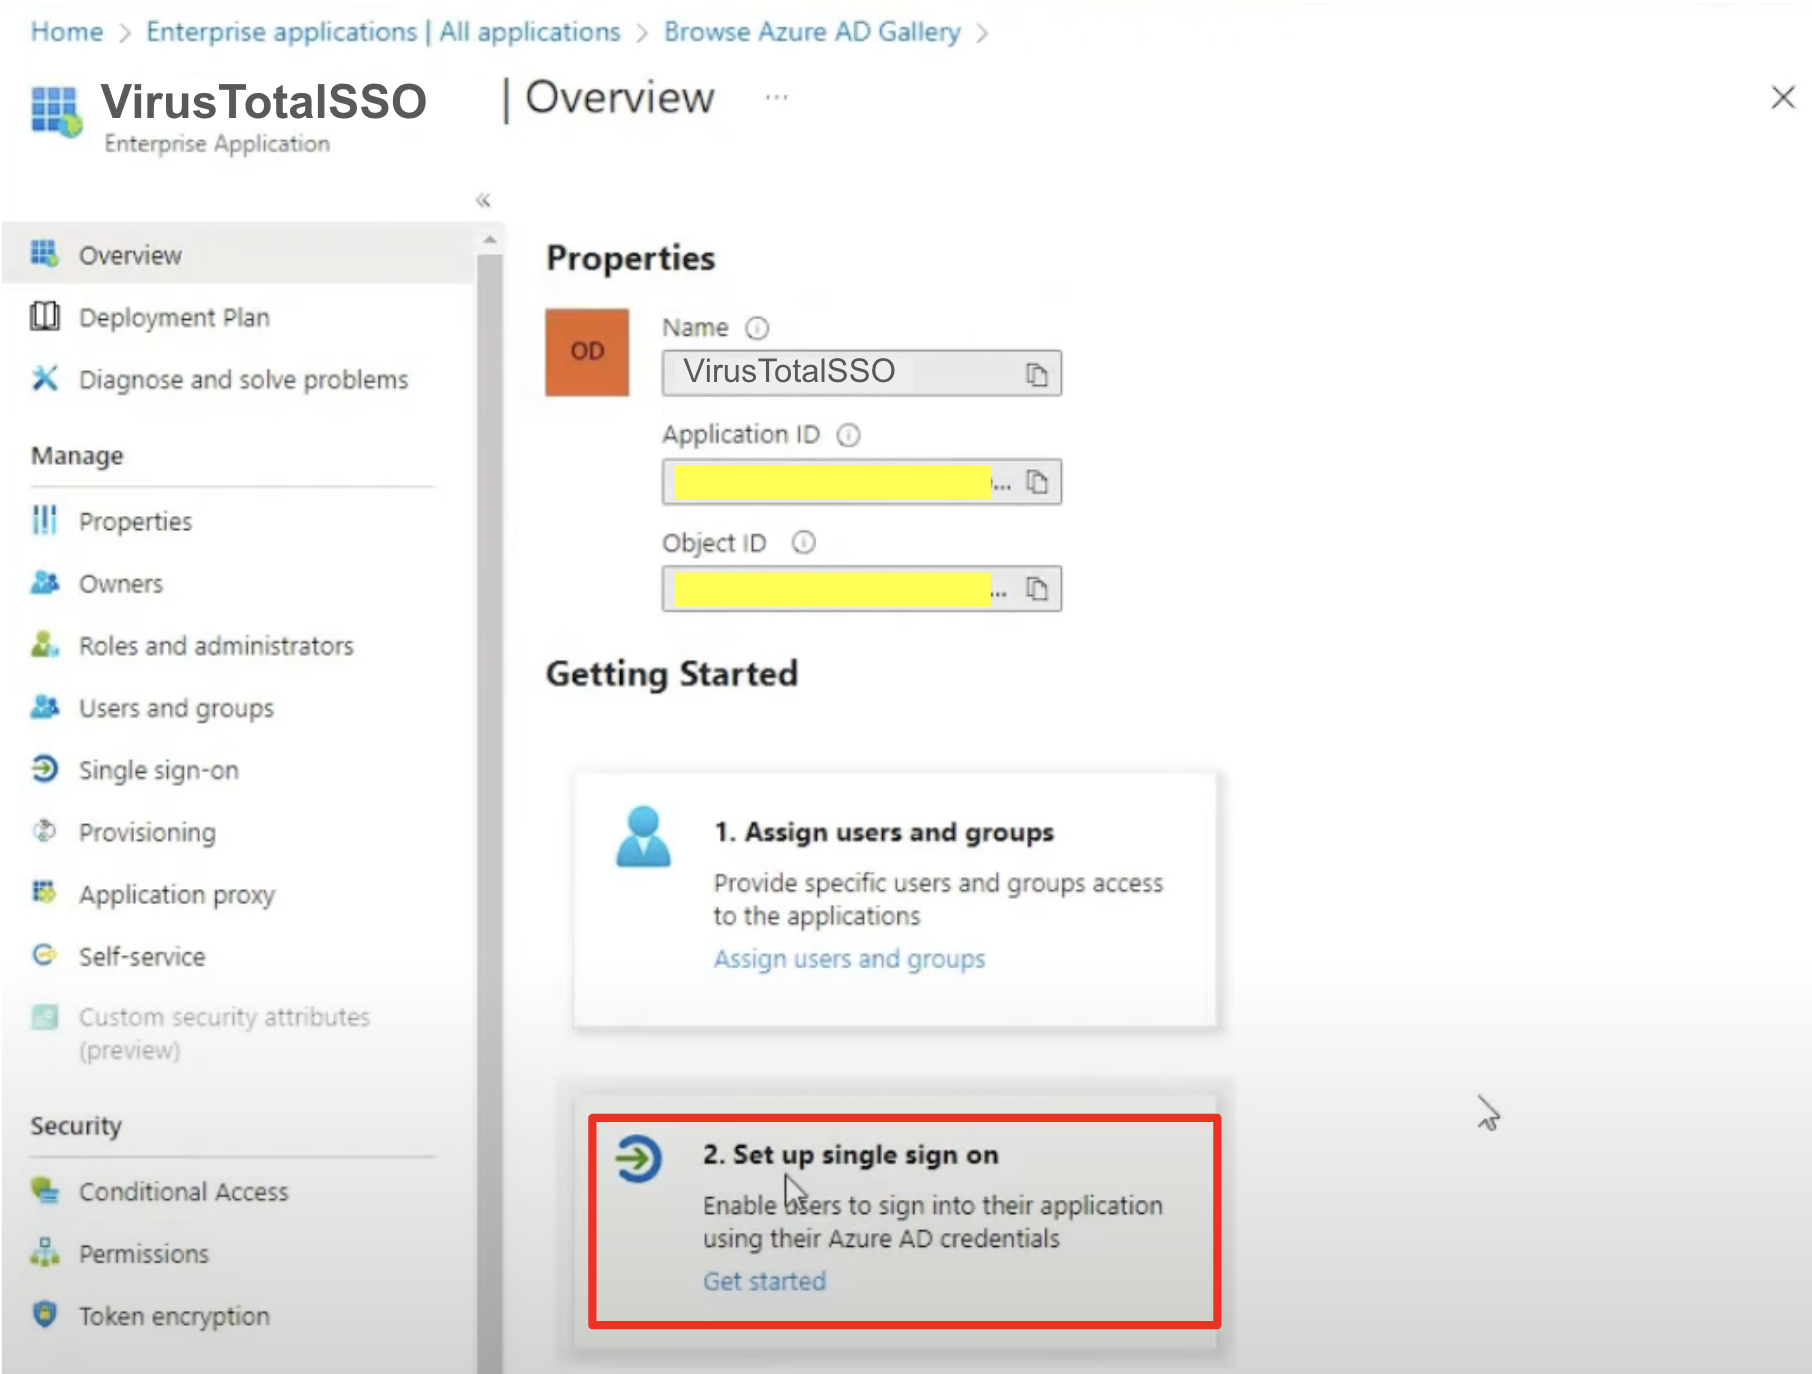
On the "Overview" tab of the new application, press the "Set up single sign on" button.
Select the "SAML" option.
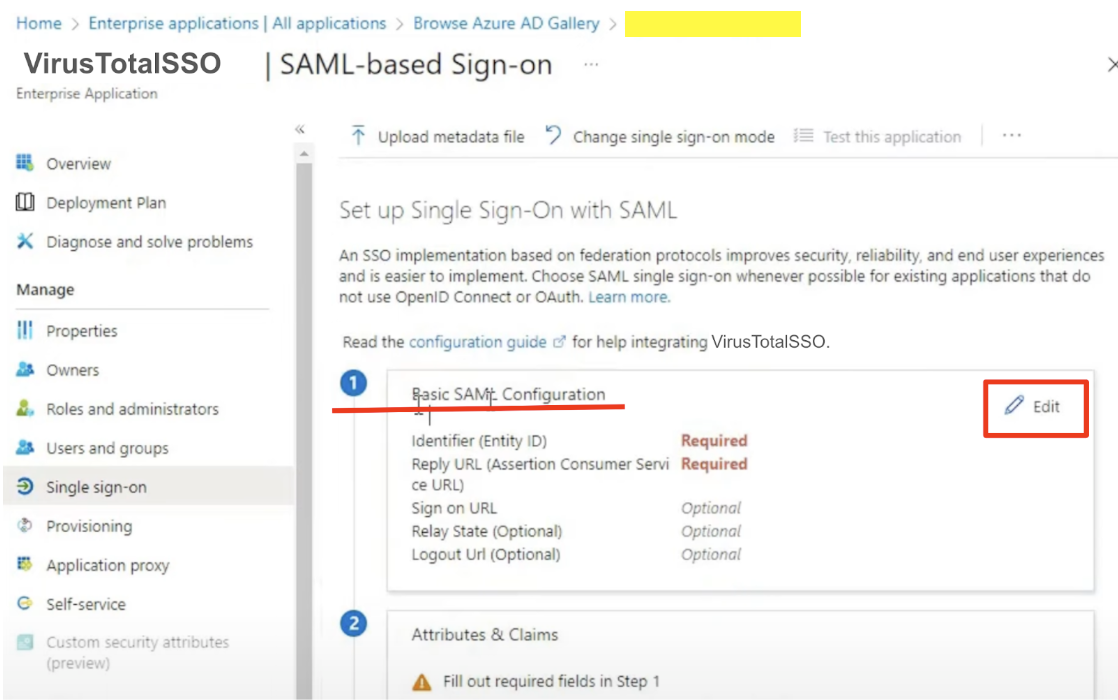
4. SAML configuration
On the SAML setup, select "Basic SAML configuration" and press "Edit" button.
Press "Add identifier" in order to configure the Entity ID. The Entity ID must be the same as the Audience in the VirusTotal SAML configuration on the group page. Choose a unique string as an example, VirusTotal_group_id_SSO.
Press "Add reply URL" in order to configure the Reply URL. The Reply URL must be https://virustotalcloud.firebaseapp.com/__/auth/handler.
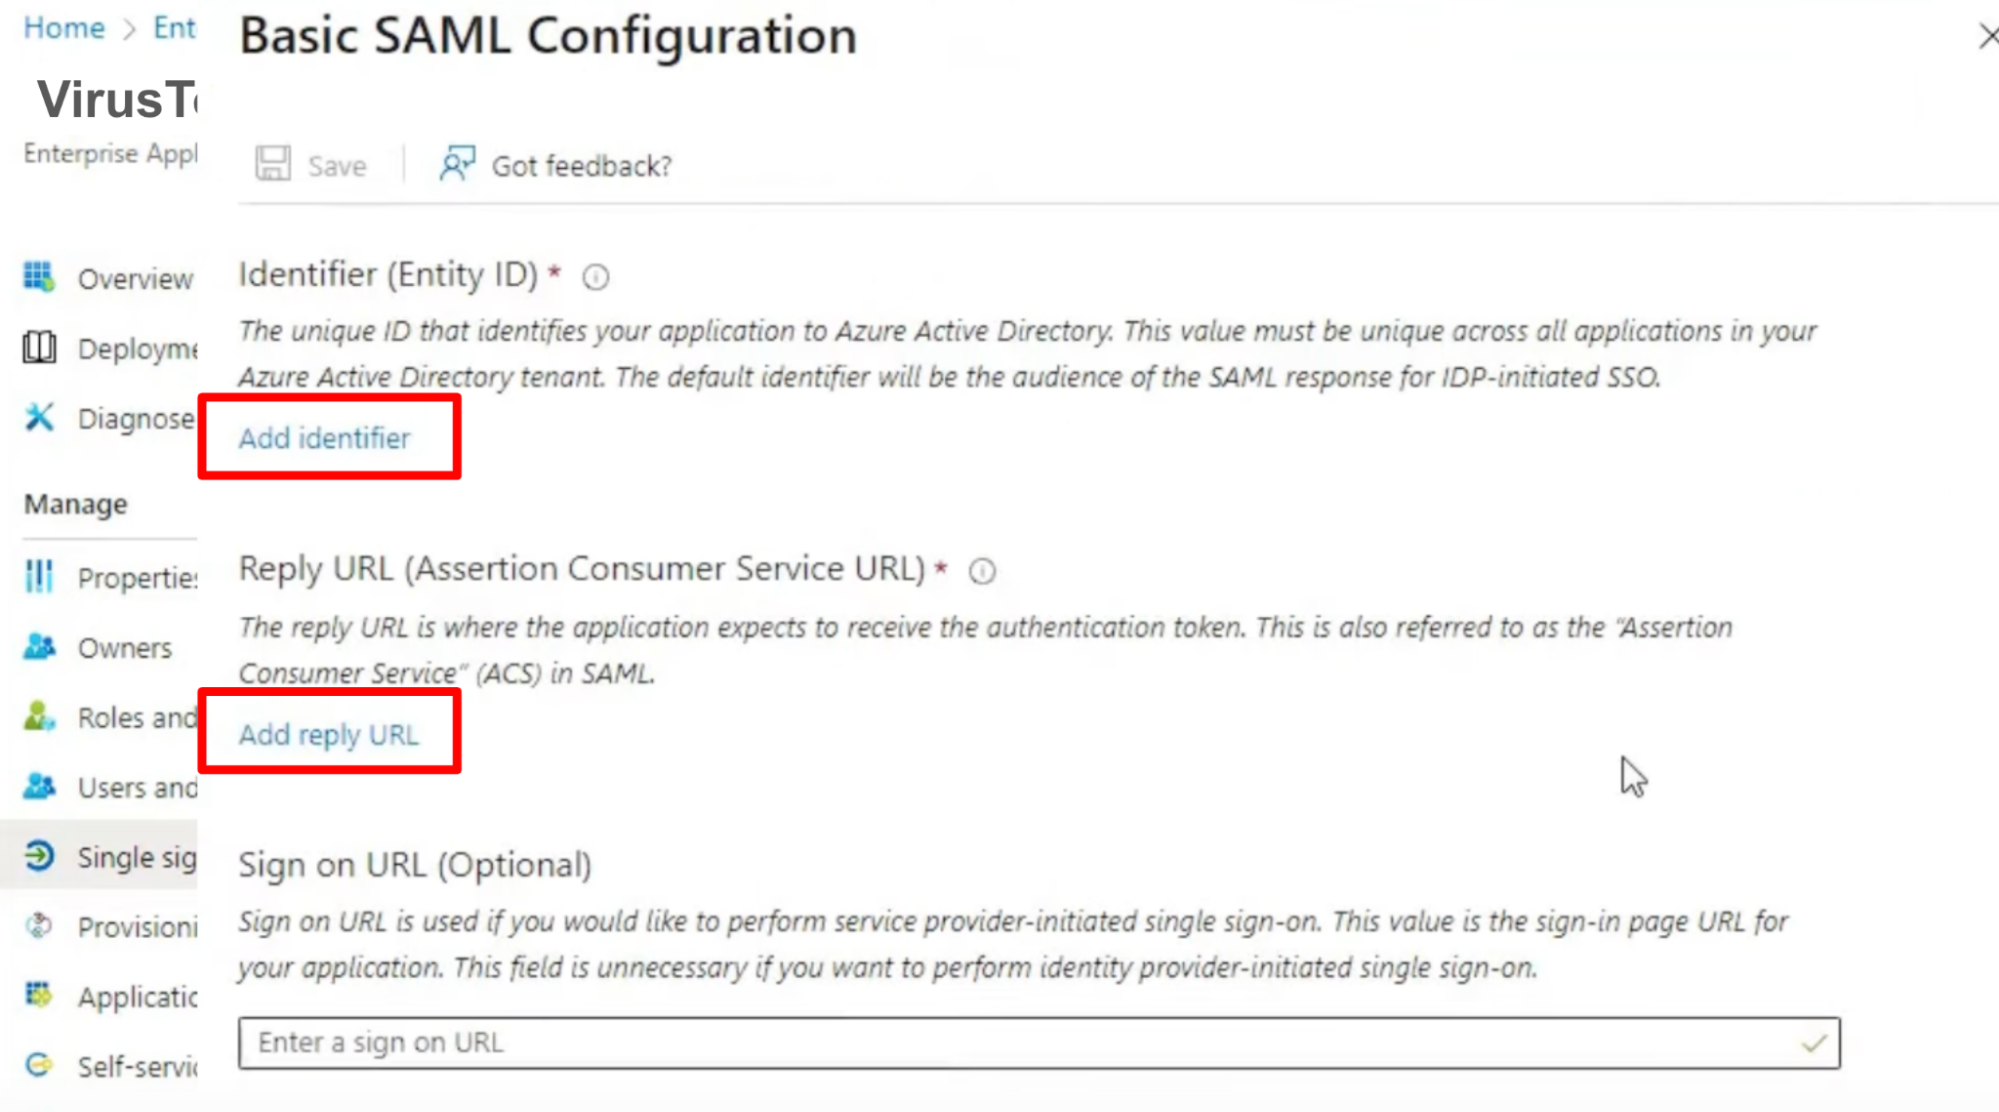
Press "Save" in order to save the changes.
Note that both Entity ID and Reply URL are mandatory.
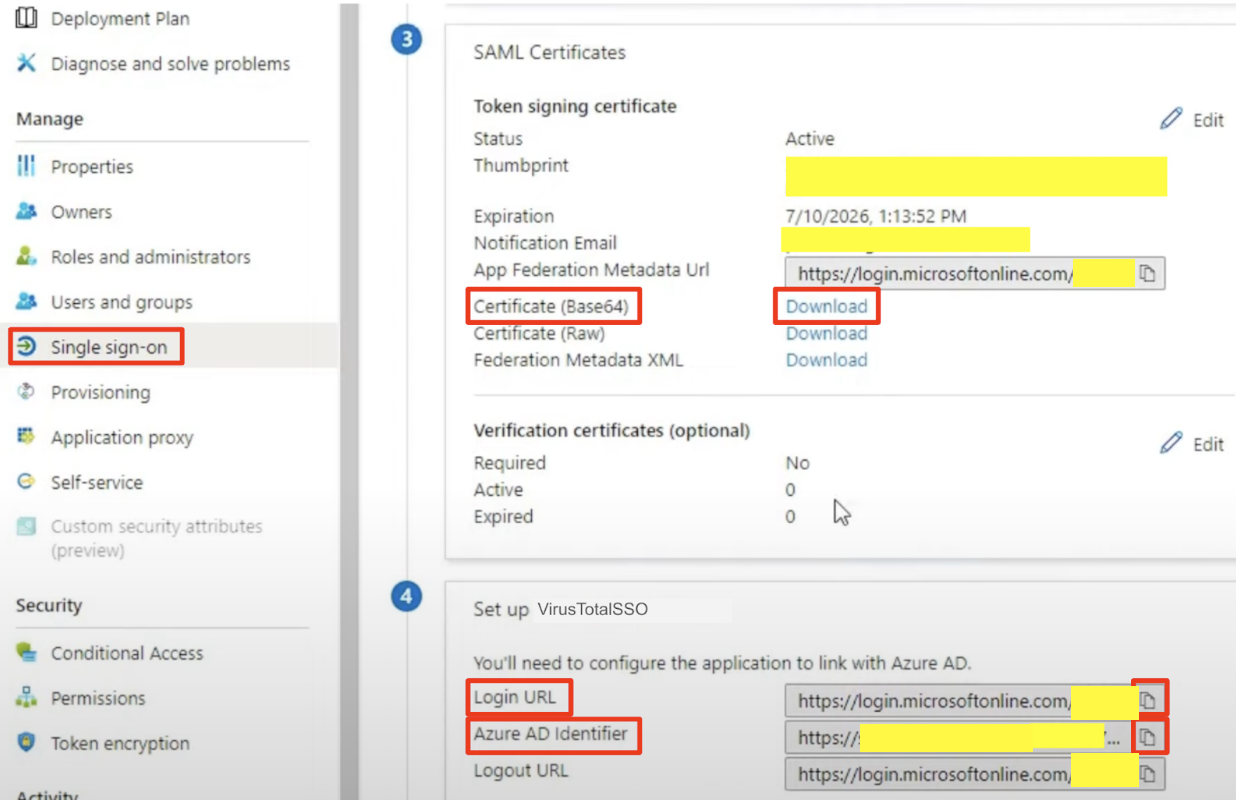
4. Required data
Check those fields on the image at the bottom of the section.
SAML certificate
Download the certificate from the "SAML Certificate" section.
Use the base64 format to download the certificate.
Login URL
Copy the Login URL from the "Setup VirusTotalSSO" section.
Azure AD identifier
Copy the Azure AD Identifier from the "Setup VirusTotalSSO" section.
Configuring the SSO in VirusTotal
1. Group settings page
Open your group settings page: https://www.virustotal.com/gui/group/<group_id>/settings
Note that only Group admin are able to see the settings page.
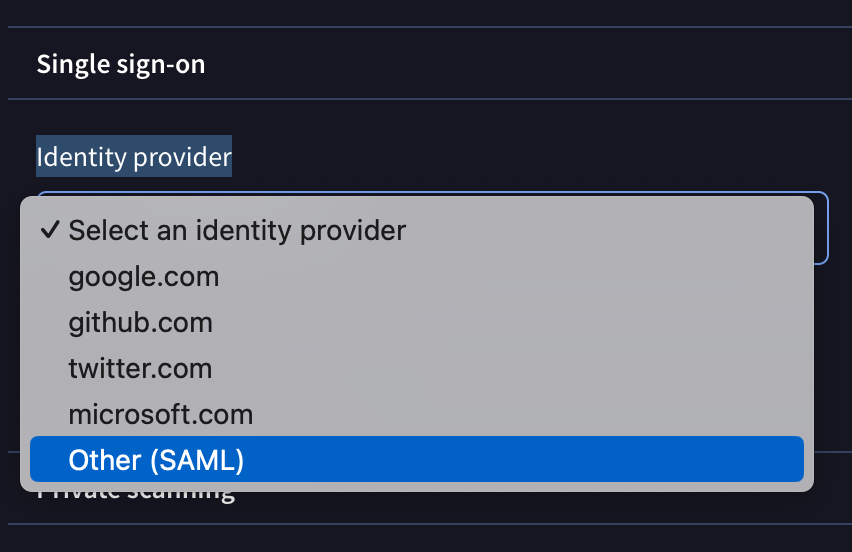
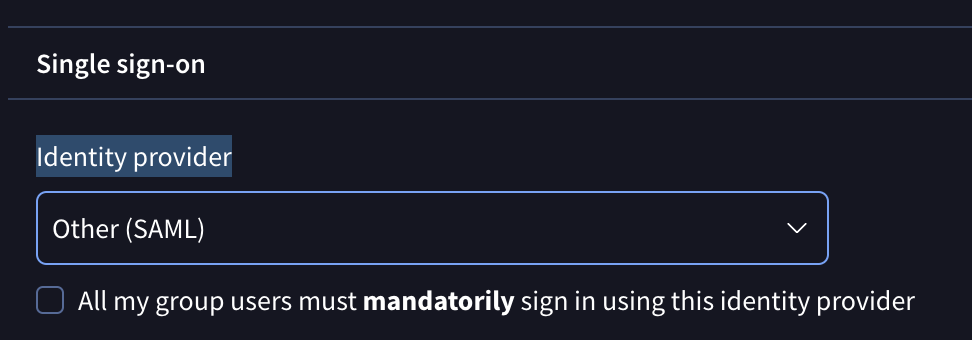
On "Single sign-on" section select the Other (SAML) option in "Identity provider" dropdown.
Do NOT enable the "All my group users must mandatorily sign in using this identity provider" until you've fully confirmed your SAML configuration is working and your organization can successfully sign in.
Enabling this setting with an incorrect configuration could lock all your users out of the platform.
2. Required fields
Include the information provided by the Azure application on the different fields:
Identity provider issuer
Add the Azure AD identifier provided in step 4: Required data.
Identity provider single sign-on URL
Add the Login URL provided in step 4: Required data.
Audience
Add the Entity ID used on step 3: Configure SAML. In our example, the value "VirusTotal_group_id_SSO".
X.509 certificate
Add the content of the downloaded certicate in step 4: Required data.

Save your SSO settings to activate SAML.
3. Sign-in URL
The Sign-in URL will appear once the settings are saved.
Share this Sign-in URL with your group members so they can authenticate on the platform using SSO.

Manage user access to Google TI on Azure AD platform
Open the application you previously created within Azure AD.
Navigate to the "Users and Groups" section. Here, you can manage which users will have access to the Google TI platform via SSO.
Once you've confirmed that everything is working correctly, you can enforce SSO authentication for your group selecting the "All my group users must mandatorily sign in using this identity provider" option on the group settings page.
Updated 1 day ago